Task & Assignment (teacher)
TABLE OF CONTENTS
1 Overview
The Assignment tool allows teachers to give students a work instruction within itslearning. It combines the former Assignment and Task tools into a single tool that works across all course types.
When creating an assignment, teachers enter content and instructions into the rich text editor, attach files, and configure settings. Two assignment types are available:
| Students submit work | No student submission required | |
|---|---|---|
| Replaces | Assignment tool | Task tool |
| Typical use | Essays, project reports, file uploads, text answers | Reading tasks, presentations, excursions, in-class activities |
| After creation | Opens in the existing assignment editor | Opens in new view with completion toggle, assessment and feedback |
| Student action | Submits work via text editor or file upload | Marks the assignment as complete or with a scale (if allowed) |
| Teacher assessment | All-in-One Grader | Students tab with toggle and feedback |
| Assessment options | Scale, rubric, peer assessment, self-assessment | Completed or with assessment scale by students / by teacher / scale |
2 Creating an assignment
To create an assignment, go to a course and add a new resource. Select Assignment from the activity list. The new assignment creation page opens.
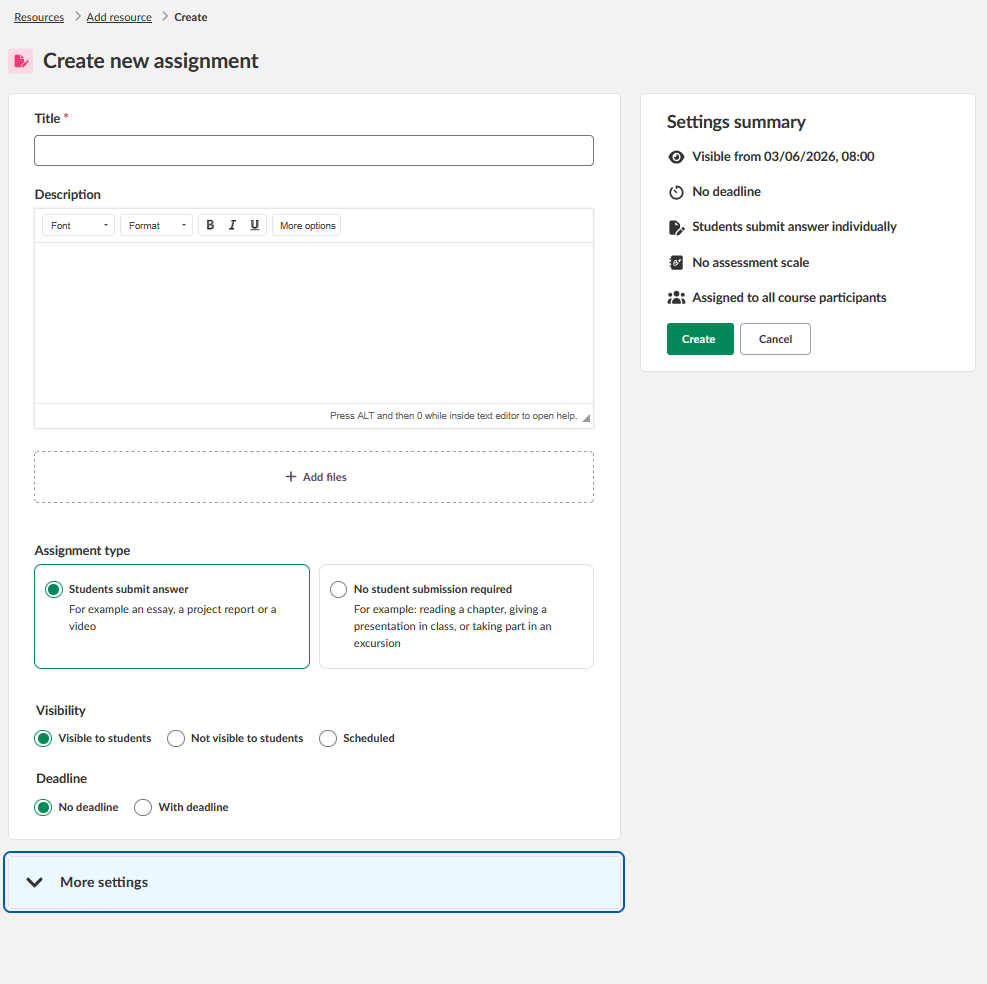
The creation page contains a content area on the left and a Settings summary panel on the right. The Create and Cancel buttons are in the settings summary panel.
2.1 Assignment content
The assignment has a required Title field and an optional Description field. The description uses the itslearning rich text editor, which supports text formatting, embedded media, and third-party tool content via LTI Advantage.
2.2 Adding files
Use the Add files area below the description to attach files to the assignment. Files can be dragged and dropped directly into the area.
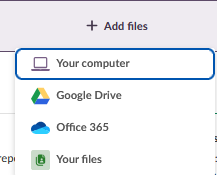
Available file sources depend on the account setup. Typical sources could include Your computer, Google Drive, Office 365, and Your files.
2.3 Assignment type
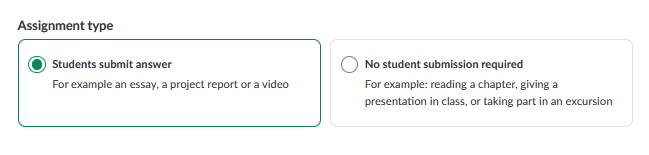
Select the assignment type under Assignment type in the content area.
| Assignment type | Description |
|---|---|
| Students submit answer | Students submit work via the text editor or by uploading files. Examples: an essay, a project report, or a video. |
| No student submission required | Students do not submit work in itslearning. Examples: reading a chapter, giving a presentation in class, or taking part in an excursion. |
2.4 Visibility and deadline
Visibility and deadline are configured below the assignment type selector.
| Setting | Options | Description |
|---|---|---|
| Visibility | Visible to students / Not visible to students / Scheduled | Controls whether students can see the assignment. Scheduled sets a specific date and time from which the assignment becomes visible. |
| Deadline | No deadline / With deadline | Sets a submission deadline. Submissions are time-stamped. Late submissions can be permitted and are marked as late. |
2.5 More settings
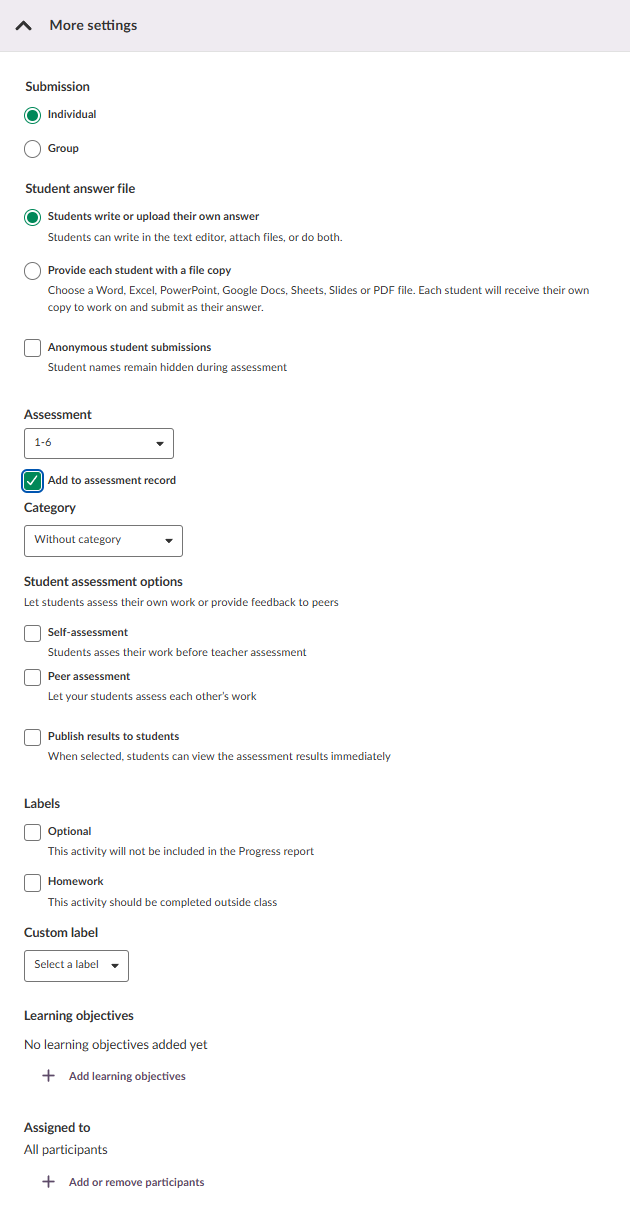
Expand the More settings accordion to configure additional options. The available settings differ depending on the assignment type selected.
▶ More settings – Students submit work
| Setting | Description |
|---|---|
| Submission | Individual (default) or Group. Selecting Group enables group submission. |
| Anonymous student submissions | Hides student names from the teacher during assessment. |
| Student answer file | Determines how students submit their answer: free-form (text editor and file upload) or by receiving a dedicated file copy (Word, Excel, PowerPoint, Google Docs, Sheets, Slides, or PDF) to work on and submit. |
| Assessment scale | Selects the assessment scale. If set to No assessment scale, the assignment is not added to the assessment record. |
| Category | Will only show up when assessing with a scale and is defined in the assessment settings. See section 7.3 in course settings |
| Self-assessment | Students assess their own work before teacher assessment. |
| Peer assessment | Students assess each other's work after the deadline. Requires a deadline to be set. |
| Publish results to students | When enabled, students can view their assessment results immediately after the teacher saves them. |
| Labels | Labels let you mark an assignment as Optional or Homework. A tag is added to the assignment, the student's task list, and Plans. |
| Custom Label | Lets you mark an assignment with a label set by the sysadmin on your site. |
| Learning objectives | Attaches learning objectives from the course to the assignment. Enables tracking of standards mastery. |
| Assigned to | Assigns the assignment to all participants (default) or a specific subset of students. |
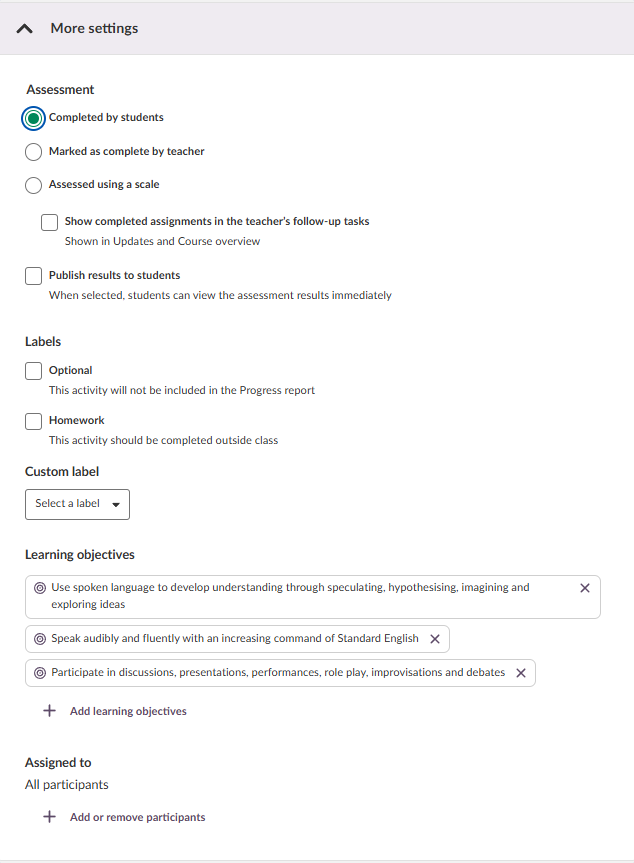
▶ More settings – No student submission required
| Setting | Description |
|---|---|
| Completed by students | Students mark the assignment as complete themselves using a toggle on the assignment page. |
| Marked as complete by teacher | The teacher marks each student's assignment as complete from the Students tab. Students cannot mark it themselves. |
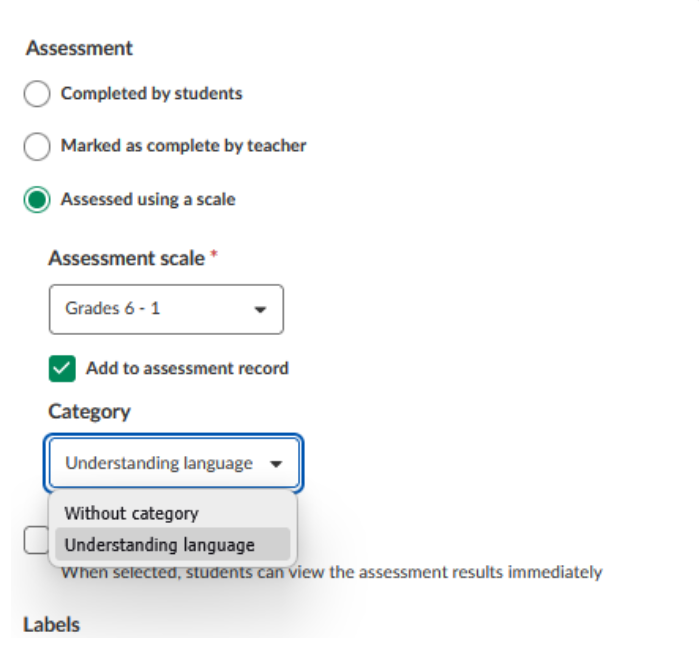
| Assessed using a scale | The teacher assesses students using an assessment scale. Selecting this option reveals an Assessment scale selector, an Add to assessment record checkbox, and a Category dropdown. The assignment is considered complete when the teacher sets an assessment. |
| Show in teacher follow-up tasks | When enabled, completed assignments are shown in Updates and the Course overview for the teacher. |
| Publish results to students | When enabled, students can view their assessment results immediately after the teacher saves them. |
| Labels | Labels let you mark an assignment as Optional or Homework. A tag is added to the assignment, the student's task list, and Plans. |
| Custom Label | Lets you mark an assignment with a label set by the sysadmin on your site. |
| Learning objectives | Attaches learning objectives from the course to the assignment. |
| Assigned to | Assigns the assignment to all participants (default) or a specific subset of students. |
2.6 Settings summary
The Settings summary panel on the right side of the creation page reflects the current configuration at a glance. It floats as you scroll the page, so it remains visible while editing the assignment.
The panel shows icons for visibility, deadline, assignment type, assessment scale, labels, and assigned participants. When you are ready, click Create to create the assignment.
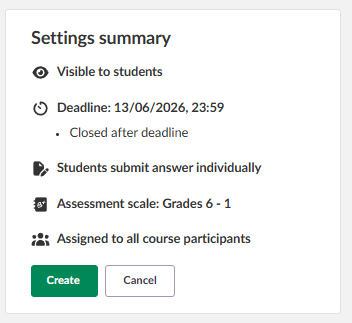
Note: After creation, the Settings summary remains visible in the assignment view with an Edit button to return to the edit page. For no-submission assignments, the settings summary continues to float while scrolling.
3 No student submission required
When the assignment type is set to No student submission required, a new dedicated view is used for both teachers and students. This replaces the former Task tool.
3.1 Teacher view
After creating a no-submission assignment, the assignment opens in the new assignment view. The page has two tabs: Description and Students.
The Description tab shows the assignment title, description, any attached files, and the Settings summary panel. The settings summary floats as you scroll, keeping the current configuration and the Edit button visible at all times.
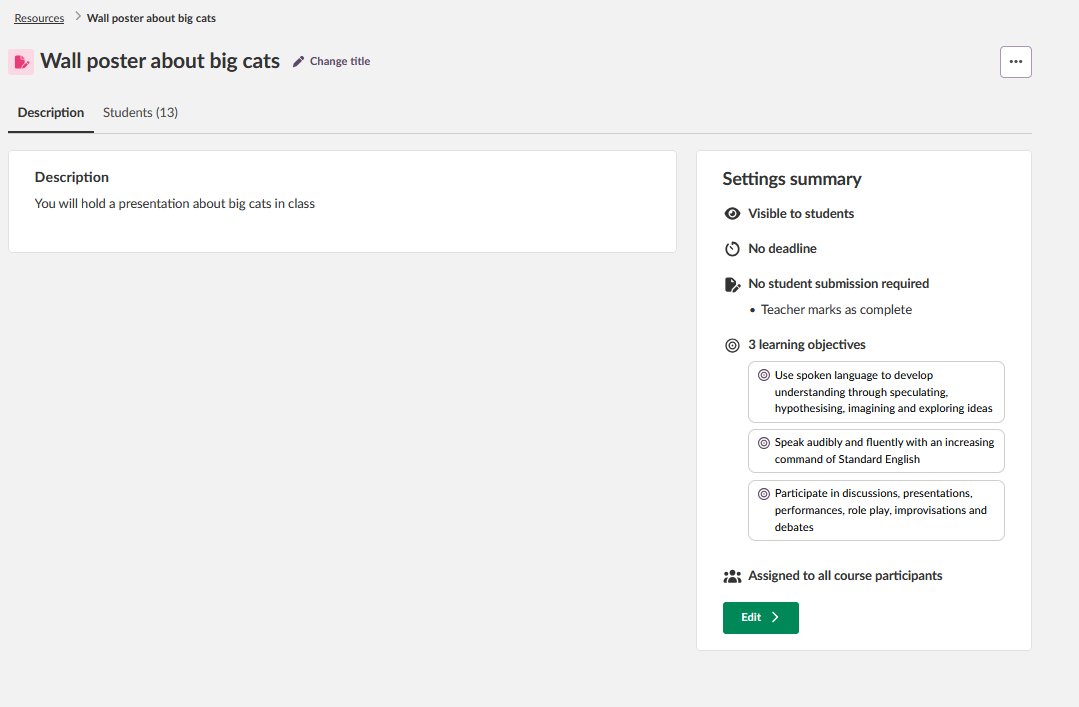
To edit the assignment, click Edit in the Settings summary. The assignment edit page opens, where the description, files, and all settings can be changed. The assignment type is shown as read-only and cannot be changed.
3.2 Monitoring completion
Select the Students tab to view all assigned students and their completion status.
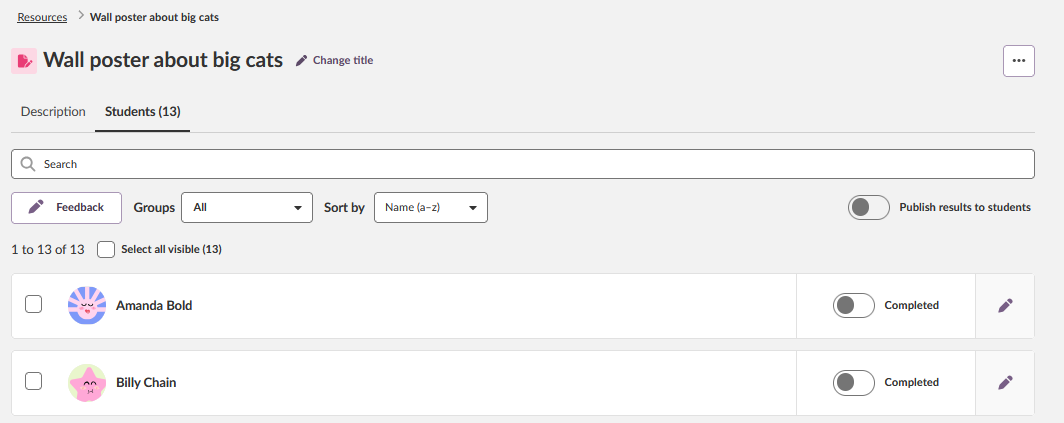
The Students tab provides the following controls:
| Control | Description |
|---|---|
| Search | Search for a student by name. The list updates to show matching students. |
| Groups | Filter the student list by course group. |
| Sort by | Sort the student list by name or completion status. |
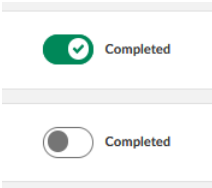
| Completion toggle | Toggle the completion status for an individual student. The switch changes state immediately. |
| Publish results to students | Toggle at the top right of the Students tab. When enabled, students can see their assessment results and published feedback. |
| Select all / checkboxes | Select multiple students for bulk feedback or assessment. See Section 3.4. |
3.3 Assessment options
The assessment method for a no-submission assignment is set under More settings during creation, or via Edit in the settings summary afterwards. Three options are available:
| Assessment option | Behaviour |
|---|---|
| Completed by students | Students mark the assignment as complete themselves using a toggle on their assignment page. The teacher can see each student's self-reported completion status in the Students tab and can override it. |
| Marked as complete by teacher | Students cannot mark the assignment as complete. The teacher marks each student using the toggle in the Students tab. Until marked, the student's status is Not completed. |
| Assessed using a scale | The assignment is assessed by the teacher using the selected assessment scale. The assignment is considered complete when the teacher sets an assessment. If Add to assessment record is enabled, the result is included in the course assessment record. A Category can also be assigned. This will only show up when assessing with a scale and is already defined in the assessment settings. |
3.4 Providing feedback
Feedback can be provided to individual students or to multiple students at once.
Individual feedback
To provide feedback to a single student, click the pencil icon next to the student's name in the Students tab.
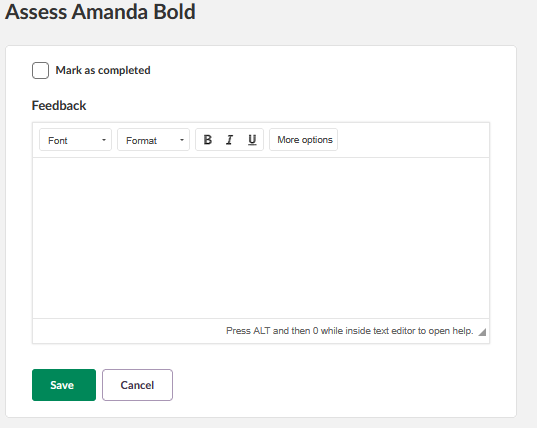
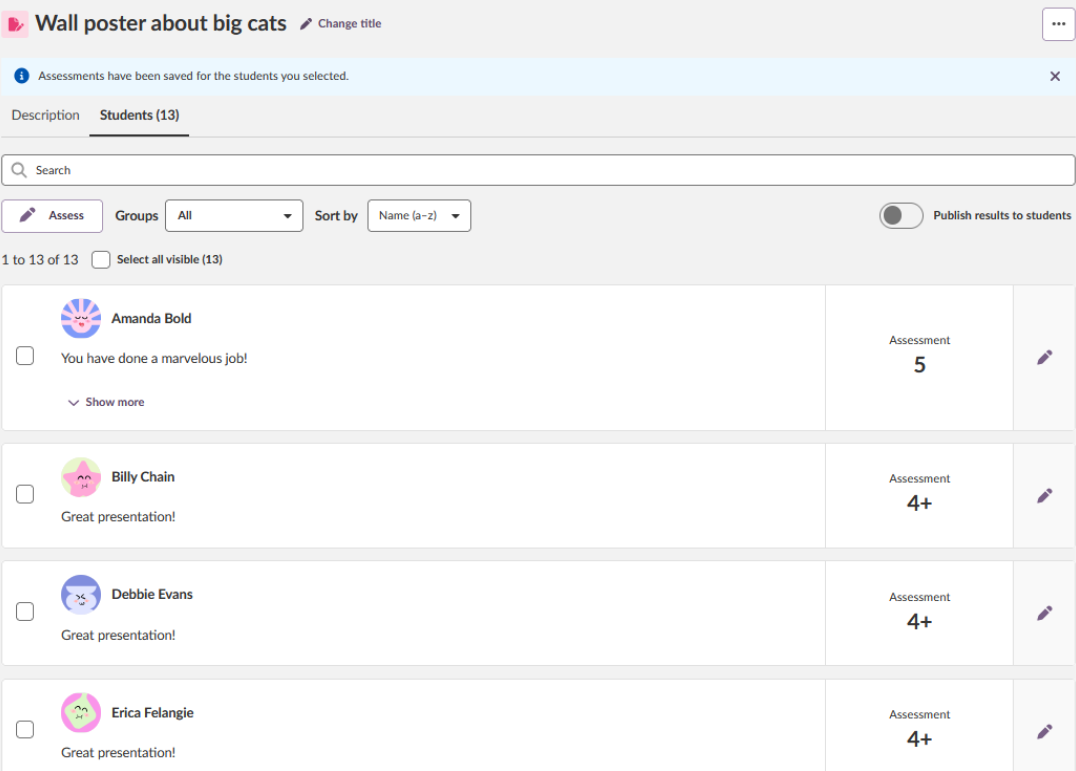
A feedback panel opens. Enter feedback in the rich text editor. You can also mark the student's assignment as completed using the Mark as completed checkbox. Click Save to return to the Students tab. Saved feedback is shown in the student row. If the feedback is longer than one line, a Show more button is provided.
Individual assessment with assessment scale
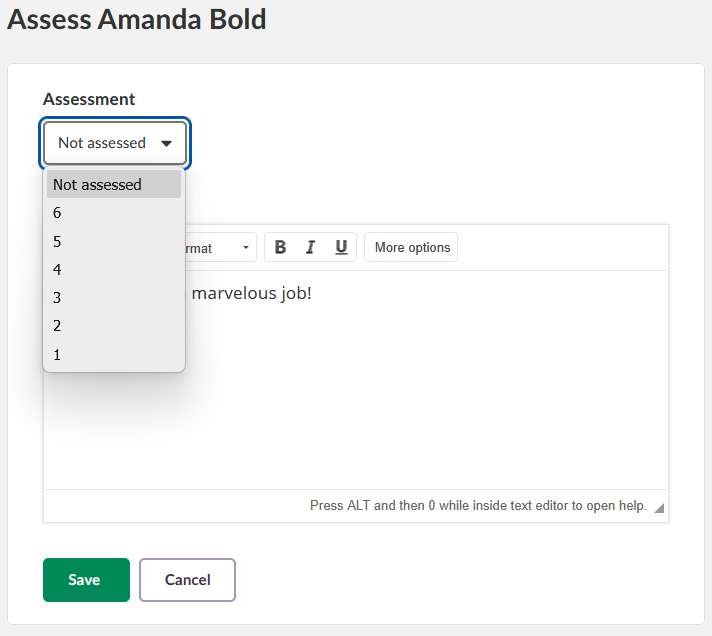
If an assessment scale has been configured for the assignment, click the pencil icon to open the assessment panel. Select a grade from the dropdown, enter optional feedback, and click Save.
Bulk feedback and assessment
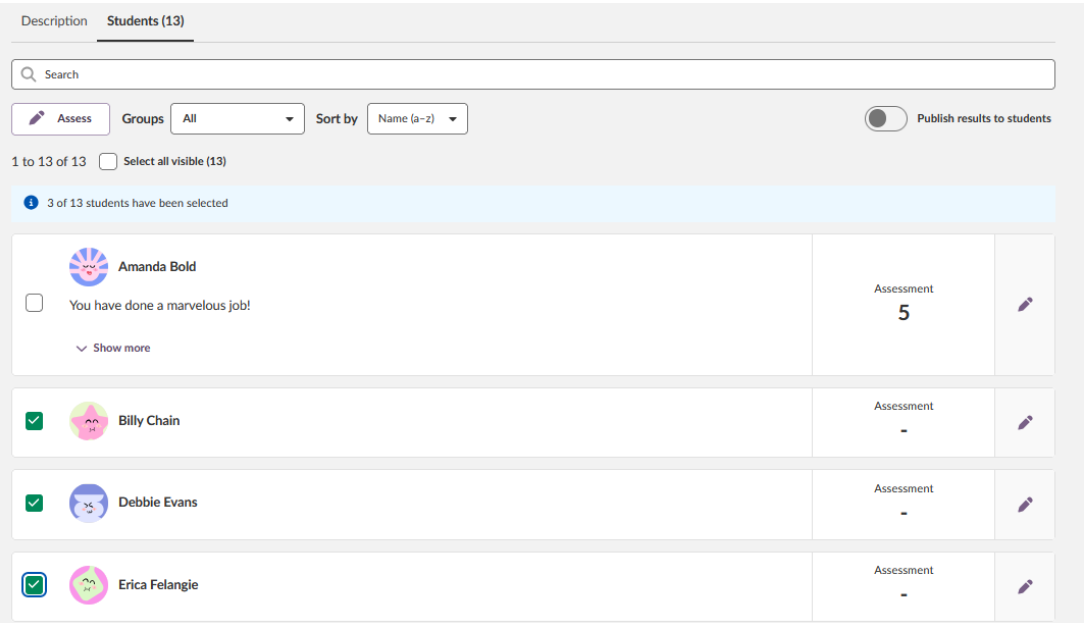
To provide the same feedback or assessment to multiple students at once:
- Select the checkboxes for the students you want to assess.
- Click the Assess button that appears above the student list.
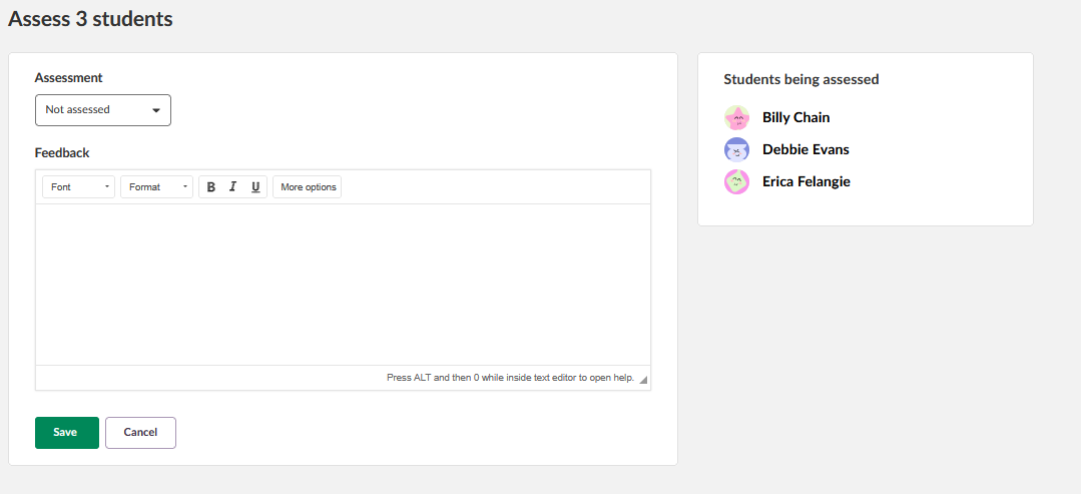
A bulk assessment window opens showing the selected students on the right. Select a grade from the dropdown (if an assessment scale is configured), enter feedback, and click Save. The same assessment and feedback are applied to all selected students.
More Help Resources
Have more questions? Please start with asking your school administrator.
Product Release notes
Stay updated with itslearning latest releases: https://itslearning.com/product-updates
Service Status
Check the current status of itslearning services: https://status.itslearning.com/
Ideas Portal
Share your ideas and help shape the future of itslearning: https://ideas.itslearning.com/
Roadmap
Check out our roadmap: https://itslearning.com/global/roadmap/
The features shown are part of the project within the framework of the German Development Project (GDP), a cooperation between four German states and itslearning with the aim of improving digital education in Germany through tailor-made product developments.
Click here to learn more about the GDP roadmap and what other features you can expect.
For German readers: Click here for more information about the project within the framework of the German Development Project.