Learning Objectives Repository - Sysadmin
TABLE OF CONTENTS
- 1 Overview
- 2 Prerequisites
- 3 Getting started
- 4 Core features
- 5 Step-by-step workflow
- 6 Import learning objectives from an XLSX file
- 7 Technical information
- 8 Troubleshooting
1 Overview
Local, site, and school learning objective repositories allow organisations to create and maintain curriculum structures tailored to their needs. These repositories exist alongside any national repository but operate independently. Administrators can organise subjects, categories, and learning objectives to reflect local programmes of study. Once published, these learning objectives can be added to courses for planning, assessment, metadata tagging, and reporting.
2 Prerequisites
Prerequisite: Users must have the Learning objectives repository management right for the relevant school or site. This right is granted to system administrators by default but may be assigned to other profiles or policies.
- School repository: Access is granted through the School option in a profile or policy.
- Site repository: Access to all repositories at site level is granted through the Site option.
- Browser: A modern browser supported by itslearning.
- Dependencies: Learning objectives must be published before teachers can add them to courses.
3 Getting started
Basic setup
Local, site, and school repositories begin empty. Administrators can either build the structure manually or import it from an XLSX file.
Initial configuration
Administrators prepare the repository by creating folders, subjects, and learning objectives under the root folder. The root folder name matches the site or school.
4 Core features
Hierarchical structure
Repositories use a hierarchical structure with six levels. The first four levels organise the curriculum. The last two levels (Criterion and Descriptor) are optional and used to define assessment rubrics within individual learning objectives.
| Icon | Level type | Description |
|---|---|---|
 | Folder | Used to organise subjects, for example by educational level such as elementary or secondary. |
 | Subject | Contains a set of learning objectives that share a common context, for example History, Geography, or Maths. When a subject is published, the icon turns green. |
 | Category | Used to organise learning objectives within a subject, for example Critical thinking and problem solving. Categories are optional but may make it easier for teachers to locate learning objectives. Categories can be nested. |
 | Learning objective | The actual learning objective that can be used in plans and elements – such as tests or assignments – and be assessed and reported on. |
 | Criterion (optional) | A specific aspect or dimension of a learning objective that can be assessed separately. For example, a maths learning objective might have criteria for Procedural accuracy and Conceptual understanding. Criteria are used when you want to break down a learning objective into more granular assessment components. They are only needed if you plan to use rubric-style assessment. |
| Descriptor (optional) | A description of what a specific performance level looks like for a given criterion. Each criterion can have multiple descriptors representing different achievement levels (e.g. Low, Medium, High). Descriptors serve as reference documentation – they help teachers understand what each proficiency level means for that criterion, ensuring consistent assessment across the organisation. Descriptors do not replace the centrally-defined achievement levels used during assessment; they provide additional detail about what those levels look like in practice. See section 4.1 for how achievement levels are configured. |
Note: Criteria and Descriptors are optional. Most schools start with just Folders, Subjects, Categories, and Learning Objectives. You can add Criteria and Descriptors later if you decide to implement rubric-based assessment.
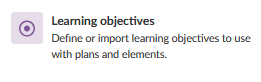
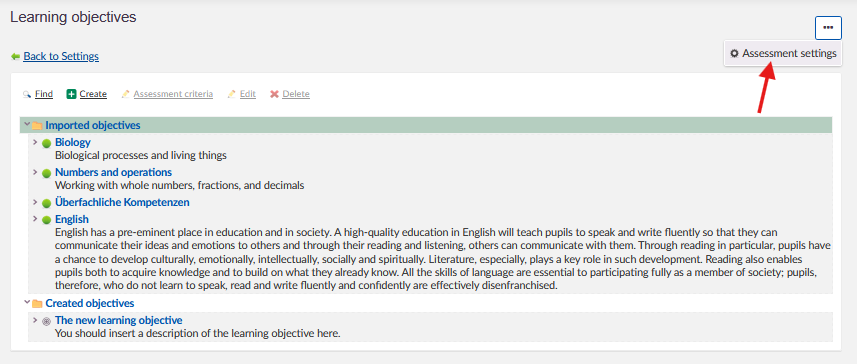
4.1 Achievement levels (Assessment settings)
Before working with Criteria and Descriptors, whether you build them manually in the repository or prepare them in an XLSX file for import, it is worth understanding how the assessment scale itself is configured. This scale is set up separately from the learning objective repository, and it determines how rubrics are displayed in a course.
Where to find it: Course settings → Learning Objectives → Assessment settings → Achievement levels.
Here, an administrator or teacher defines:
- Number of levels – for example 4.
- Achievement level labels – the name shown for each level, ordered from the lowest to the highest. A common setup is Below basic, Basic, Proficient, Advanced.
Course settings:
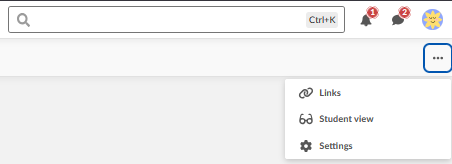
Learning Objectives:
Assessment settings:
Achievement levels:

Important: Descriptors are matched to achievement levels by position, not by name. The first Descriptor under a Criterion corresponds to the lowest configured achievement level, the second descriptor to the next level, and so on. The Title you give a Descriptor (for example Low, Medium, High) does not need to match the achievement level labels (for example Below basic, Basic, Proficient, Advanced) – only the order and the count matter.
If a Criterion has fewer Descriptors than the configured number of achievement levels, the descriptors fill the highest levels first, and the lowest level or levels are left without a description. To make sure every level shows text, create one Descriptor for each configured achievement level, ordered from lowest to highest.
Achievement levels cannot be changed once learning objectives have been assessed using them. Confirm the assessment scale is configured the way you need before building or importing a large rubric structure.
Publishing
Subjects must be published before teachers can add their objectives to courses. Published subjects display a green icon; unpublished subjects display a red icon.
Metadata use
Learning obj
5 Step-by-step workflow
5.1 Access a local/site/school repository
Objective: Open the repository for editing.
- Click Admin in the top menu.
- Select Learning objective repository.

- Choose the desired school or site repository if more than one is available. If the user has access to only one, it opens automatically.

5.2 Create the structure (folders, subjects, categories)
Objective: Build the hierarchy for the curriculum.
- Open the repository root folder.
- Click Add folder to create organisational levels (e.g. Primary).

- Provide a Title and ID (required). The description is optional.
- Click Save.

- To create a subject, click Add subject inside a folder.

- Complete the subject form that opens.

- Add categories as needed using Add category.

5.3 Add learning objectives
Objective: Create learning objectives inside a subject or category.
- Open the subject or category.
- Click Add learning objective.
- Enter a Title and ID.
- Optionally enter a description (plain text only).
- Click Save.

5.4 Add rubrics (optional)
You can add assessment rubrics to individual learning objectives by creating Criteria and Descriptors. This is optional and only relevant if you want to define what different performance levels look like for specific aspects of a learning objective.
What are Criteria?
A criterion defines a specific aspect or dimension of a learning objective that you want to assess separately. For example, a learning objective about fractions might have two criteria: one for Procedural accuracy (can the student carry out the calculation correctly?) and one for Conceptual understanding (does the student understand why the method works?).
What are Descriptors?
Descriptors sit beneath a criterion and describe what different performance levels look like for that specific aspect. Each descriptor represents one achievement level. Together, the descriptors for a criterion form a rubric scale that should mirror the achievement levels described in section 4.1.
Note: Descriptors serve as reference documentation for teachers. They help ensure that all teachers interpret proficiency levels consistently. During actual student assessment, teachers select from the centrally-defined achievement levels configured under Assessment settings – the descriptors provide guidance on what those levels mean in practice for each specific criterion.
Example structure:
| Level | Example | Purpose |
|---|---|---|
| Learning objective | Add and subtract fractions with unlike denominators | The skill students should achieve |
| → Criterion | Procedural accuracy | A specific aspect being assessed |
| → Descriptor | Low: Frequently makes calculation errors and needs significant support | What low performance looks like |
| → Descriptor | Medium: Completes most steps correctly but may make occasional errors | What medium performance looks like |
| → Descriptor | High: Consistently carries out all steps accurately and independently | What high performance looks like |
To add a Criterion:
- Open an existing learning objective.
- Click Add criterion.
- Enter a Title and ID.
- Click Save.

To add Descriptors:
- Open the criterion.
- Click Add descriptor.
- Create one descriptor for each achievement level configured under Course settings → Learning Objectives → Assessment settings (see section 4.1), for example Low, Medium, High.
Important: The lowest performance level must be placed at the top of the list. itslearning displays descriptor levels from top to bottom, with the lowest level first, and matches them to the configured achievement levels in that order.

5.5 Publish the learning objectives
Objective: Make a subject available for teachers to use.
- Open the subject.
- Click Publish.
- Confirm the action.
- The icon turns green once the subject is published.
- Deleting items in a published subject triggers a confirmation prompt due to the potential impact on courses.

5.6 Add learning objectives to a course
Objective: Insert local/site/school learning objectives into a course (teacher-side).
- Open the course.
- Navigate to Settings → Learning objectives.
- Click Find.
- Choose the repository type: School, Site, or Global (if applicable).
- Select a subject or category.
- Click Insert to add the objectives to the course.
Teachers may now connect these learning objectives to elements such as assignments, planner items, and tests.
6 Import learning objectives from an XLSX file
You can create and import a complete learning objective repository structure using an XLSX file. This method is suitable for preparing large curriculum structures externally before uploading them to itslearning.
The import process consists of two stages: preparing the XLSX file with the correct structure, then uploading it through the Admin section.
- File format: XLSX only
- Maximum file size: 10 MB
- Required columns: ID, ParentID, Title, Description, Type (exact spelling required)
6.1 XLSX file structure
The XLSX file uses a hierarchical structure in which each row represents one element. The ParentID column links each element to its parent level in the hierarchy.
6.1.1 Required columns
The file must contain exactly the following five column headers in row 1. Header names are case-sensitive and must be typed exactly as shown.
| Column | Description | Required |
|---|---|---|
| ID | Unique identifier for the element | Yes |
| ParentID | ID of the parent element. Leave blank for root-level folders. | Yes (except root folder) |
| Title | Display name of the element | Yes |
| Description | Additional information about the element | No |
| Type | Element type. Accepted values: Folder, Subject, Category, LO, Criterion, Descriptor | Yes |
Note: The maximum file size is 10 MB. Only XLSX format is accepted.
6.1.2 Element types
Each row in the file must be assigned one of the following six element types. The type determines the hierarchy level and which parent elements are valid.
| Type | Description | ParentID must reference |
|---|---|---|
| Folder | Organises subjects by educational level (e.g. Primary, Secondary) | Leave blank (root level) |
| Subject | Contains learning objectives for a specific subject (e.g. Mathematics, English) | A Folder ID |
| Category | Organises learning objectives within a subject (e.g. Year 3, Addition) | A Subject ID or another Category ID |
| LO | The actual learning objective – the competency or skill to be assessed | A Subject ID or Category ID |
| Criterion | A specific aspect of a learning objective to be assessed separately (optional – only needed for rubric-based assessment) | An LO ID |
| Descriptor | A performance level description for a criterion – describes what achievement looks like at a given level (optional – used as reference documentation for consistent assessment) | A Criterion ID |
6.2 Preparing the XLSX file
6.2.1 Set up the spreadsheet
- Open Excel or another spreadsheet application.
- Create a new sheet.
- Add the following column headers in row 1, exactly as shown:
ID | ParentID | Title | Description | TypeImportant: Column headers are case-sensitive. Incorrect spelling or capitalisation will cause the import to fail.
6.2.2 Add a root folder
- In row 2, add your top-level folder.
- Leave the ParentID column blank.
- Set Type to Folder.
- Enter a unique ID and a descriptive Title.
Example:
| ID | ParentID | Title | Description | Type |
|---|---|---|---|---|
| MAT | Mathematics | Mathematics curriculum structure | Folder |
6.2.3 Add subjects
- Add one row for each subject.
- Set ParentID to the ID of the parent folder (e.g. MAT).
- Set Type to Subject.
- Use short, unique IDs (e.g. MAT_NUM).
- Enter a descriptive title (e.g. Numbers and operations).
Example:
| ID | ParentID | Title | Description | Type |
|---|---|---|---|---|
| MAT_NUM | MAT | Numbers and operations | Working with whole numbers, fractions, and decimals | Subject |
6.2.4 Add categories (optional)
Categories organise learning objectives within subjects. Categories can be nested within other categories to create deeper structures.
- Add a row for each category.
- Set ParentID to the relevant subject ID or parent category ID.
- Set Type to Category.
- Enter a descriptive title (e.g. Year 3, Calculation).
Example:
| ID | ParentID | Title | Description | Type |
|---|---|---|---|---|
| MAT_NUM.3 | MAT_NUM | Working with whole numbers | Year 3 number objectives | Category |
6.2.5 Add learning objectives
- Add a row for each learning objective.
- Set ParentID to the relevant subject ID or category ID.
- Set Type to LO.
- Enter a clear, specific title describing the skill or knowledge.
Example:
| ID | ParentID | Title | Description | Type |
|---|---|---|---|---|
| MAT_NUM.3_CALC_1 | MAT_NUM.3 | Add and subtract within 1000 | LO |
6.2.6 Add criteria (optional)
Criteria define specific aspects of a learning objective that you want to assess. Add these only if you use rubric-style assessment. Each criterion represents one dimension of the skill being assessed (e.g. accuracy, understanding, application).
- Add a row under the relevant learning objective.
- Set ParentID to the learning objective ID.
- Set Type to Criterion.
- Enter a short title describing the aspect being assessed.
Example:
| ID | ParentID | Title | Description | Type |
|---|---|---|---|---|
| MAT_NUM.3_CALC_1_CRIT | MAT_NUM.3_CALC_1 | Strategy use | Criterion |
6.2.7 Add descriptors (optional)
Descriptors define what different performance levels look like for a specific criterion. Create one descriptor for each achievement level in your rubric (e.g. Low, Medium, High). Descriptors serve as reference documentation – they help teachers understand and apply your proficiency levels consistently.
Before you start: Check how many achievement levels are configured under Course settings → Learning Objectives → Assessment settings (see section 4.1). Create exactly one Descriptor row per configured level, ordered from lowest to highest, so that every level in the rubric receives a description after import.
- Add a row for each performance level.
- Set ParentID to the criterion ID.
- Set Type to Descriptor.
- In Title, enter the level name (e.g. Low, Medium, High).
- In Description, enter a detailed explanation of what performance at this level looks like.
Important: List the lowest performance level first. itslearning expects descriptors ordered from lowest to highest, and matches them to the configured achievement levels in that order (see section 4.1).
Example:
| ID | ParentID | Title | Description | Type |
|---|---|---|---|---|
| MAT_NUM.3_CALC_1_DESC1 | MAT_NUM.3_CALC_1_CRIT | Low | Frequently makes calculation errors and needs significant support to complete the procedure | Descriptor |
The completed file should look like this:

6.3 Import the file
- Save your spreadsheet as an XLSX file.
- In itslearning, navigate to Admin → Learning objective repository.
- Select the appropriate school or site repository.
- Click Import curriculum.

- Click Browse and select your XLSX file.

- Click Upload file.
- Review the repository tree to verify that all elements imported correctly.

6.4 After import
Once the import is complete:
- All folders, subjects, categories, and learning objectives appear in the repository tree.
- Subjects display as unpublished (red icon) until you publish them.
- You can edit or extend the structure using the standard interface.
- The repository is available to teachers once subjects are published.
6.5 Download example file
An example XLSX file is available in the import interface. Click the here link under "Download an example file" to access a correctly formatted template.

7 Technical information
| Topic | Details |
|---|---|
| Local repository scope | Local repository learning objectives do not sync across sites and cannot be shared with the global community. |
| Course synchronisation | When structures change, updates synchronise overnight for learning objectives already added to courses. |
| My Library integration | Learning objectives can be used as metadata in My Library searches. |
| Achievement levels | The number and labels of achievement levels are configured under Course settings → Learning Objectives → Assessment settings, independently of the repository. Imported Descriptors are matched to these levels by position, lowest first. See section 4.1. |
8 Troubleshooting
Descriptor text is missing or appears under the wrong achievement level
Symptoms: When a learning objective's rubric is displayed in a course, one or more achievement levels show no descriptor text, or a descriptor's text appears under a different level than intended.
Cause: The number of Descriptor rows for a Criterion does not match the number of achievement levels configured under Course settings → Learning Objectives → Assessment settings. Descriptors are matched to achievement levels by position, lowest first. If there are fewer descriptors than configured levels, the lowest level or levels are left without text.
Solution:
- Check Course settings → Learning Objectives → Assessment settings → Achievement levels to find the configured number of levels.
- Edit the Criterion in the repository, or update the XLSX file and re-import, so that it has exactly one Descriptor for each achievement level, ordered from lowest to highest.
Prevention: Confirm the achievement level configuration (see section 4.1) before preparing Descriptor rows, and design each Criterion's rubric to match the configured number of levels.
Subject does not appear when adding objectives to a course
Symptoms: The subject list is empty or expected subjects are missing when adding objectives to a course.
Cause: The subject is not published, or it belongs to a different repository level.
Solution:
- Open the repository.
- Verify that the subject displays a green published icon.
- Confirm the user is connected to the correct school or site.
Prevention: Publish subjects immediately after creating learning objectives.
Cannot access the repository from the Admin section
Symptoms: The "Learning objective repository" link does not appear in the Admin section.
Cause: The user does not have the Learning objectives repository management permission.
Solution:
- Edit the user profile or policy.
- Enable Learning objectives repository management at School or Site level.
Prevention: Assign this permission during onboarding for all curriculum-responsible profiles.