Dashboard - Creating a site and school dashboard (Sysadmin)
TABLE OF CONTENTS
Introduction
This article explains how to enable a dashboard for a school hierarchy in itslearning, and how to build and brand the dashboard page using content blocks. It also covers who can view and edit a dashboard.
1 Overview
A dashboard is a page that can be used as an information hub, for example as a landing page for a school. Dashboards are managed from the Groups tab in the top menu, under Your dashboards, not from Projects.
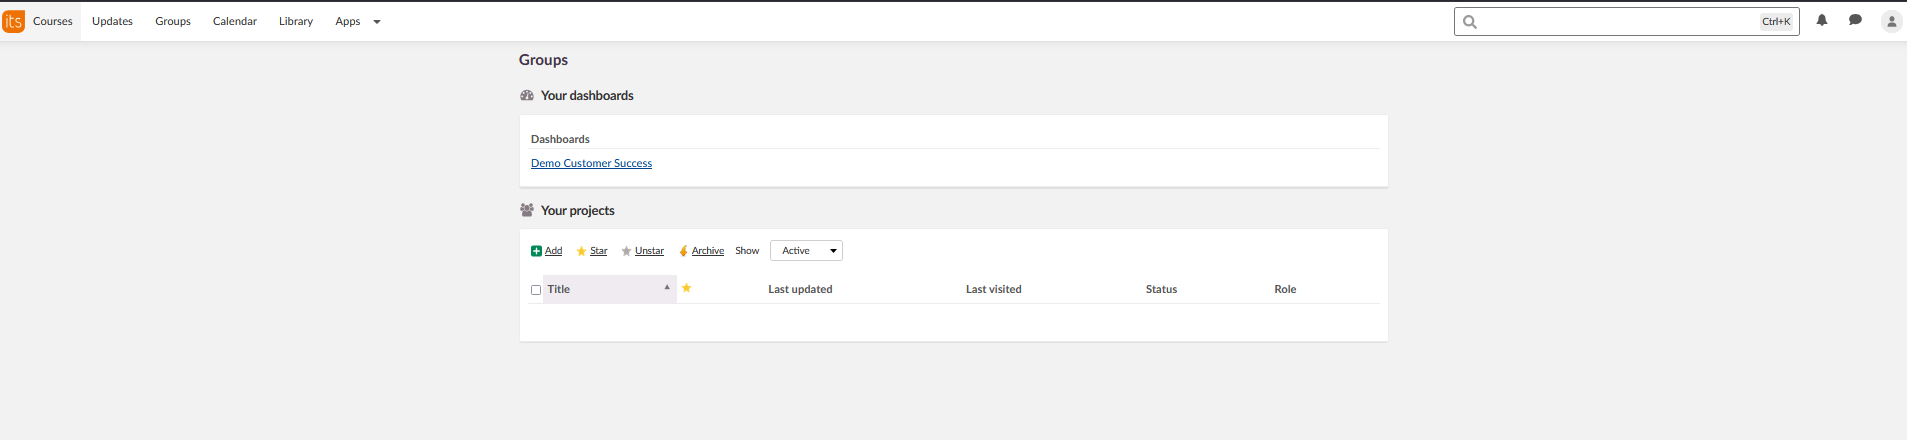
A dashboard must first be enabled for a hierarchy, such as a school, before it appears under Your dashboards. This is done by a sysadmin under Administration > Hierarchy.
Note: A site dashboard is not the same as a school dashboard. The site dashboard is created and managed by a sysadmin and applies to the whole itslearning instance, while a school dashboard is tied to a single school and managed by that school's school admin.
Who can view and edit a dashboard depends on the role:
| Role | Dashboards visible |
|---|---|
| School admin | The site dashboard and their own school’s dashboard. |
| Sysadmin | Both the site dashboard and school dashboards. |
A school admin can only edit their own school’s dashboard, even though they can also see the site dashboard.
2 Step-by-step instructions
2.1 Enabling the dashboard for a hierarchy
Admin setting: Administration > Hierarchy
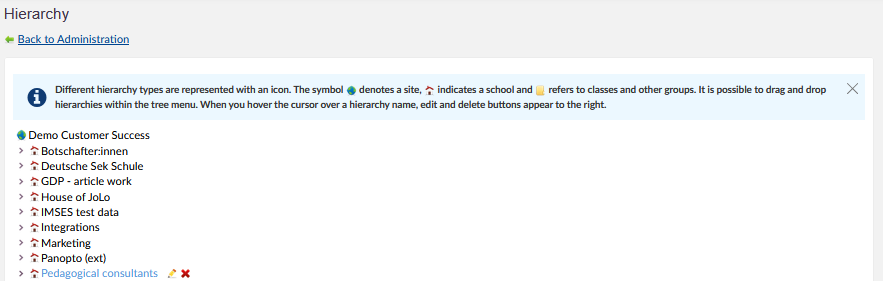
- In Administration, select Hierarchy.
- Locate the school that should have a dashboard, and select the pencil icon next to it to edit the hierarchy.
- In the edit hierarchy form, under Settings, select Use dashboard.
- Select Save.
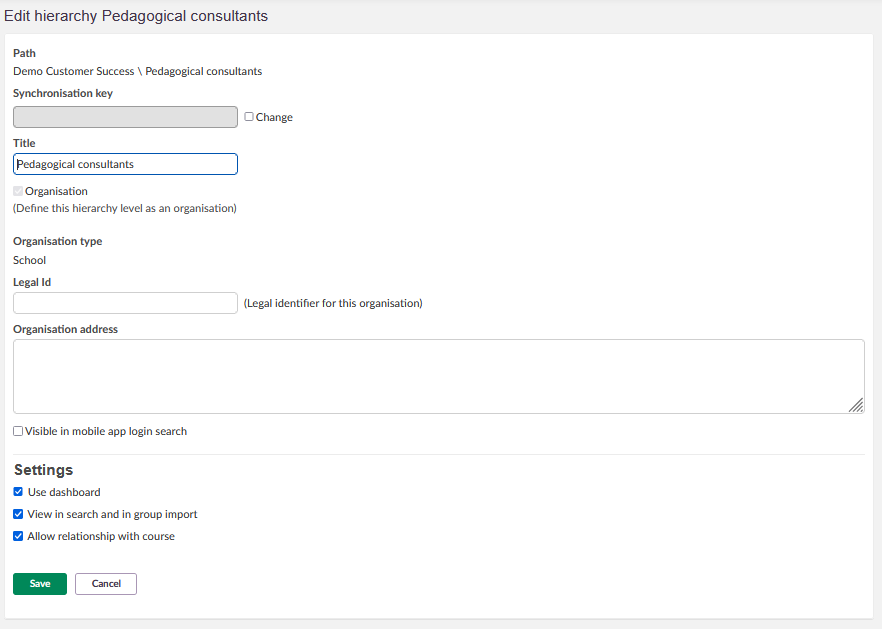
Note: To remove a dashboard, turn off Use dashboard again in the hierarchy setting (Administration > Hierarchy) for that specific hierarchy level. An organisation cannot have more than one dashboard at the same hierarchy level, so this also works if a dashboard has already been created for a school but that school no longer wants to use it. However, dashboards can also be enabled at underlying levels within a school's hierarchy (for example, at a department or sub-unit level), so a school may in theory have several dashboards spread across its hierarchy. Each of these must be disabled individually, at its own hierarchy level, the same way it was enabled. If you want different content on an existing dashboard instead, delete or update the existing content blocks rather than disabling the dashboard.
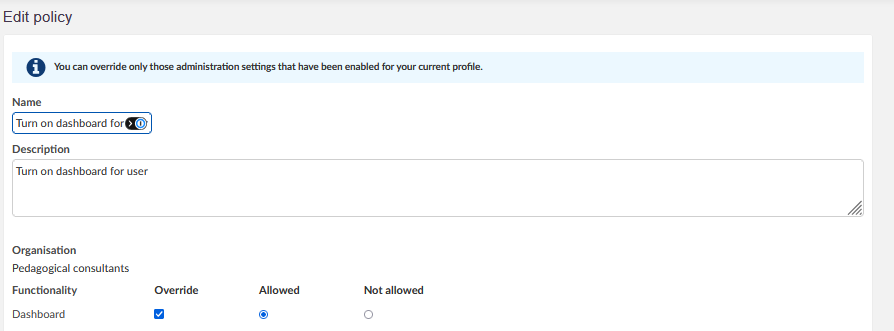
Prerequisite: The school admin responsible for the dashboard needs a policy granting dashboard access, unless this is already enabled for all school admin profiles. In the policy, set Functionality to Dashboard, select Override, and choose Allowed.
2.2 Opening the dashboard
- Select Groups in the top menu.
- Under Your dashboards, select the dashboard you want to open and edit. Note that as a school admin you should only be able to edit the dashboards in your organisation.

2.3 Adding content blocks
- On the dashboard page, select the more options icon (…) in the upper-right corner.
- Select Add content block.
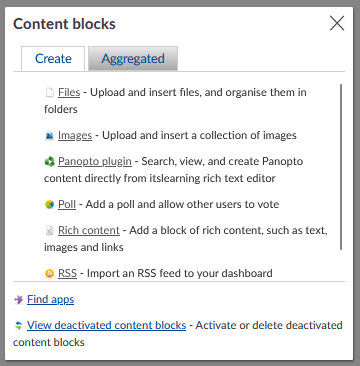
The content blocks panel offers the following block types:
| Block | Description |
|---|---|
| Files | Upload and insert files, and organise them in folders. |
| Images | Upload and insert a collection of images. |
| Panopto plugin (depending on setup and existing licenses) | Search, view and create Panopto content directly from the itslearning rich text editor. |
| Poll | Add a poll and allow other users to vote. |
| Rich content | Add a block of rich content, such as text, images and links. |
| RSS | Import an RSS feed to your dashboard. |
Note: Additional apps can be added from the same panel using Find apps. Content blocks that have been removed can be reactivated or permanently deleted using View deactivated content blocks.
- Select the block you want to add, and configure it as needed.
2.4 Branding the dashboard
- Select the more options icon (…) and select Settings.
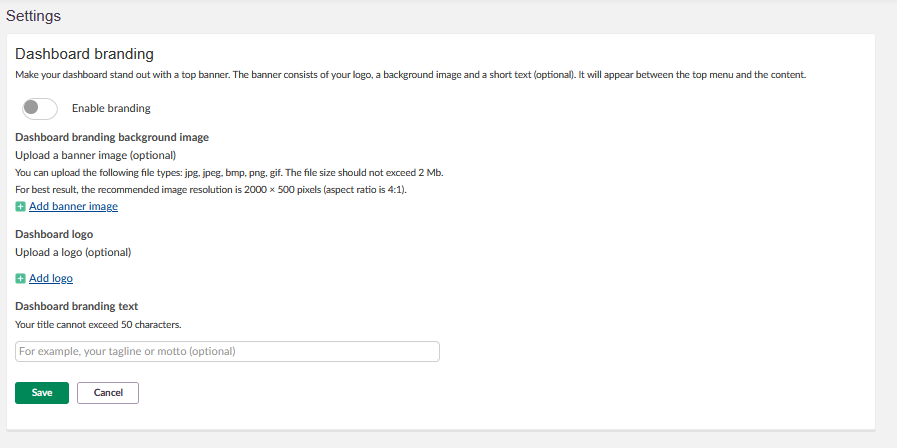
- Under Dashboard branding, turn on Enable branding.
- Optional: select Add banner image to upload a background image for the banner.
- Optional: select Add logo to upload a logo.
- Optional: enter a short tagline or motto under Dashboard branding text.
- Select Save.
| Setting | Specification |
|---|---|
| Banner image file types | jpg, jpeg, bmp, png, gif |
| Banner image maximum file size | 2 MB |
| Recommended banner image resolution | 2000 × 500 pixels (4:1 aspect ratio) |
| Dashboard branding text maximum length | 50 characters |
Note: The banner, consisting of the logo, background image and branding text, appears between the top menu and the dashboard content.
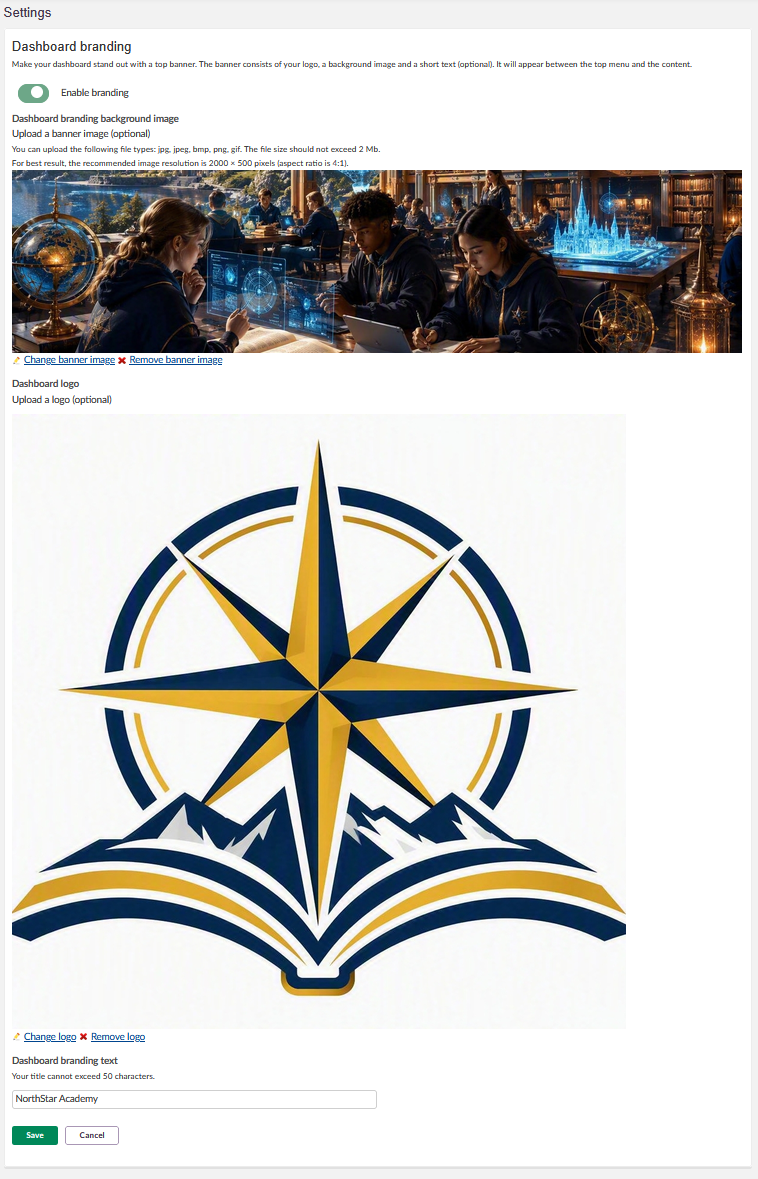
Finished branding:

2.5 Adding further content
- Select the more options icon (…) and select Add content block to continue building the rest of the page.
- Repeat as needed to add further blocks, such as files, images or a poll.
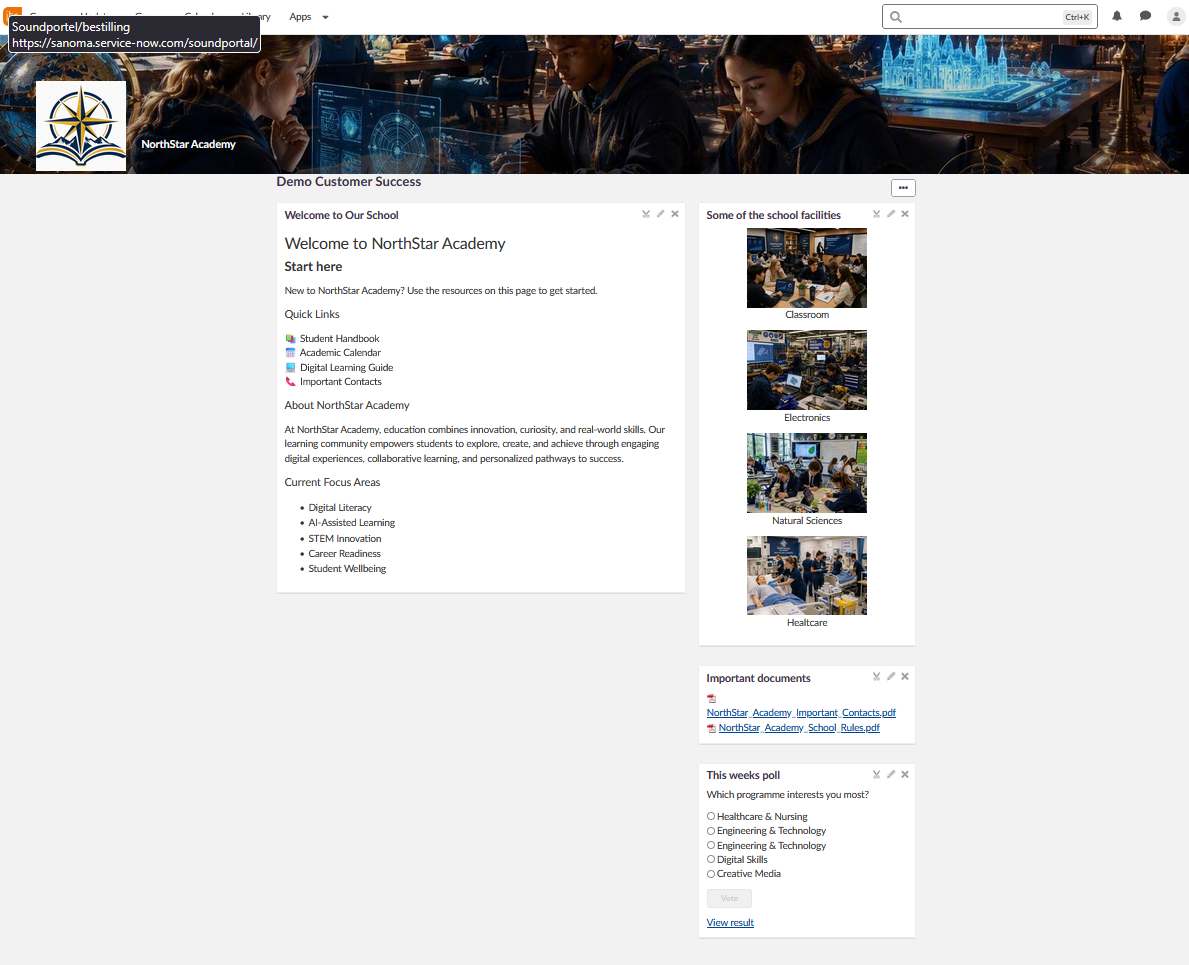
2.6 Example of a finished dashboard
A dashboard can combine several content blocks, such as rich content, images and a poll, alongside the branding banner, to create a full information hub.
More Help Resources
Have more questions? Please start with asking your school administrator.
Product Release notes
Stay updated with itslearning latest releases: https://itslearning.com/product-updates
Service Status
Check the current status of itslearning services: https://status.itslearning.com/
Ideas Portal
Share your ideas and help shape the future of itslearning: https://ideas.itslearning.com/
Roadmap
Check out our roadmap: https://itslearning.com/global/roadmap/