Profile Pictures and Avatars - Reference (Sysadmin)
TABLE OF CONTENTS
- Introduction
- 1 Overview
- 2 Prerequisites
- 3 Managing Avatars at Profile Level
- 4 Assigning Avatars to Selected Users
- 5 Managing Illustration Settings
- 6 Troubleshooting
Introduction
This article explains how administrators can manage profile pictures and avatars for users in itslearning, including assigning avatars at the profile level or to selected users, and managing illustration settings.
1 Overview
Administrators can manage profile pictures and avatars at both the profile level and for individual users. This includes enabling automatic avatar assignment for new users, bulk assignment to existing users, and targeted assignment to selected users within courses or organisations.
Profile pictures and avatars appear alongside user contributions throughout the platform, including announcements, comments, submissions, and course cards.
Note: All avatar assignment operations affect only users who have not uploaded a custom profile picture.
2 Prerequisites
2.1 For Profile-Level Management
System administrator access is required to manage avatar settings at the profile level.
2.2 For Selected User Management
Administrator role within an organisation, plus one of the following permissions enabled by the site administrator:
- Course management
- Policy management
- Hierarchy management
3 Managing Avatars at Profile Level
System administrators can configure avatar assignment for entire profiles, affecting all users associated with a specific profile.
3.1 Assign Random Avatars to All New Users
Enable automatic assignment of random avatars for all new users associated with a specific profile.
Impact: This setting affects only users created after the setting is enabled. Existing users are not affected.
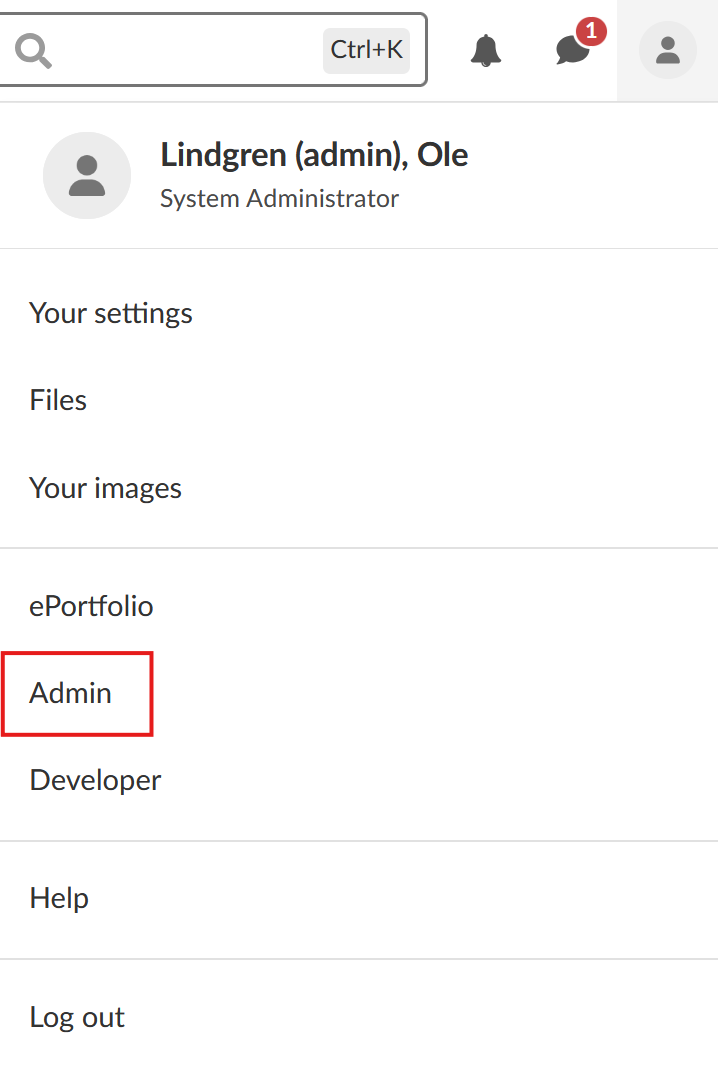
Click the circular picture in the upper-right corner and select Admin from the personal menu.
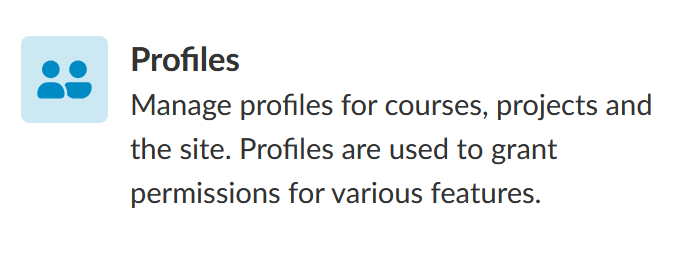
In the Settings section of the Administration menu, select Profiles.
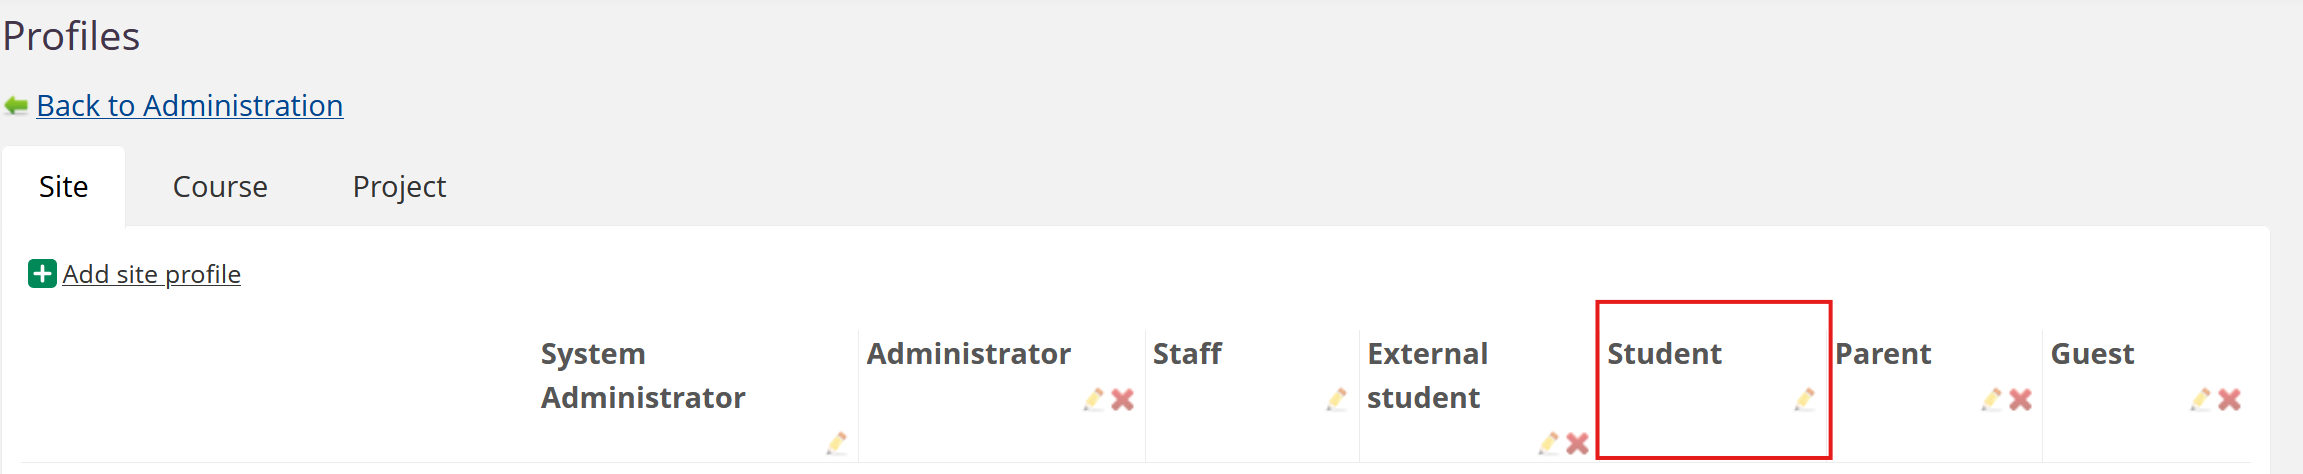
On the Profiles page, locate the profile (for example Student) in the table.
Click the pencil icon next to the profile name to edit it.
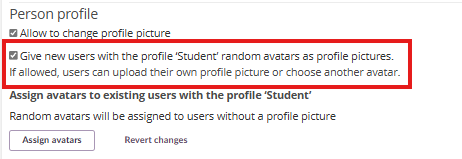
On the Edit Site Profile page, scroll to the Person profile section.
Tick the checkbox labelled Give new users with the profile 'Student' random avatars as profile pictures.
Scroll to the bottom of the page and click the green Save button to apply the changes.
3.2 Assign Random Avatars to All Existing Users
Assign random avatars to all existing users within a specific profile who have not uploaded a custom profile picture.
Important: Depending on the size of your site, this action may affect a large number of user accounts. Review the scope of the profile before proceeding.
- Click the circular picture in the upper-right corner and select Admin from the personal menu.
- In the Settings section of the Administration menu, select Profiles.
- On the Profiles page, locate the profile (e.g., Student) in the table.
- Click the pencil icon next to the profile name to edit it.
- On the Edit Site Profile page, scroll to the Person profile section.
Click the button labelled Assign avatars.
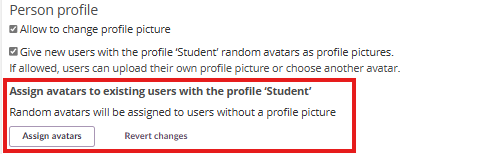
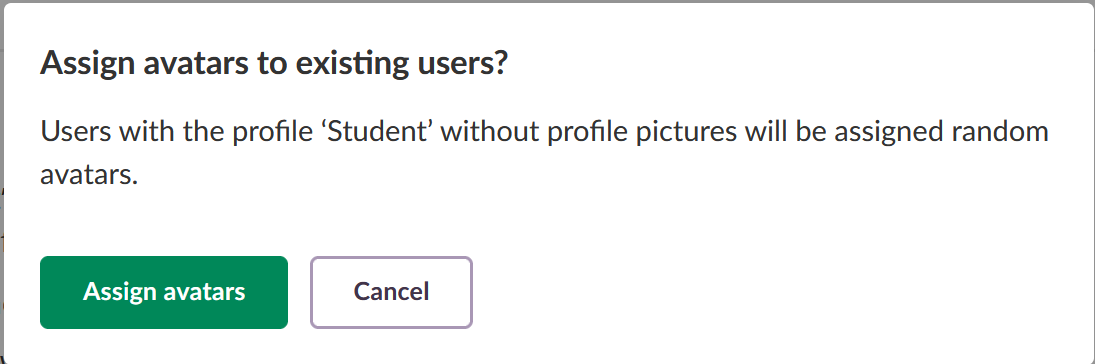
A confirmation dialogue appears. Click the green Assign avatars button to confirm.
When the action is completed, a notification with the result appears in the notification bell.
3.3 Remove Avatars from All Users
Remove all assigned avatars from users associated with a specific profile, reverting them to the default grey silhouette.
Note: This action affects all users associated with the current profile.
Click the circular picture in the upper-right corner and select Admin from the personal menu.
In the Settings section of the Administration menu, select Profiles.
On the Profiles page, locate the profile (e.g., Student) in the table.
Click the pencil icon next to the profile name to edit it.
On the Edit Site Profile page, scroll to the Person profile section.
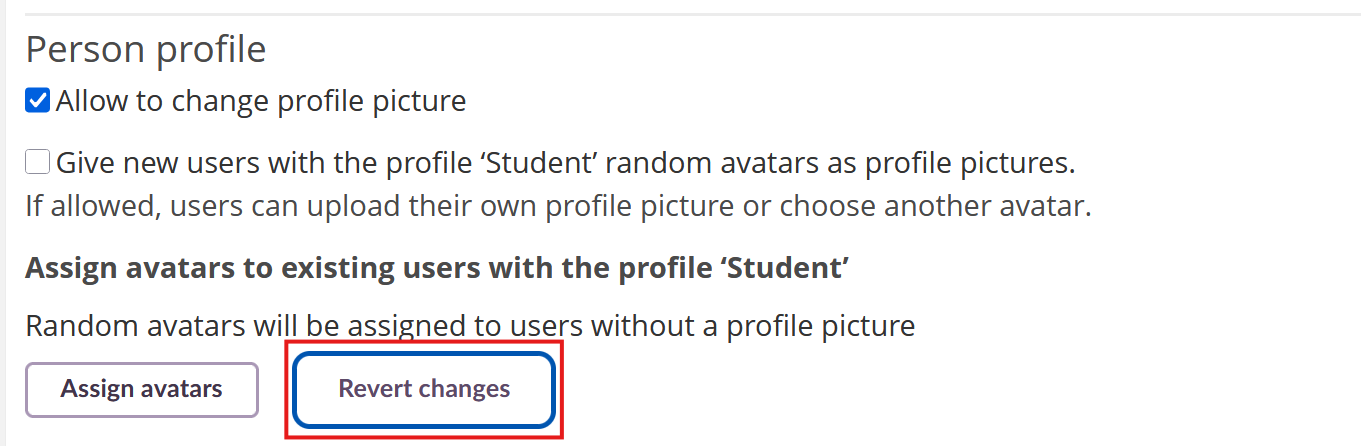
Click the button labelled Revert changes.
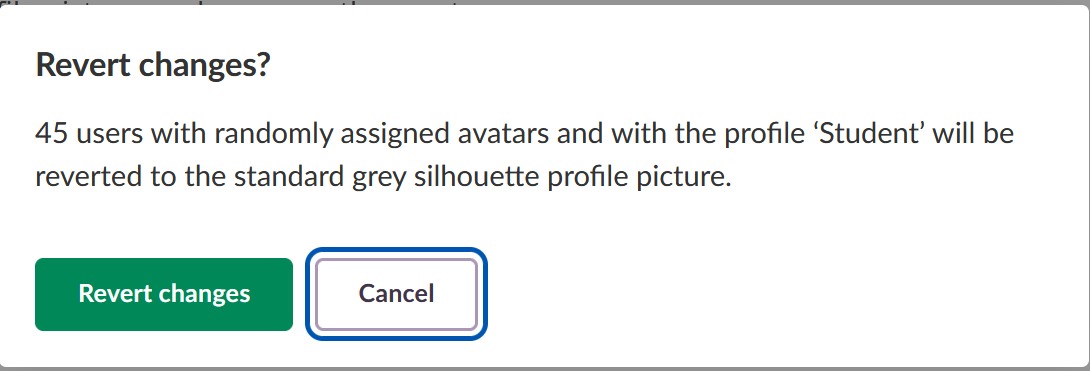
A confirmation dialogue will appear. Click the green Revert changes button to confirm the action.
4 Assigning Avatars to Selected Users
Administrators within an organisation can assign random avatars to selected users through the User and Access Rights page. When assigning avatars to participants in the same course (fewer than 25 users), this method ensures no duplicate avatars are assigned within that group.
Step by step walkthrough
This procedure demonstrates assigning avatars to all students in a specific course. You can adapt these steps to assign avatars to other user groups.
Click the circular picture in the upper-right corner and select Admin from the personal menu.
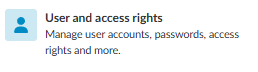
From the administration menu, select User and access rights.
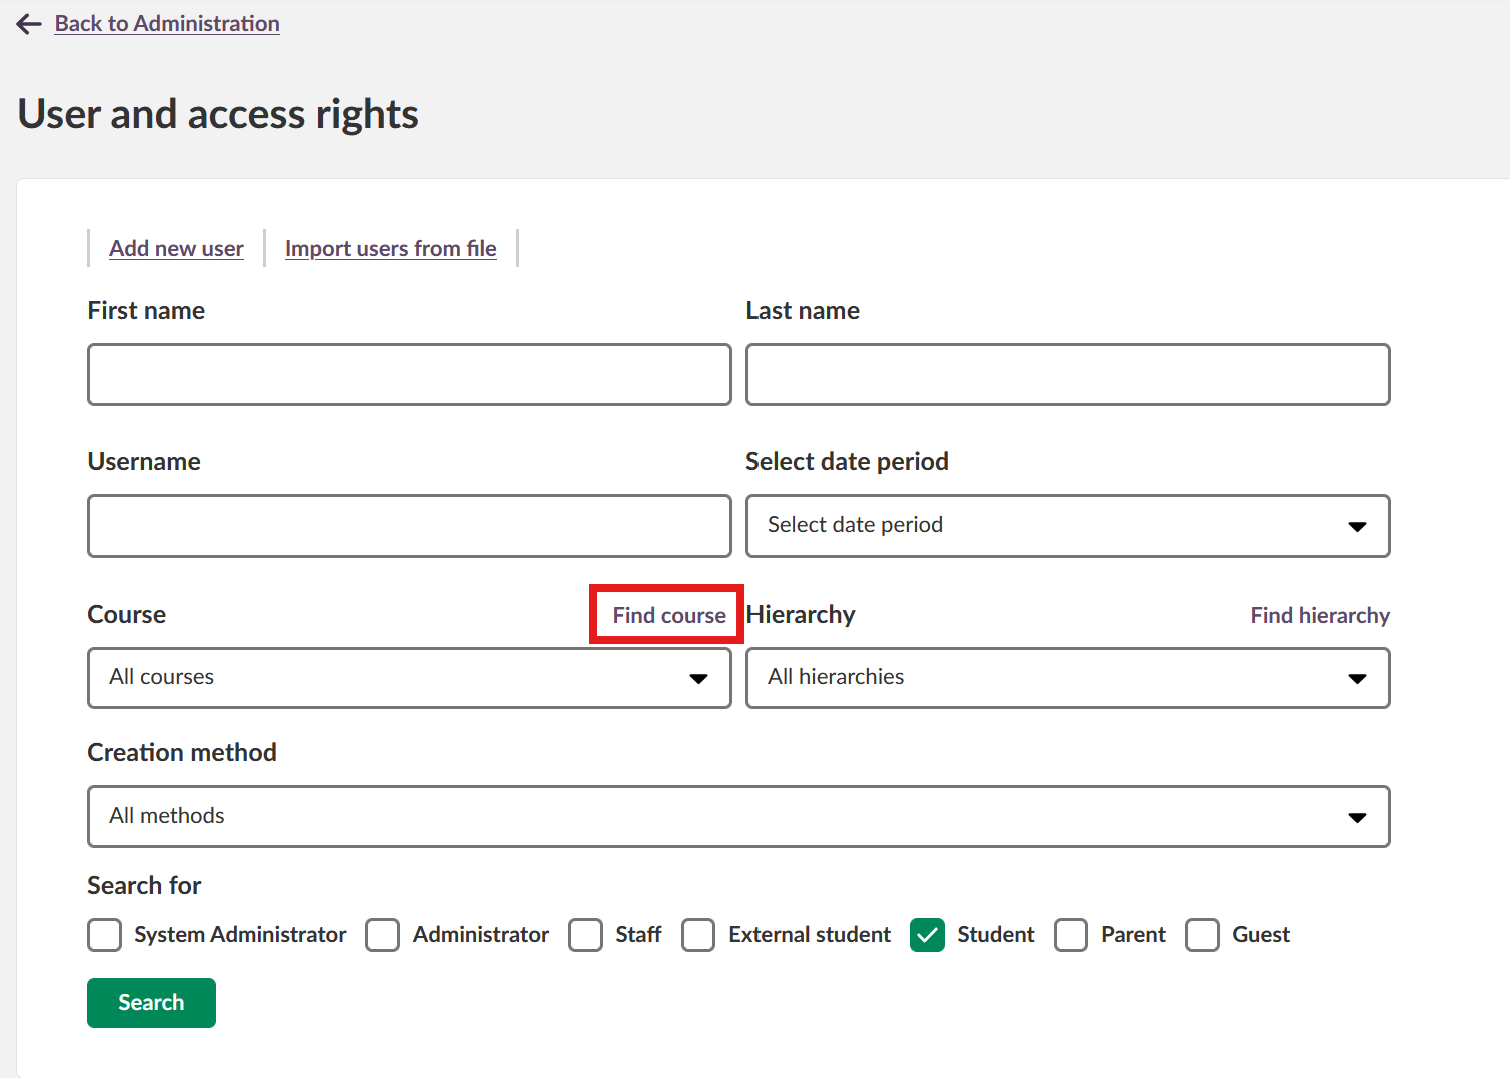
Click the Find course link to search for users by course.
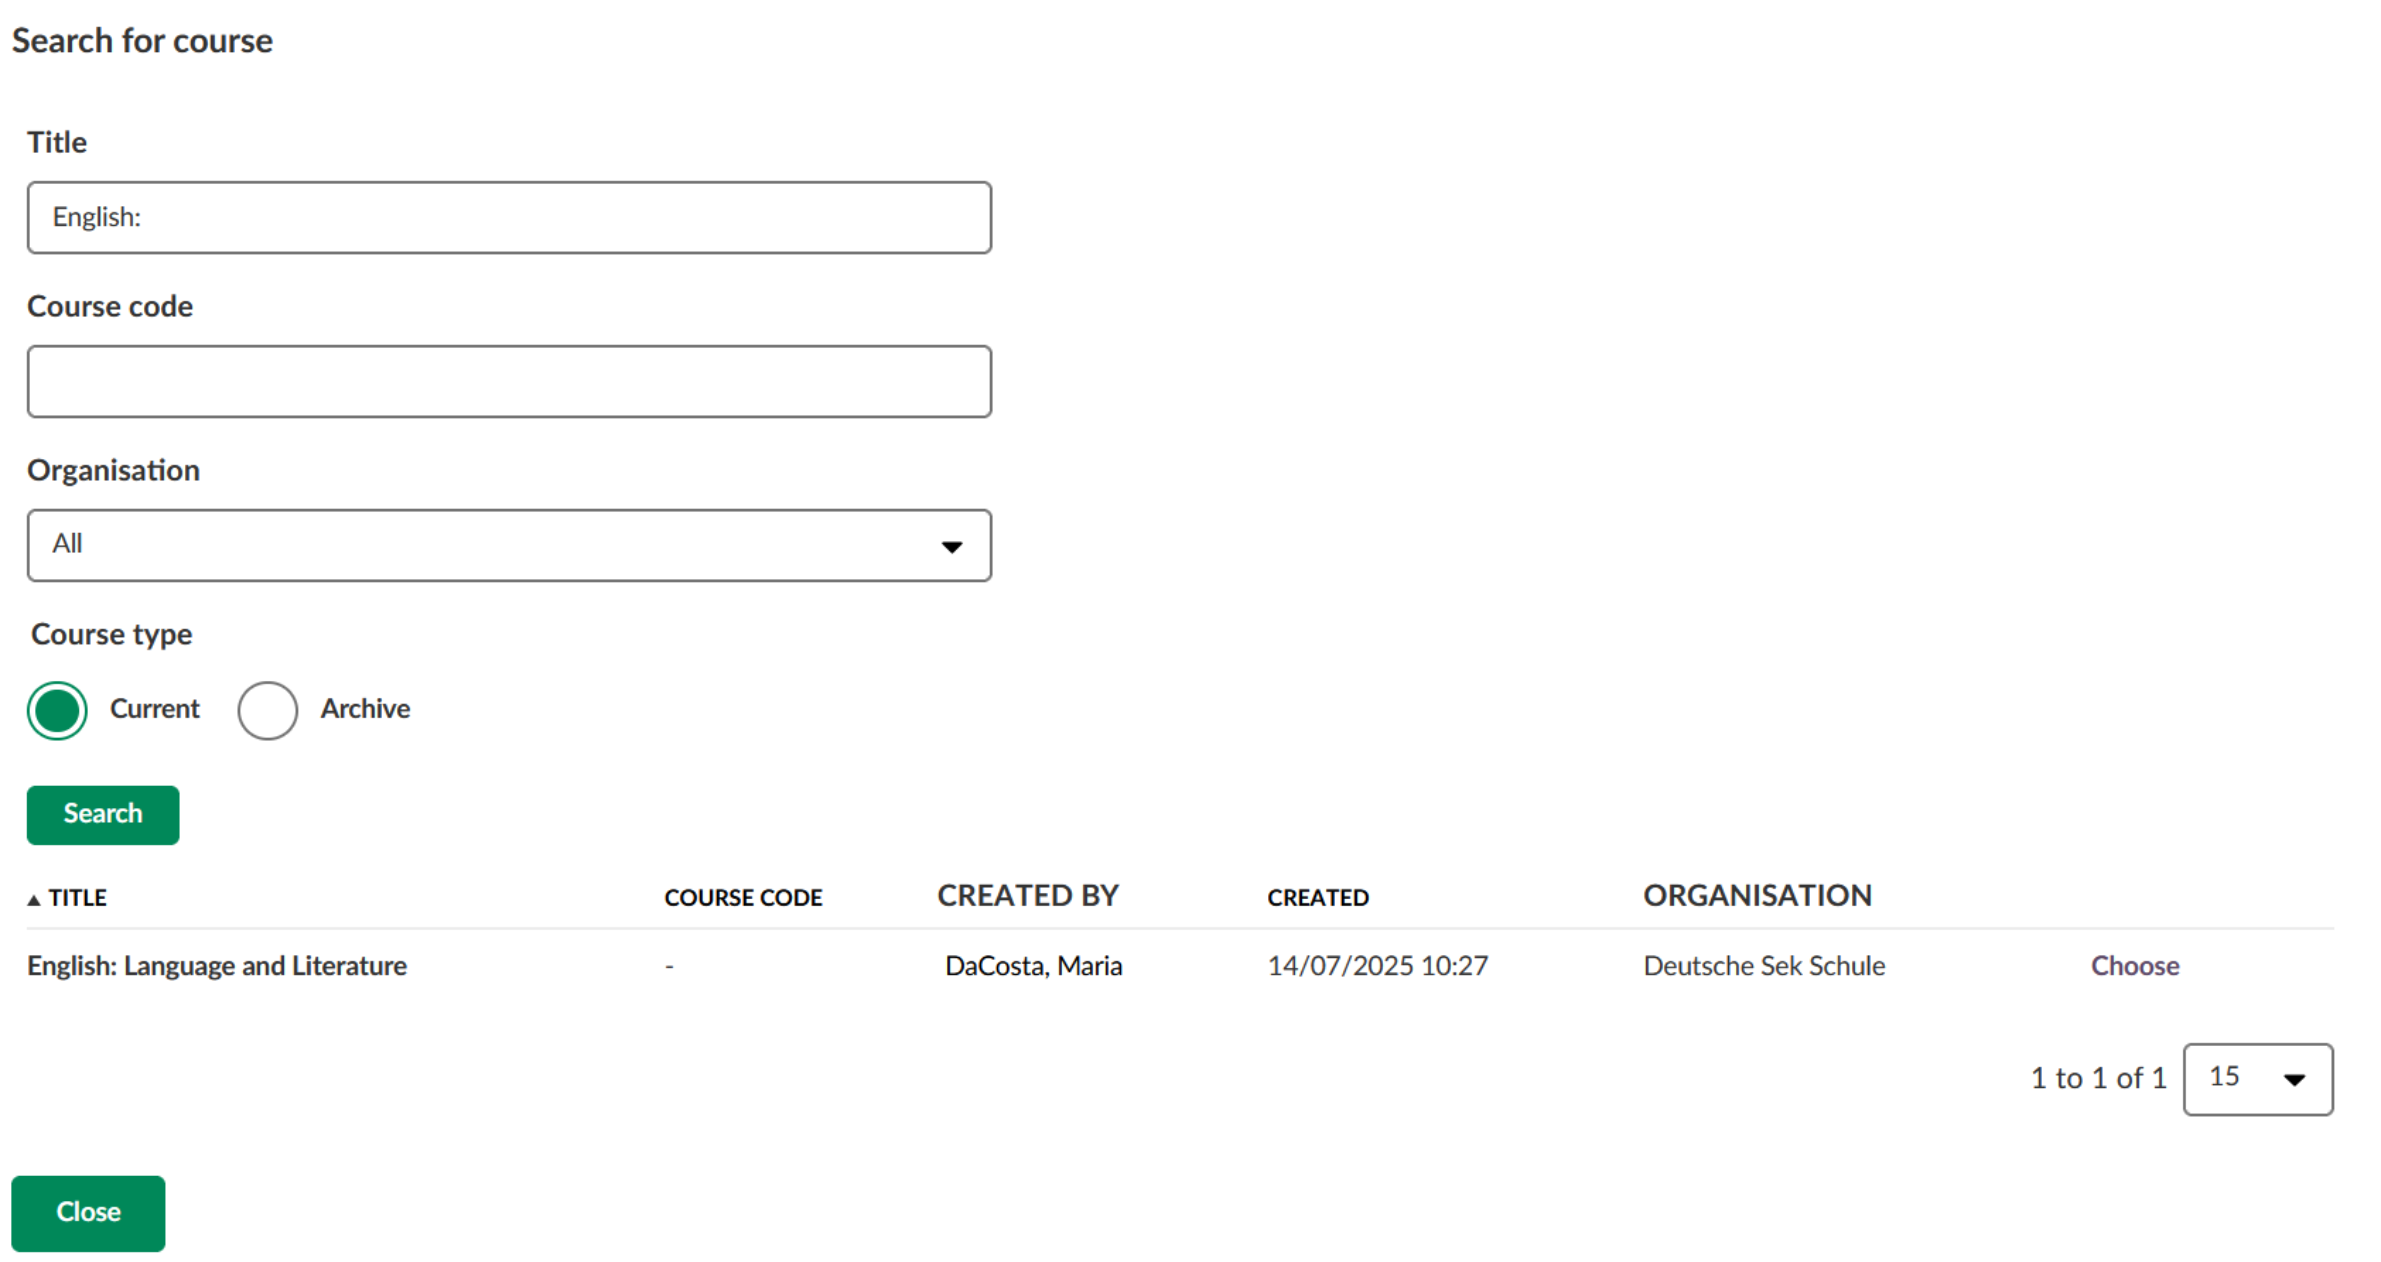
Enter your search query (for example English:) in the Title field and click the green Search button.
Locate the correct course in the results table and click Choose in the far-right column of that row.
Confirm that the correct course is selected in the Course dropdown.
Activate the Search for filter by ticking the Student checkbox, then click the green Search button.
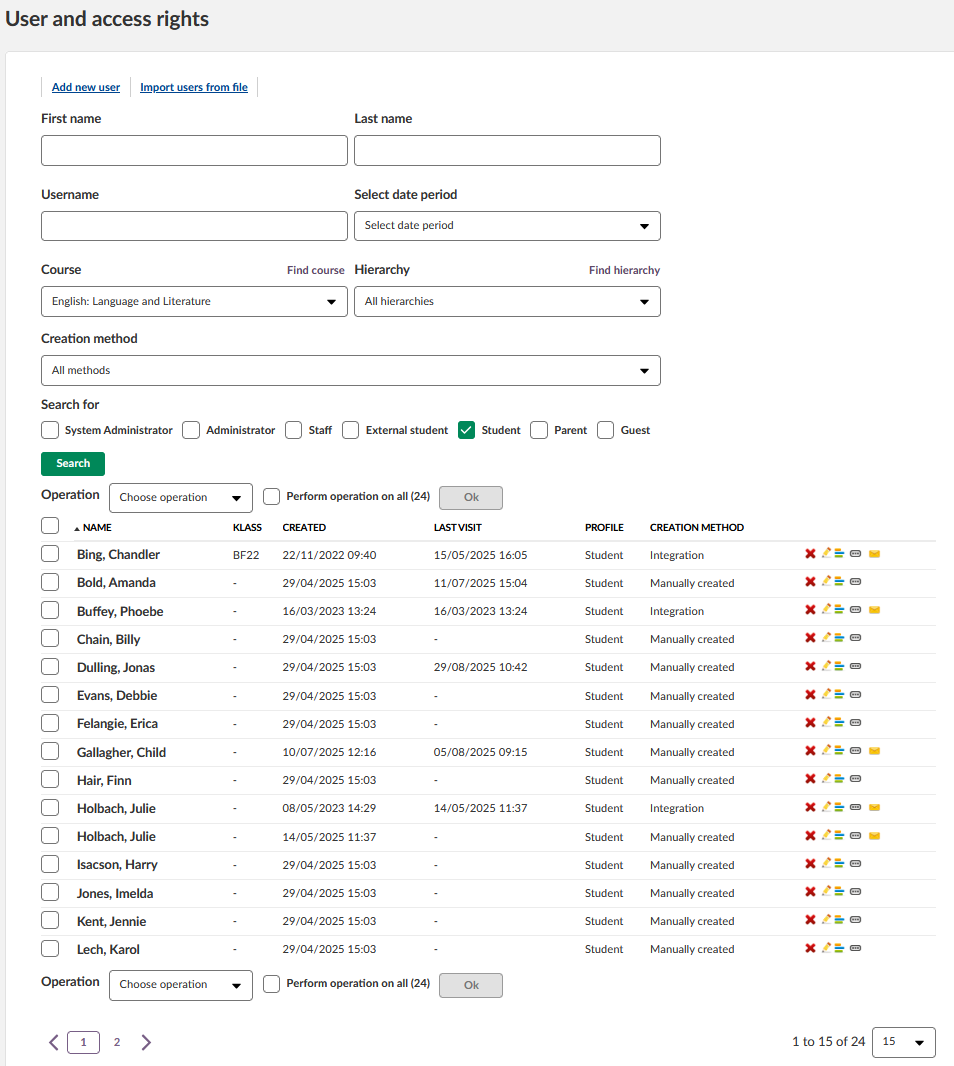
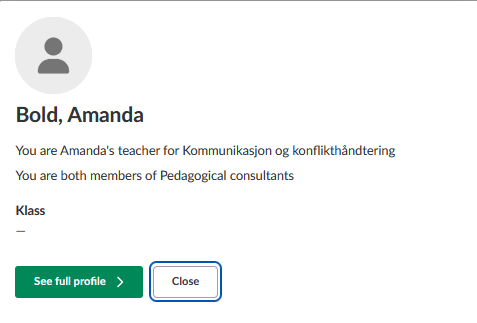
Verify the user status: click one of the student names in the list and confirm that the user currently has the grey silhouette as profile picture. Click Close.
Click the checkbox in the upper-left corner of the table to select all students.
Open the Choose operation dropdown and select Assign random avatar.
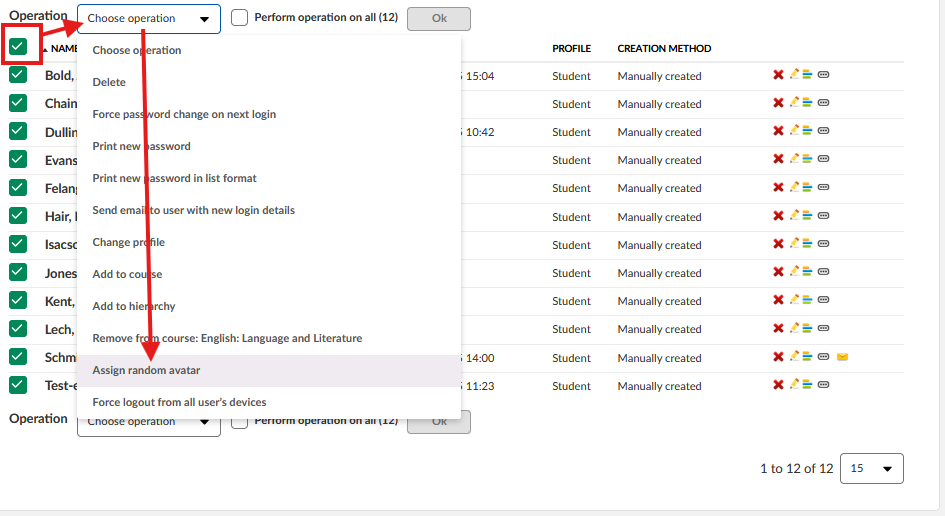
Click the green Ok button.
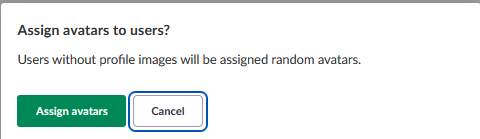
A confirmation dialogue appears. Click the green Assign avatars button to confirm.
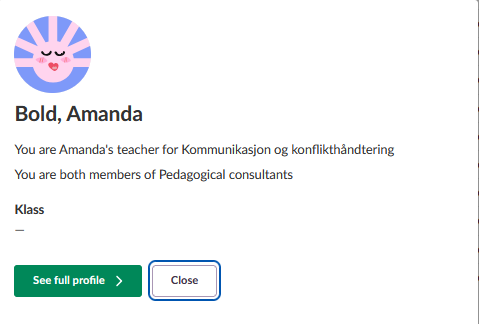
To verify the assignment, click one of the student names and check that the user now has a random avatar as profile picture.
5 Managing Illustration Settings
System administrators can control which illustrations are available in the image selector dialogue. The image selector includes K12-targeted illustrations that can be enabled or disabled based on your site's needs.
Note: Disabling K12 illustrations does not remove all illustrations. Users will still have access to illustrations suitable for higher education and professional contexts. This setting affects all users site-wide.
5.1 Enable or Disable K12 Illustrations
Control the availability of K12-targeted illustrations in the image selector dialogue.
Impact: This setting applies site-wide and affects all users. When K12 illustrations are disabled, users have access to fewer illustrations, with only those suitable for higher education and professional contexts remaining available.
- Click the circular picture in the upper-right corner and select Admin from the personal menu.
- From the administration menu, select Edit global settings.
- Navigate to the Features and security section.
- Scroll down to the Tools and content section.
- Locate the checkbox labelled Enable illustrations suitable for K12.
- Ticked: K12-targeted illustrations are available to all users
- Unticked: Only illustrations suitable for higher education are available
- Tick or untick the checkbox based on your site's requirements.
- Scroll to the bottom of the page and click the green Save button to apply the changes.
Note: Changes take effect immediately. Users will see the updated illustration selection the next time they open the image selector dialogue.
6 Troubleshooting
6.1 Avatar Assignment Notification Shows Errors
Symptoms: After assigning avatars, the notification indicates that some or all users were not assigned avatars.
Cause: The affected users already have profile pictures uploaded.
Solution:
- Review the notification details to identify which users were not assigned avatars.
- Verify whether these users have custom profile pictures by checking individual user profiles.
- Avatar assignment only affects users without existing profile pictures - this is expected behaviour.
Prevention: Understand that avatar assignment only applies to users with the default grey silhouette profile picture.
6.2 Cannot Access User and Access Rights Page
Symptoms: The User and access rights option is not visible in the Admin menu.
Cause: You do not have the required permissions to access this feature.
Solution:
- Verify you have an administrator role within your organisation.
- Contact your site administrator to enable one of the following permissions for your account:
- Course management
- Policy management
- Hierarchy management
- Once permissions are granted, log out and log back in to refresh your access rights.
Prevention: Confirm you have the necessary permissions before attempting to assign avatars to selected users.
6.3 Assigned Avatars Disappeared
Symptoms: Users who previously had avatars now display the grey silhouette again.
Cause: Someone with system administrator access used the Revert changes function on the profile, or the user have removed their avatar.
Solution:
- Contact your system administrator to confirm whether avatars were intentionally removed.
- If the removal was unintentional, re-assign avatars using either the profile-level or selected users method.
- Review who has system administrator access to prevent accidental changes.
Prevention: Communicate with your team before using the Revert changes function, as this affects all users in the profile.
6.4 Cannot Find Users in Selected User Assignment
Symptoms: After searching for a course, no users appear in the results list.
Cause: Either the wrong profile filter is selected, or the course contains no users of that profile type.
Solution:
- Verify the correct course is selected in the Course dropdown.
- Check that the appropriate profile checkbox is ticked in the Search for filter (e.g., Student for students).
- Click the green Search button after making filter changes.
- Confirm the course actually contains users of the selected profile type.
Prevention: Always verify your filter selections before expecting to see results in the user list.
6.5 "Assign Random Avatar" Option Not Available in Dropdown Menu
Symptoms: The User and access rights page is accessible, but Assign random avatar does not appear in the Choose operation dropdown menu.
Cause: You do not have sufficient permissions to assign avatars. This option requires administrator role at the organisational level, not just teacher permissions.
Solution:
- Verify you have an administrator role within your organisation (not just teacher access)
- Contact your site administrator to confirm the following permissions are enabled for your account:
- Course management
- Policy management
- Hierarchy management
- Once permissions are granted, refresh the page or log in again.
- Navigate back to User and access rights and verify Assign random avatar now appears in the Choose operation dropdown
Contact Support: For additional support, contact your itslearning administrator or visit the itslearning support pages
Note: For unresolved issues, contact your itslearning Key Account Manager or support team with error messages and screenshots.
More Help Resources
Have more questions? Please start with asking your school administrator.
Product Release notes
Stay updated with itslearning latest releases: https://itslearning.com/product-updates
Service Status
Check the current status of itslearning services: https://status.itslearning.com/
Ideas Portal
Share your ideas and help shape the future of itslearning: https://ideas.itslearning.com/
Roadmap
Check out our roadmap: https://itslearning.com/global/roadmap/
The features shown are part of the project within the framework of the German Development Project (GDP), a cooperation between four German states and itslearning with the aim of improving digital education in Germany through tailor-made product developments.
Click here to learn more about the GDP roadmap and what other features you can expect.
For German readers: Click here for more information about the project within the framework of the German Development Project.