Profile Pictures and Avatars – Overview (All users)
TABLE OF CONTENTS
Introduction
You can upload a profile picture to represent your presence within itslearning. Your profile picture appears alongside your contributions, including announcements, messages, comments, submissions, and course cards, helping others recognise and connect with you.
You can either upload your own image or select from a collection of pre-defined avatars. If you upload an image, you can crop it to ensure it displays correctly as your profile picture.
1 Prerequisites
Prerequisite: The ability to change your profile picture depends on settings configured by your system administrator. If the profile setting Allow to change profile picture has been disabled for your profile, you cannot change your profile picture.
By default, users see a grey silhouette as their profile picture until they upload an image or select an avatar.
Note: System administrators can assign avatar images to profiles. If you suddenly have an avatar without choosing one, this is probably why. This only happens if you do not already have an image or avatar selected.
2 Changing Your Profile Picture
Upload and optionally crop an image to use as your profile picture.
Supported file formats: JPEG (.jpeg, .jpg) and PNG (.png). Maximum file size: 5 MB.
Note: Maximum allowed file size is 5MB. A red warning text will be visible if you try to upload an image that is too large.
- Click the circular picture in the upper-right corner to open the personal menu.
- Select the Your settings menu item.
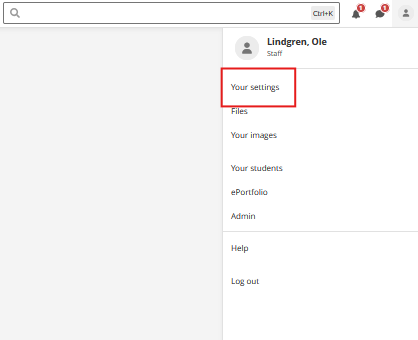
- On the Your settings page, click Edit profile.
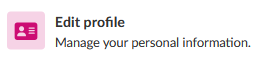
- On the Edit profile page, click the + Add image option.
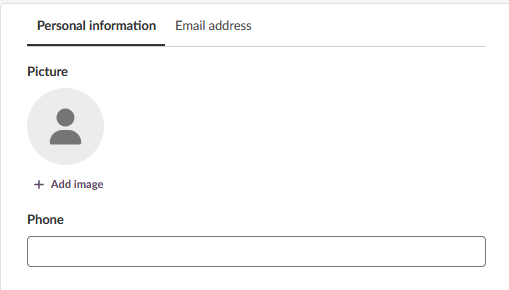
- The Change profile picture box opens with the Upload image tab selected by default.
- Add an image using either one of these methods:
- Drag and drop an image file from your computer into the upload area
- Click the Add image label to browse and select an image file from your computer
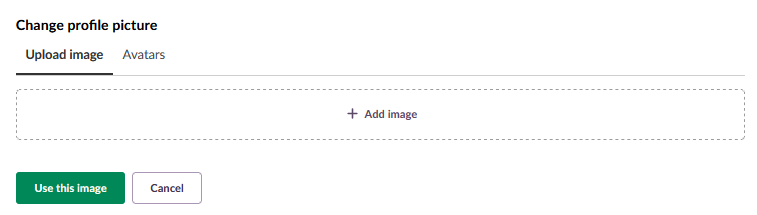
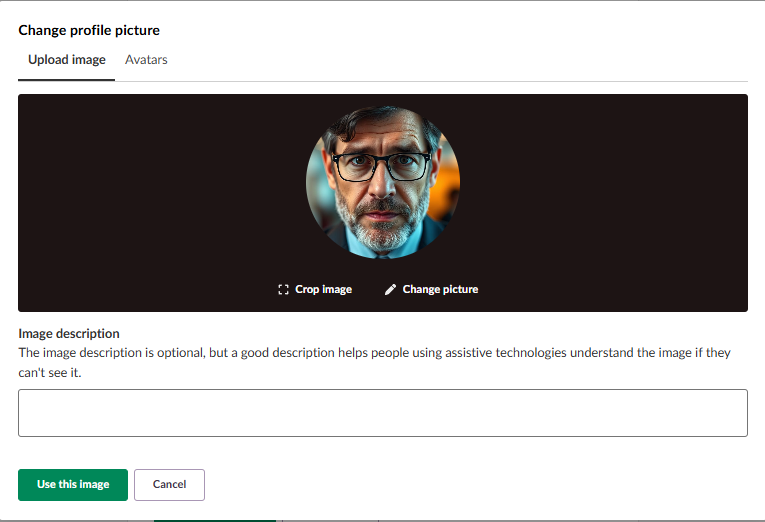
- After uploading, the image appears with cropping options:
- Click Crop image to adjust the visible area of your profile picture
- Click Change picture to upload a different image
- Click Use this image if you are happy
- Click Cancel to discard the image and go back to the Edit profile page
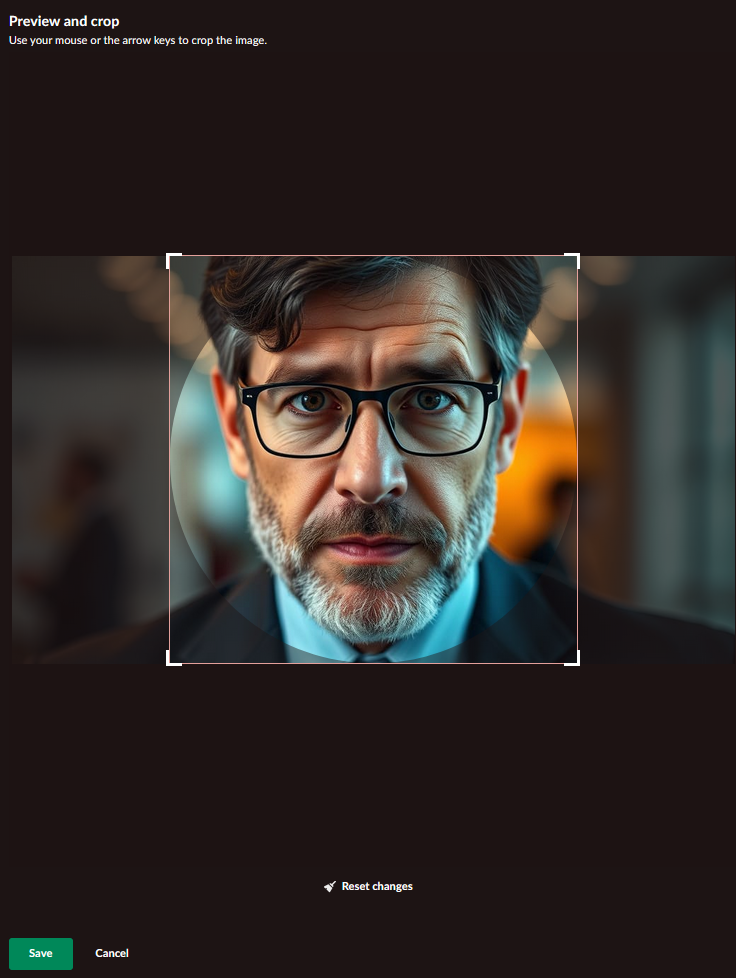
- Use the cropping interface to frame your image. The circular preview shows how your profile picture will appear to others. Once you are satisfied with the preview, click Save to confirm or Cancel to discard the cropping and return to the Change profile picture box.
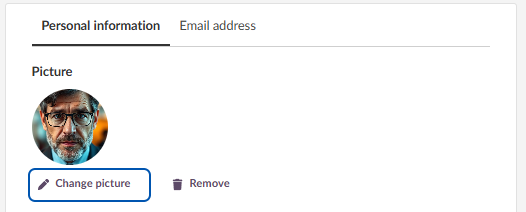
- On the Edit profile page, you can now change or remove your image.
- Click the green Save preferences button on the bottom of the page to finalise your new profile picture.
3 Selecting an Avatar
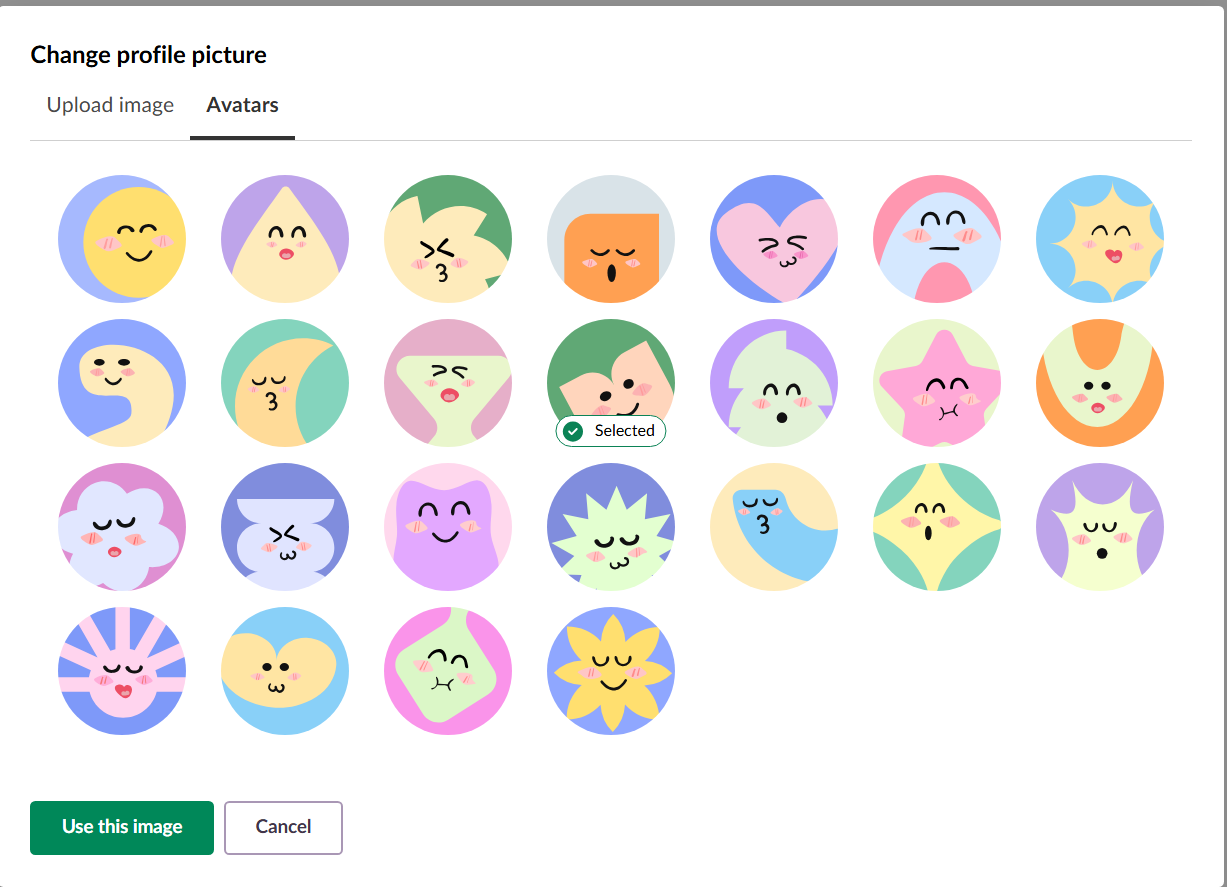
Choose from a collection of pre-defined avatars instead of uploading your own image.
Click the circular picture in the upper-right corner to open the personal menu.
Select the Your settings menu item.
On the Your settings page, click Edit profile.
On the Edit profile page, click the Change picture option, indicated by a pencil icon.
In the Change profile picture modal, click the Avatars tab.
Browse the available avatars and click on any avatar to select it.
Click the green Use this image button to confirm your selection.
- Back on the Edit profile page, click the green Save preferences button to apply your changes.
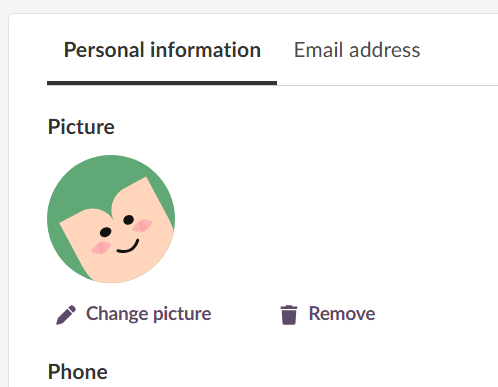
Note: Users can change their assigned avatar at any time unless the profile setting Allow to change profile picture has been disabled by an administrator.
4 Troubleshooting
4.1 Cannot Change Profile Picture
Symptoms: The Change picture option is not visible on the Edit profile page.
Cause: Your system administrator has disabled the Allow to change profile picture setting for your profile.
Solution:
- Contact your system administrator to request that profile picture changes be enabled for your profile.
- Provide a clear reason why you need to change your profile picture.
- Wait for the administrator to enable the setting, then try again.
Prevention: Check with your administrator about profile picture policies before planning to change your picture.
4.2 Uploaded Image Does Not Save
Symptoms: After uploading a profile picture, it does not appear when you return to your profile.
Cause: You did not click the Save preferences button after confirming your image selection.
Solution:
- Navigate to Your settings > Edit profile.
- Click the Change picture option.
- Upload or select your image and click Use this image.
- Refresh your browser to verify the change has been saved.
Important: Important: Click the green Save preferences button at the bottom of the Edit profile page.
Prevention: Always click Save preferences after making any changes to your profile settings.
4.3 Image Upload Fails
Symptoms: When trying to upload an image, you receive an error message or the image does not appear.
Cause: The file format is not supported, or the file size exceeds the limit.
Solution:
- Verify your image is in JPEG (.jpeg, .jpg) or PNG (.png) format.
- Check the file size - if the image is very large, reduce the size using image editing software.
- Try a different image file to determine if the issue is file-specific.
- If the problem persists, contact your system administrator for assistance.
Prevention: Use standard image formats (JPEG or PNG) and keep the file size within the 5 MB limit.
4.4 Profile Picture Appears Distorted
Symptoms: Your profile picture looks stretched, squashed, or poorly cropped.
Cause: The image was not properly cropped before saving.
Solution:
- Navigate to Your settings > Edit profile > Change picture.
- Upload the image again.
- Use the Crop image button to properly frame your picture within the circular preview.
- Adjust the crop area until the preview looks correct.
- Click Use this image and then Save preferences.
Prevention: Always preview your image in the circular frame and use the cropping tool before confirming.
More Help Resources
Have more questions? Please start with asking your school administrator.
Product Release notes
Stay updated with itslearning latest releases: https://itslearning.com/product-updates
Service Status
Check the current status of itslearning services: https://status.itslearning.com/
Ideas Portal
Share your ideas and help shape the future of itslearning: https://ideas.itslearning.com/
Roadmap
Check out our roadmap: https://itslearning.com/global/roadmap/
The features shown are part of the project within the framework of the German Development Project (GDP), a cooperation between four German states and itslearning with the aim of improving digital education in Germany through tailor-made product developments.
Click here to learn more about the GDP roadmap and what other features you can expect.
For German readers: Click here for more information about the project within the framework of the German Development Project.