Courses – Archiving (Teacher)
TABLE OF CONTENTS
- 1 Overview
- 2 Archive a single course
- 3 Archive multiple courses
- 4 Find archived courses
- 5 Reactivate an archived course
- 6 Maintaining student access after archiving
1 Overview
Archiving a course removes it from the course overview page for all participants. Archived courses can still be accessed and can serve as templates for new courses. Archiving is particularly useful at the end of the school year for courses that are no longer in active use.
Note: If you no longer need a course and its content, consider deleting the course instead to free up storage space.
2 Archive a single course
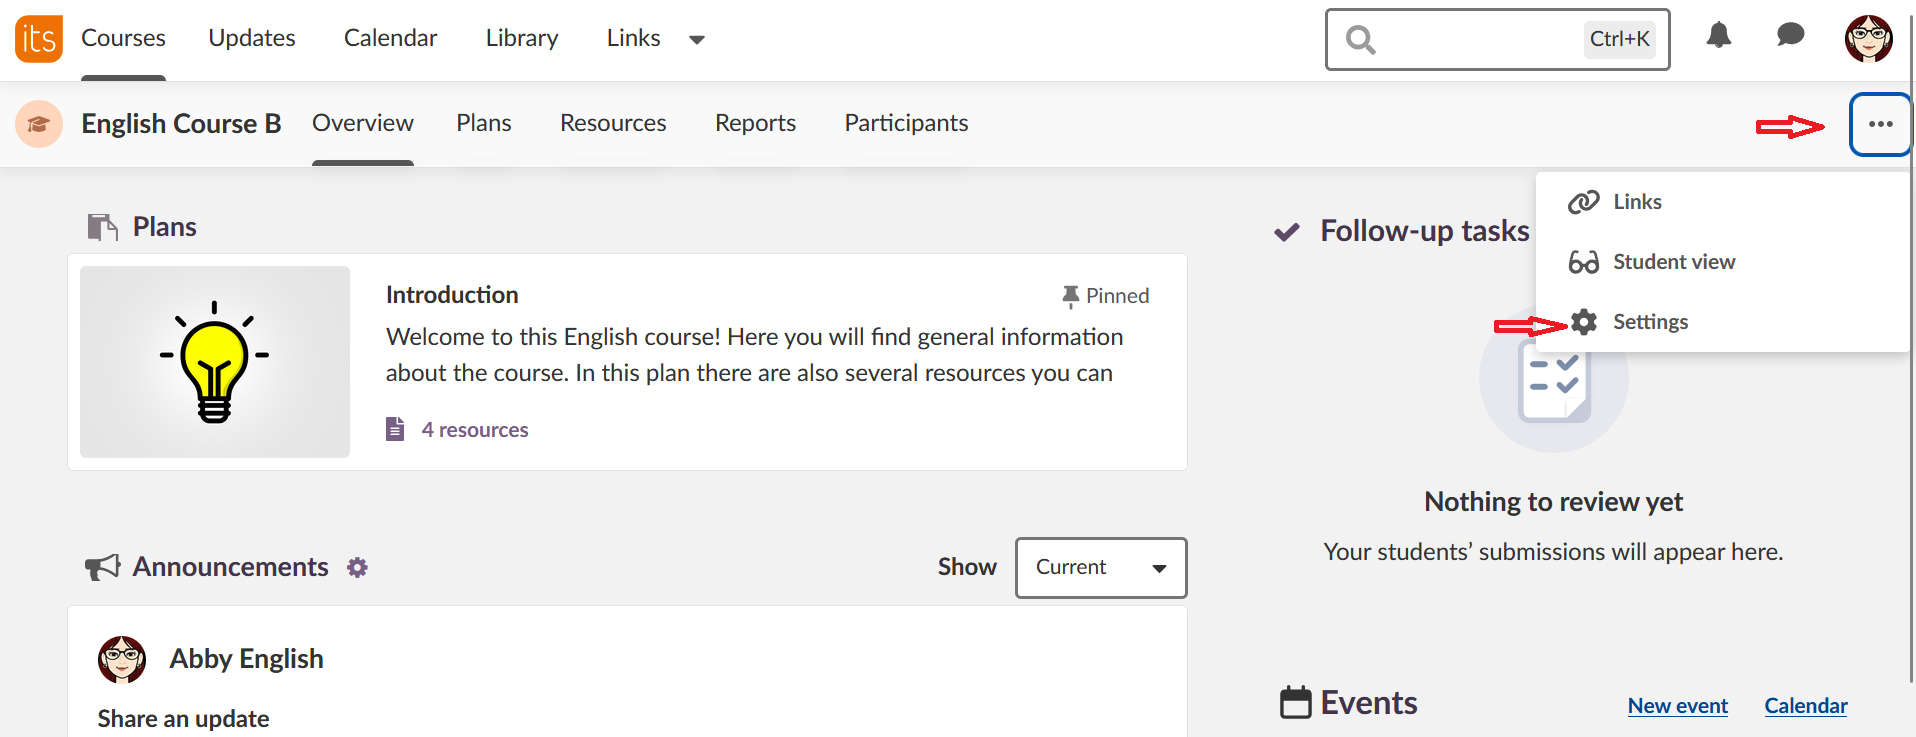
- Open the course and click the three-dot menu (...), then select Settings.
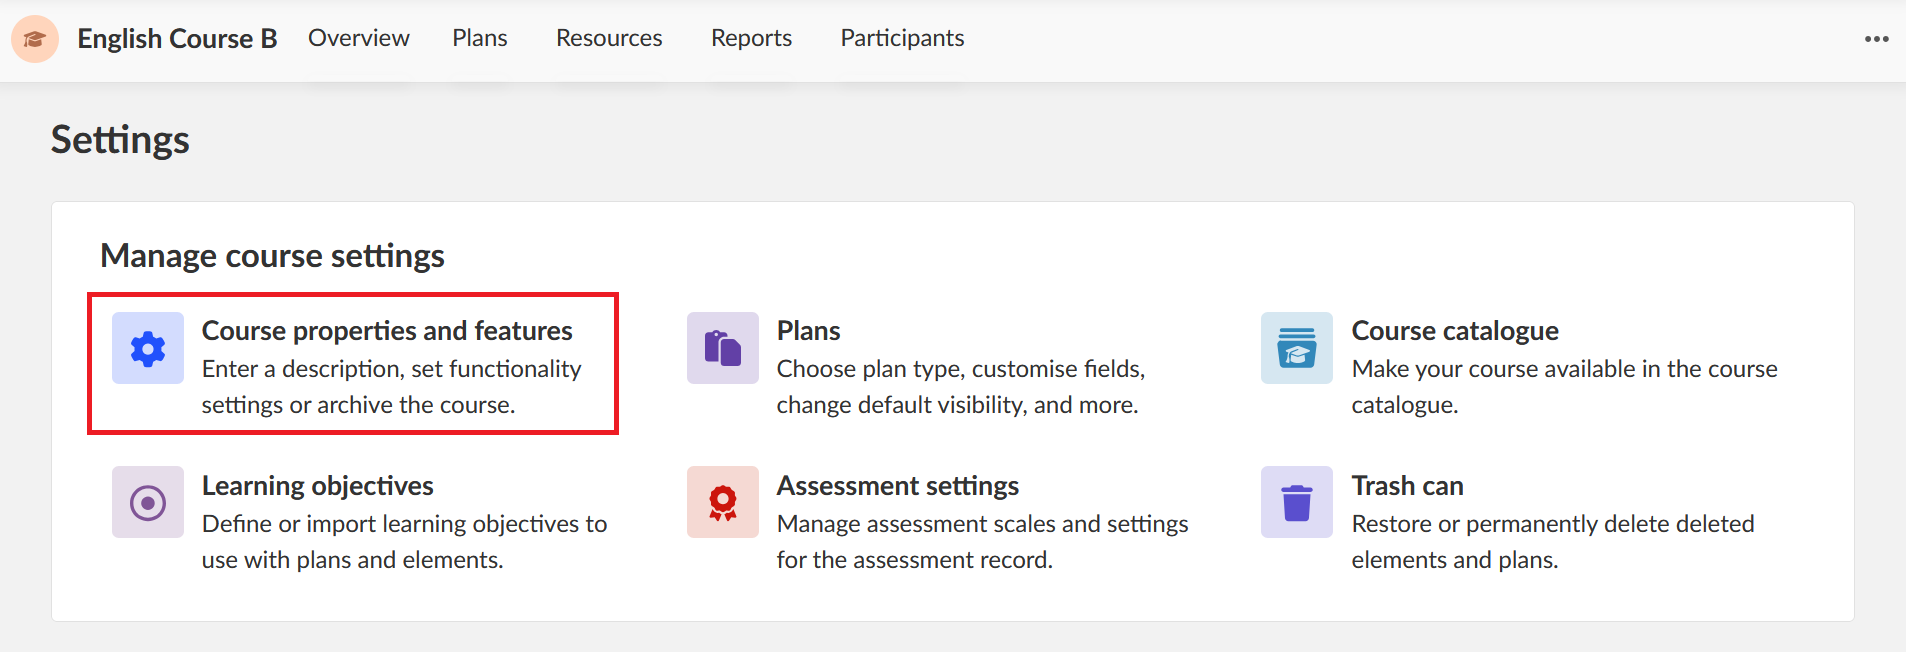
- Click Course properties and features.
- Click the three-dot menu in the top right corner and select Move to archive.
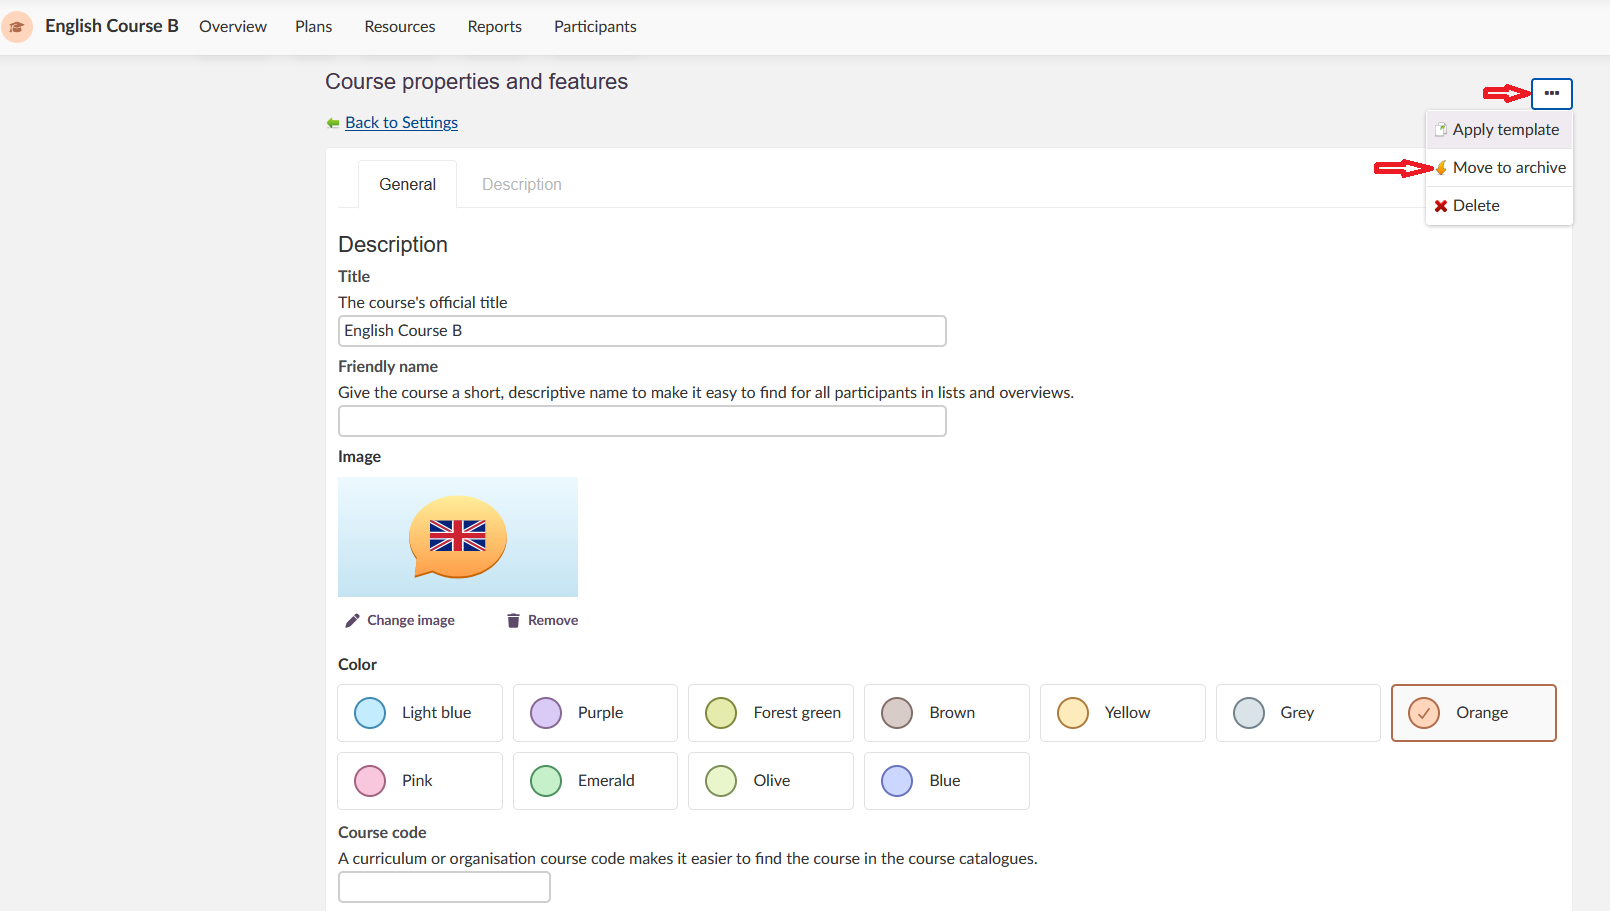
- Click OK to confirm. The course is now archived for all participants.
If you want to ensure that certain students retain access to course content after archiving, see section 6 before archiving the course.
3 Archive multiple courses
- Go to the course overview and click All courses.

- Select the courses to be archived using the checkboxes.
- Click Move to archive in the action menu.
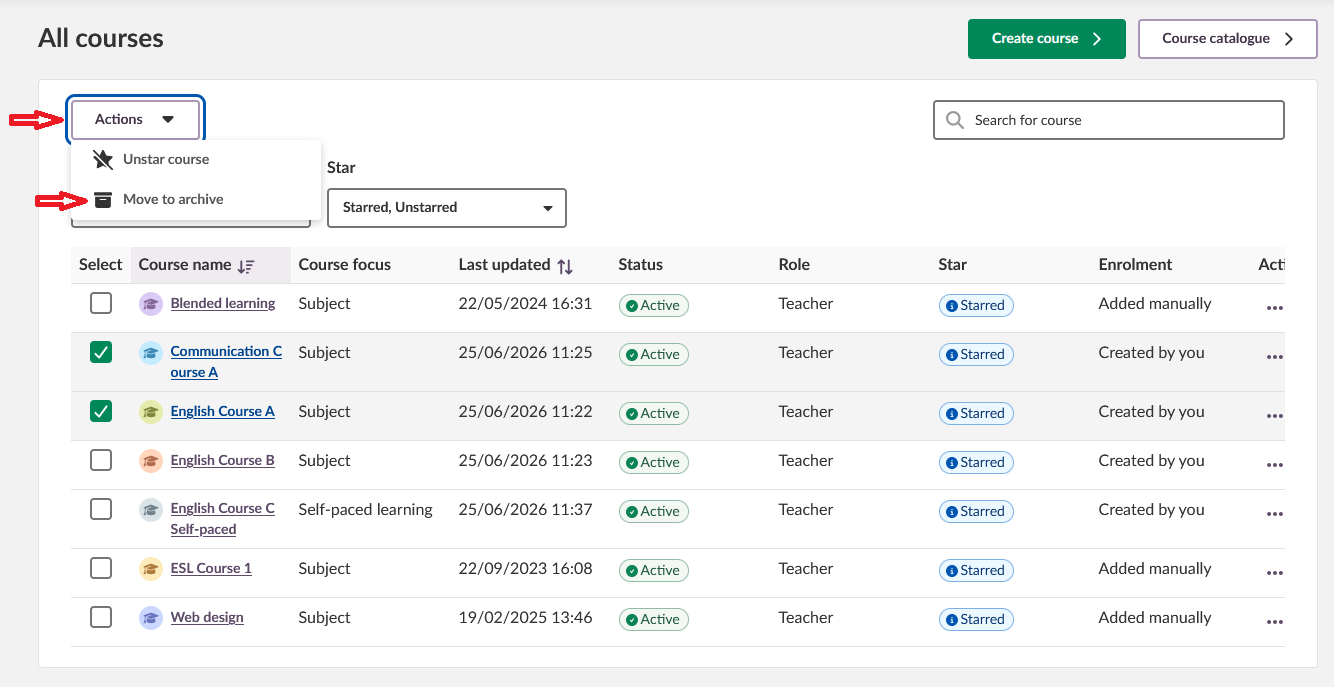
- Confirm that you want to archive.

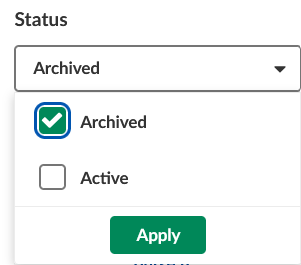
4 Find archived courses
- Go to the course overview and click All courses.
- Click the status dropdown and select Archived to filter the list.
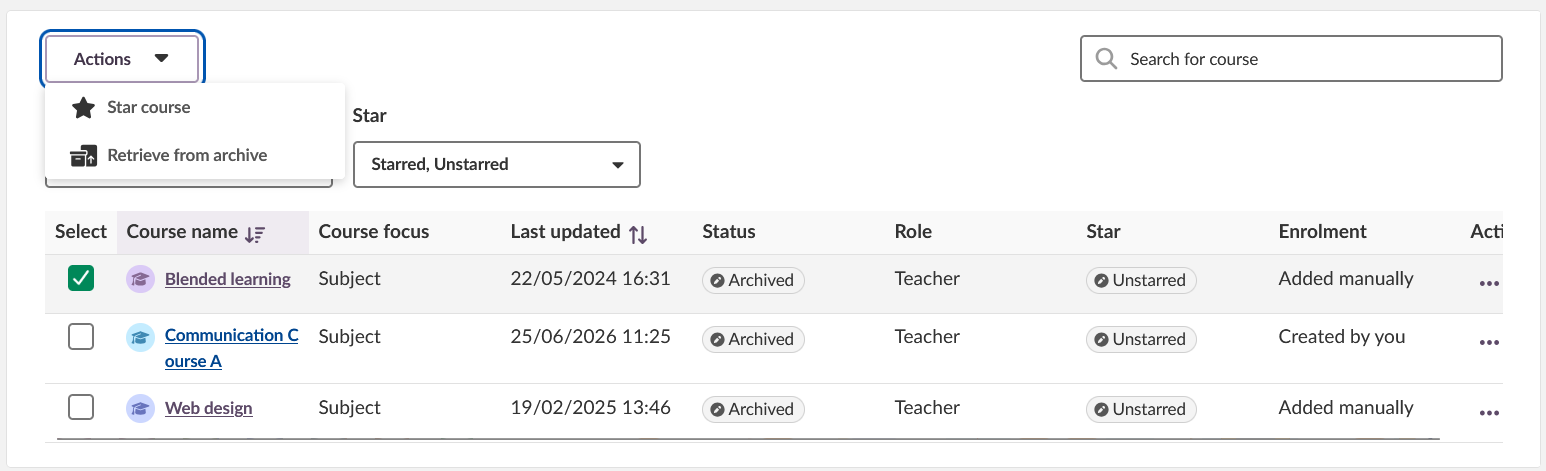
5 Reactivate an archived course
- Go to the All courses page and filter by Archived status.
- Select the course(s) to reactivate using the checkboxes.
- In the Action menu click Retrieve from archive.
6 Maintaining student access after archiving
When a course is archived, it is archived for all participants. If participants are connected to the course via an organisation group (previously called hierarchy synchronisation), their membership will change when the organisation structure changes. For example, at the end of a school year, students in Class 7a who move to Class 8a will lose access to the archived 7a course material.
To ensure students retain access after archiving, remove the automatic group update before archiving the course:
- Open the course and go to Participants > Groups.
- In the Organisation groups section, click the three-dot menu next to the relevant group.
- Select Remove automatic update. This converts all group members to individual participants.
- Archive the course.
The students are now listed as individual participants and will retain access to the course content regardless of changes to the organisation structure.
More Help Resources
Have more questions? Please start with asking your school administrator.
Product Release notes
Stay updated with itslearning latest releases: https://itslearning.com/product-updates
Service Status
Check the current status of itslearning services: https://status.itslearning.com/
Ideas Portal
Share your ideas and help shape the future of itslearning: https://ideas.itslearning.com/
Roadmap
Check out our roadmap: https://itslearning.com/global/roadmap/