Rich Text Editor - Reference
TABLE OF CONTENTS
- Rich-text Editor – Overview
Introduction
The Rich-text editor is a content creation tool used throughout itslearning for formatting text and integrating media. Use the Rich-text editor when creating course content, assignments, discussions, announcements, or other text-based materials. The editor provides word processing functions alongside tools for embedding videos, recording audio, inserting mathematical formulas, and linking to course resources.
1 Overview
Teachers and students with appropriate course permissions can access the Rich-text editor when creating or editing content. The editor is used in numerous locations throughout the platform and appears in either a full or reduced version, depending on where it is opened.
Note: Not all functions are available for all users at all times. This can depend on the setup of your itslearning site.
2 Prerequisites & requirements
User permissions required:
- Editing rights in the relevant course area (varies by location)
- For media uploads: appropriate file storage quota
System/browser requirements:
- Modern web browser (Chrome, Firefox, Safari, Edge)
- Microphone access (for audio recording features)
- Camera access (for video recording features)
- Stable internet connection for media uploads
Prerequisite: Extension Library features require platform-level enablement. Teams and Google Meet integration require institutional configuration.
3 Getting started
3.1 Accessing the editor
The Rich-text editor appears automatically when creating or editing content in itslearning. You will encounter it in numerous locations throughout the platform, but in some places a newer version with fewer options may be encountered.
- Course content pages
- Assignment creation
- Discussion posts
- Announcement (new, simplified version)
- Messages (new, simplified version)
3.2 Expanding the full toolbar
In some cases, you might initially see a reduced version of the editor where not all functions are displayed.
To access all editor functions:
- Look for the "More options" button in the toolbar.
- Click "More options" to expand the hidden icons.
The full toolbar will then display all available editing functions.
4 Features & functions
Note that not all functions are available for all users at all times. This can depend on the setup of your itslearning site.
4.1 Text formatting tools
The first section of the toolbar contains standard text formatting functions. These symbols and functions should be familiar from other word processing programmes.

Available formatting options:
- Font selection
- Text size (Normal, Heading, etc.)
- Bold, Italic, Underline
- Text colour
- Background colour
- Special characters (Ω)
- Text alignment (left, centre, right, justify)
4.2 Text alignment and structure
The next section provides tools for structuring your content.

Structure functions:
- Subscript (lower text on the line)
- Superscript (heighten text on the line)
- Increase indentation
- Decrease indentation
- Numbered lists
- Bullet points
- Language definition for text sections
4.3 Media integration icons
The toolbar includes numerous icons for integrating different types of media and content.

| Icon | Function |
|---|---|
| Anchor: Sets a marker ("anchor") in a text that you can directly refer to with a link. | |
Link: Inserts a link, for example to another webpage or an anchor. When you paste a link, the editor tries to embed the content behind it. There are three possible outcomes:
| |
| Table: Inserts a table. | |
| Smiley: Opens a selection of smileys to insert into the text. | |
| Tree link: Inserts a link to a resource in the course you are in. | |
| File from "My web files": Sets a link to a file in your personal storage area on itslearning. | |
| Image: Inserts an image from the computer, or from your files in itslearning. | |
| Audio recording: Here you can record audio or upload an audio file. | |
| Video recording: Here you can record a video or upload a video file. | |
 | iMathEQ formula editor: Inserts mathematical symbols and formulas. |
| Embed video: Here you can embed a video from another webpage. | |
| Teams meeting: Here you can create a Teams meeting for your course, and add the link to this page. | |
| Google Meet: Here you can create a Meet room for your course and add the link to this page. | |
| Extension library: Here you can access additional functions enabled for your platform. |
4.4 Additional functions
The next section of the toolbar provides:
- Undo (regret actions in the editor window)
- Redo (go forward with actions)
- Cut, Copy, and Paste shortcuts

4.5 Display options
The final icons are:
- The "Source" button, which displays your content in HTML code format
- The check accessibility button
- Full screen editor, especially useful for smaller screens

5 Step-by-step workflows
5.1 Embedding media content
Objective: Add external video or media content.
Steps:
- Copy the URL of the video or media content.
- Click the Link icon or Embed video icon.
- Paste the URL.
- The editor will attempt to embed the content automatically.
- If embedding fails, the link will appear as a standard hyperlink.
Result: Embedded media content displayed directly in your page, or a link to external content.
5.2 Inserting tables
Objective: Create a structured table for data presentation.
Steps:
- Click the Table icon.
- Select the number of rows and columns.
- Click to insert the table.
- Fill in your content.
- Use table properties to adjust formatting as needed.
Result: A formatted table for organising information.
5.3 Recording audio and video
Objective: Create recorded content directly in itslearning.
For audio recording:
- Click the Audio recording icon.
- Allow microphone access if prompted.
- Click record and speak.
- Click stop when finished.
- Save or upload your recording.
For video recording:
- Click the Video recording icon.
- Allow camera and microphone access if prompted.
- Click record.
- Click stop when finished.
- Save or upload your recording.
Result: Embedded audio or video content created directly within itslearning.
5.4 Creating mathematical formulas
Objective: Insert mathematical notation and formulas.
Steps:
- Click the iMathEQ formula editor icon.
- Use the formula editor interface to build your equation.
- Click Insert when complete.
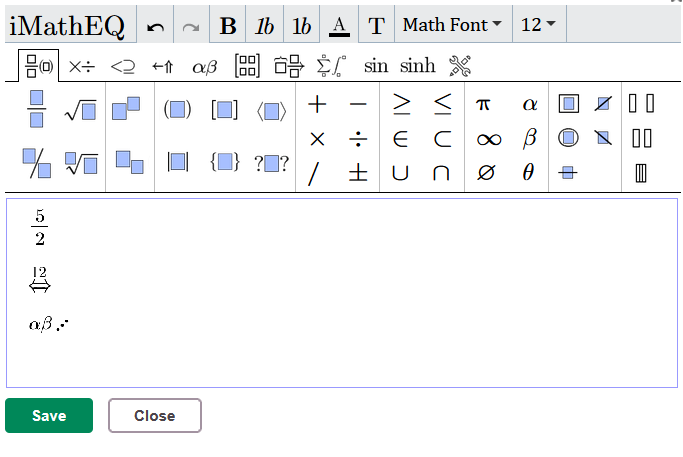
Result: Professional mathematical notation displayed in your content.
6 Settings & customisation
6.1 Language selection
Define which language is used when writing specific text sections. This assists with spell-checking and accessibility features.
To set language:
- Select the text.
- Choose the language from the language dropdown in the alignment section.

- The spell-checker will use the selected language for that text.
6.2 Source code view
Advanced users can view and edit the HTML source code directly.
To access source view:
- Click the "Source" button on the far right of the toolbar.
- View or edit the HTML code.
- Click "Source" again to return to visual editing mode.
Use cases:
- Fine-tuning formatting
- Troubleshooting display issues
- Copying clean HTML for use elsewhere
7 Technical information
7.1 Editor versions
The Rich-text editor may appear in reduced or full versions depending on the context within itslearning. The reduced version displays core formatting functions, while the full version shows all available tools.
7.2 Link embedding behaviour
When pasting URLs, the editor follows this hierarchy:
- First attempt: Retrieve embed code automatically.
- Second attempt: Build an object based on page metadata.
- Final fallback: Display as a standard hyperlink.
This behaviour ensures that content displays optimally when embedding is supported, whilst maintaining functionality when it is not.
7.3 Supported media types
The editor supports:
- Standard web video formats through embedding
- Audio recordings in common formats (MP3, M4A)
- Video recordings in common formats (MP4, WebM)
- Images (JPEG, PNG, GIF)
- External content from supported platforms (YouTube, Vimeo, etc.)
8 Troubleshooting
8.1 Common issues
Problem: Editor toolbar is incomplete or missing functions
Solution:
- Look for the "More options" button.
- Click "More options" to expand hidden icons.
- If functions remain unavailable, verify your permissions for the content area.
Problem: Pasted content appears with unexpected formatting
Solution:
- Use the Source view to examine the HTML code.
- Consider pasting as plain text first, then reformatting.
- Use undo (Ctrl+Z / Cmd+Z) if formatting goes wrong.
Problem: Cannot embed video from external source
Solution:
- Verify the video URL is correct.
- Check that the external platform supports embedding.
- If embedding fails, the link will still work as a standard hyperlink.
- Alternative: upload video files directly if embedding is not available.
8.2 Missing toolbar functions
Problem: Extension Library or integration icons (Teams, Google Meet) not visible
Cause: These features require platform-level enablement by your institution.
Solution: Contact your itslearning administrator to verify which features are enabled for your platform.
9 Additional resources
More help resources
Have more questions? Please start by asking your school administrator.
Product release notes
Stay updated with the latest itslearning releases: https://itslearning.com/product-updates
Service status
Check the current status of itslearning services: https://status.itslearning.com/
Ideas portal
Share your ideas and help shape the future of itslearning: https://ideas.itslearning.com/
Roadmap
Check out our roadmap: https://itslearning.com/global/roadmap/