Course Templates - Reference (teacher)
TABLE OF CONTENTS
- 1 Overview
- 2 Creating a Course Based on a Template
- 3 Applying a Template to an Existing Course
- 4 Sharing a Course as a Template
- 5 Pushing a Template to Other Courses
- 6 What Gets Copied
- 7 Optional Settings When Applying Templates
- 8 Library Integration
- 9 Differences When Using a Template From Another Site
- 10 Troubleshooting
1 Overview
Course templates allow you to create new courses based on existing course structures and content. This saves time and ensures consistency across courses, subjects, and school years.
With course templates, you can create a new course pre-populated with plans, topics, folder structure, learning objectives, and resources from the template. You can also apply a template to an existing course, or push your course as a template to other courses.
Note: The availability of template features depends on the permissions configured by your administrator. If you do not see the options described in this guide, contact your administrator.
1.1 Types of Course Templates
When browsing templates, you may see up to four tabs depending on your permissions and country.
| Tab | Description |
|---|---|
| Your courses | Courses where you are a teacher. You can use a previous course as a basis for a new one, for example to reuse last year's course structure. |
| Course templates | Courses explicitly shared as templates by someone in your organisation. |
| From publishers | Templates provided by learning materials publishers. This tab is only available in countries with publisher integrations, and if the relevant licences have been imported. |
| Other sites | Course templates shared by users from other itslearning sites in your country. The availability of this tab is controlled by your system administrator. |
Prerequisite: If you do not see the "Other sites" tab when browsing templates, your system administrator has not enabled cross-site templates for your site. Contact your administrator for more information.
Important: Sites using the beta shareable planner feature will no longer see planner content listed on the "Other sites" tab. If you want to continue sharing courses that contain planner content across sites, the course must be shared as a cross-site template.
Using a template from another site follows the same workflow as using any other template. However, some content may not be included or may behave differently due to differences in site configuration and available modules. These differences are described in section 9.
2 Creating a Course Based on a Template
Prerequisite: You need the user right "Create courses based on a template or apply template to existing courses".
To create a course based on a template:
- Start creating a new course.
- In the Template section, click "Browse templates".

- Browse the available tabs (Your courses, Course templates, From publishers, Other sites) to find the template you want to use.

- Click "View course" on the template you want to review.

- Review the content of the template, and decide about optional settings that may appear (see section 7).
- Click "Use as template".
- When returned to the "Create course" page, make the rest of your changes and click "Create course".
- The new course will automatically open.
The structure and content of the template will be copied to the new course. A yellow banner will appear at the top of the page indicating that the course is being set up.

You will receive an email notification when the course creation process is complete, if you have selected this option.
Note: If you select a template from the "Other sites" tab, some content may not be included or may behave differently. See section 9 for details.
3 Applying a Template to an Existing Course
Prerequisite: You need the user right "Create courses based on a template or apply template to existing courses".
Applying a template to an existing course is useful when, for example, courses are created by a SIS integration and need to be populated with content.
To apply a template to an existing course:
- Go to the course you want to apply a template to.
- Select Settings > Course properties and features.

- Click the … button.
- Select "Apply template".

- Click "Browse templates" and select the template you want to use.

- Click "View course" on the template you want to review.

- Review the content and click "Use as template".

- Review optional settings that appear (see section 7).

- Click "Next step".
- Review the summary of what will be copied.
- Optionally, select "Send me a message when copying is complete".
- Click "Apply template".
The content from the template is copied to the course. The target course name remains unchanged.

Note: If you apply a template from the "Other sites" tab, some content may not be included or may behave differently. See section 9 for details.
4 Sharing a Course as a Template
Prerequisite: You need the user right "Allowed to share a course as a template".
To share a course as a template:
- Go to the course you want to share.
- Select Settings.
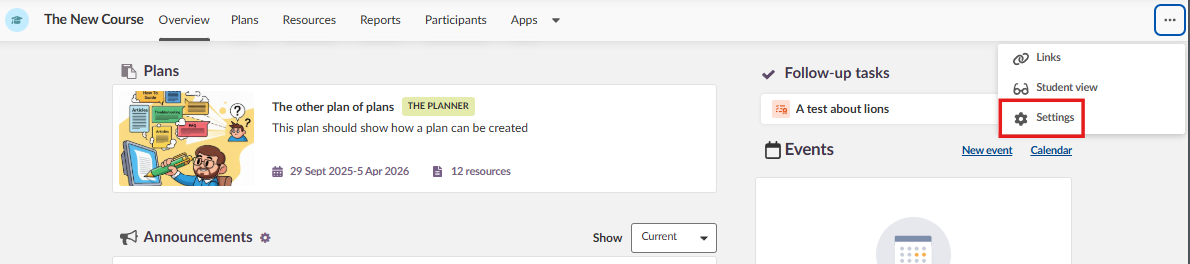
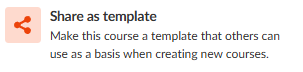
- Click "Share as template".
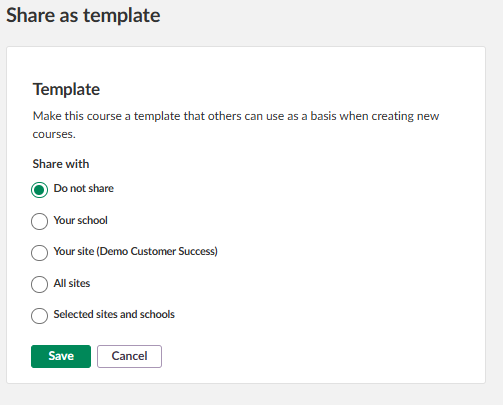
- Under "Share with", select the audience for the template.
- Optionally, enable Library integration options (see section 8).
- Click "Save".
4.1 Sharing Options
The sharing options available to you depend on the scope set in your user right. The following options may be available.
| Option | Available when |
|---|---|
| Do not share | Always available. Stops sharing the course as a template. |
| Your school | Always available when you have permission to share a course as a template. |
| Your site | When the user right is set to "Site" or "All sites". |
| Your state | When the user right is set to "All sites" and your site is connected to Germany. |
| All sites | When the user right is set to "All sites". This is limited to itslearning sites in the same country. |
| Selected sites or schools | When the user right is set to "All sites". You can only find sites from the same country. Schools must be set to be visible in the mobile search. |
5 Pushing a Template to Other Courses
Prerequisite: You need the user right "Allowed to apply a template to other courses".
Pushing a template allows you to apply the structure and content of one course to multiple other courses at once.
To push a template to other courses:
- Go to the course you want to use as a template.
- Select Settings > Course properties and features.
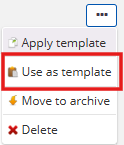
- Click the … button.
- Select "Use as template".
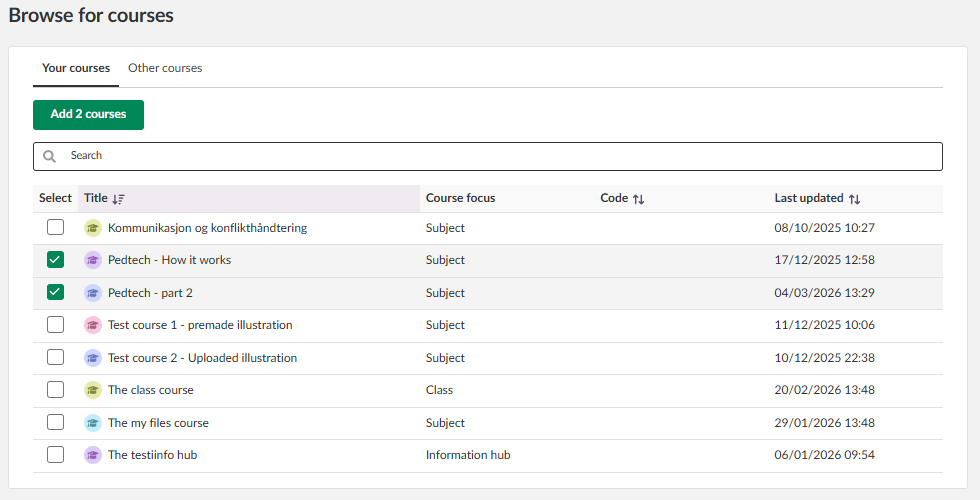
- Click "Add courses" to browse and select courses. You can select your own courses, or courses in your organisation where you are a teacher or administrator.
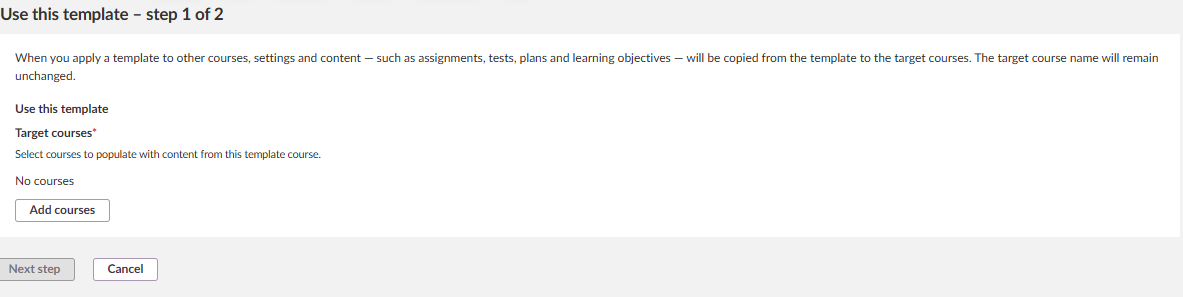
- Select the target courses. If the template has been pushed to other courses before, those courses are selected by default. Click "Add X Courses".
- Review the settings of the import (see section 7) and click "Next step".
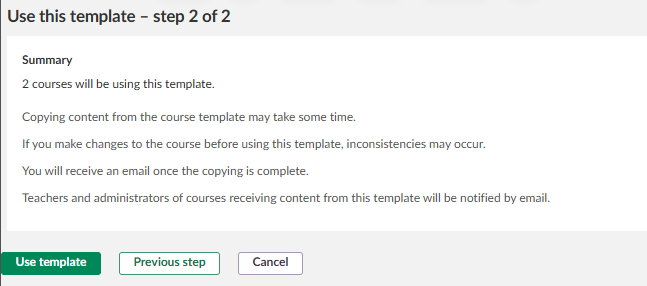
- Review the summary.
- Click "Use template" to start pushing the template to the selected courses.
- You will be returned to the Course properties and features. where you started the process. You do not need to "save" for the template push to take effect.
- You will receive an email when the copying is complete. Teachers and administrators of the target courses will also be notified by email.
Note: You cannot push a template to a course that itself is a template. Making changes to the template course before the push completes may cause inconsistencies.
6 What Gets Copied
When you create a course from a template, apply a template, or push a template, the following content is copied from the template to the target course: settings and content such as assignments, tests, plans, and learning objectives. The target course name remains unchanged.
Student-specific data such as results, submissions, or attendance is not copied.
7 Optional Settings When Applying Templates
Depending on the selected template and site configuration, optional settings may appear at different points in the template workflow.
7.1 Applying to an Existing Course
When applying a template to an existing course (see section 3), the following optional settings may appear.
| Section | Setting | Description |
|---|---|---|
| Term | Change term | Appears if the template uses terms. By default, the same terms as the template are used, but you can change them to current terms. |
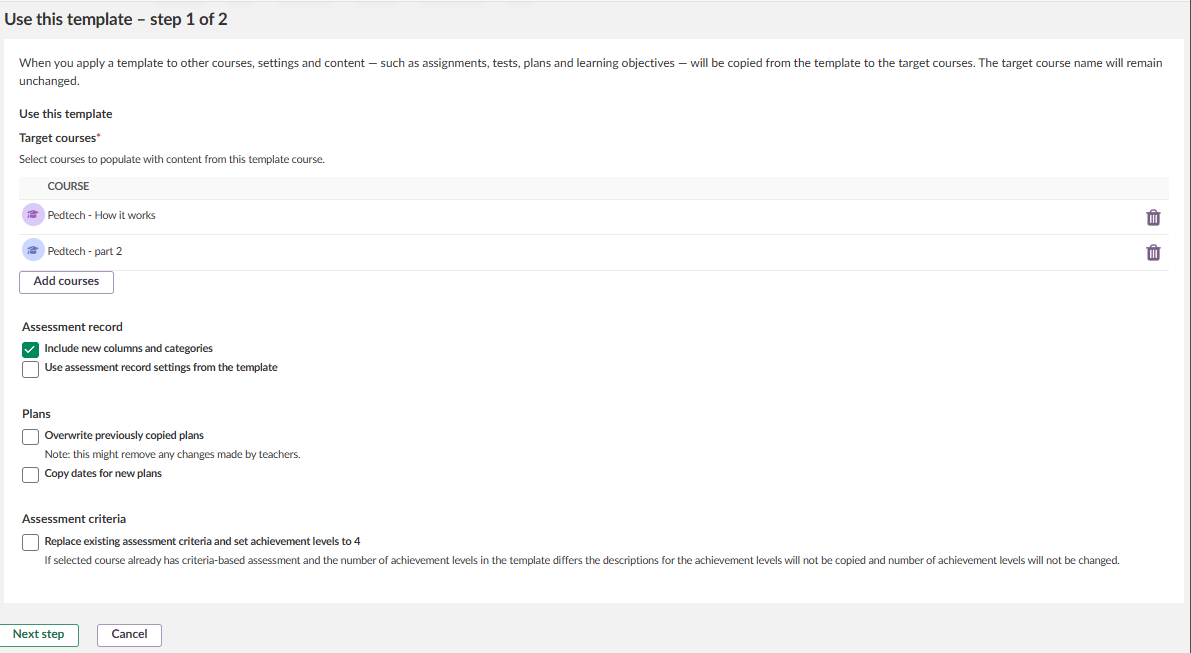
| Assessment record | Include new columns and categories | If unchecked, manual assessment record columns from the template are not added to the course. Categories from the template are only copied if this setting is checked. |
| Assessment record | Use assessment record settings from the template | If checked, the assessment record settings of the course will be overwritten with those from the template. |
| Plans | Overwrite previously copied plans | Only appears when the administrator has disabled the setting "Prevent topics and plans from being copied again". If checked, previously copied topics and plans are overwritten with the template version. Any changes made by the teacher in the course will be lost. |
| Plans | Copy dates for new plans | When checked, new plans (not previously copied) receive the same dates as in the template. |
| Assessment criteria | Use descriptions from template for identical assessment criteria | If checked, assessment criteria for a learning objective with the same name in the course and the template will receive the descriptions for achievement levels from the template. Only appears when there are assessment criteria in the course. |
7.2 Creating a New Course From a Template
When creating a new course from a template (see section 2), the following optional settings may appear.
| Setting | Description |
|---|---|
| Terms | If the template has terms connected, you can change them before the course is created. |
| Plan dates | If the template has dates added to plans, you can choose to include those dates in the new course. |
| Message when course is created | You can choose to receive an email notification on your itslearning account email when the course creation process is complete. |
7.3 Pushing a Template to Other Courses
When pushing a template to other courses (see section 5), the following additional settings may appear.
| Setting | Description |
|---|---|
| Apply to previously templated or selected courses | You can choose to apply the template to courses that have already had this template applied (updating them with new content without duplicating previously added content), or to manually selected courses. |
| Keep or replace dashboards | You can choose whether to keep the existing dashboards in the target courses or replace them with the dashboard from the template. |
| Terms | You can select what to do with terms in the target courses. |
| Change course to regular | If the target courses use an early-learner type, you can change them to regular courses. |
| Assessment record | You can choose whether to append new assessments and categories to the selected courses or apply the template's assessment record settings. |
| Clear dates in plans | You can choose to clear the dates in plans when pushing the template. |
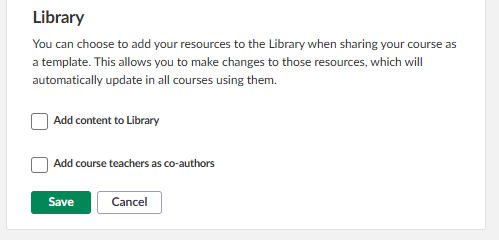
8 Library Integration
When sharing a course as a template, you can choose to add resources to the Library. This makes it possible to update content centrally and have changes reflected in all courses using it.
8.1 Library Options When Sharing
Add content to Library: When enabled, resources from the template course are added to the Library. Any changes made to these Library resources will automatically update in all courses that use them.
Add course teachers as co-authors: When enabled, existing course teachers are added as co-authors on the Library resources. Without this setting, only the teacher who shares the course as a template can make changes to the Library resources.
Note: The content types Discussion and Learning path cannot be added to the Library when sharing a course as a template.
9 Differences When Using a Template From Another Site
Compared to a template from the same site, the following exceptions apply when a user creates or applies a course template from another itslearning site.
9.1 Planner
Some itslearning sites may have the possibility to add a rubric to a topic in the planner. Since this is disabled for most sites, this topic rubric will not be included in the template.
9.2 Resources
Only content is included in the course template. Any tool-specific settings are excluded. This means, for example, that a group assignment will be added as a regular assignment.
The following resource limitations apply to cross-site templates:
| Resource Type | Behaviour |
|---|---|
| File attachments to a Task resource | Excluded. Note: Task is being merged into the Assignment tool. For assignments, file attachments are supported. |
| SCORM content | Excluded, as SCORM is an additional paid module. |
| Legacy tool content (e.g. Test 2.0) | Excluded. |
| LTI 1.3 content | Added, but the LTI tool may not be configured on the receiving site. The content can either be removed, or the LTI tool needs to be set up by the administrator. |
| Library resources (when Library is disabled for the user) | Copies are made of each resource that was in the Library. If the author of the resource has indicated that it should not be copied, it will not be added to the course. |
| Permissions on resources (including folders) | Ignored. |
9.3 Learning Objectives
If the template course has learning objectives added from the repository of the school or site, these are added as a copy to the course (as if they were created in the course). Learning objectives that were created in the template course itself are also added as a copy.
Only assessment criteria (used in rubrics) that have been added to the national or state repository are kept.
9.4 Settings
Assessment scales created within the site of the template are ignored.
10 Troubleshooting
Browse Templates Button Not Visible
Symptoms: The option to select a template does not appear when creating a course.
Cause: You do not have the required user right.
Solution:
- Contact your administrator to enable the user right "Create courses based on a template or apply template to existing courses" for your profile or policy.
Use as Template Not Visible
Symptoms: The "Use as template" option does not appear under the … button on the Course properties and features page.
Cause: You do not have the user right "Allowed to apply a template to other courses".
Solution:
- Contact your administrator to enable this user right for your profile or policy.
Duplicate Plans After Reapplying a Template
Symptoms: The course contains duplicate topics and plans after applying the same template more than once.
Cause: The system setting "Prevent topics and plans from being copied again" may not be enabled by your administrator.
Solution: Contact your administrator to review the plan duplication setting. You can manually remove duplicate content from the course.
Content Missing After Applying a Template
Symptoms: Some resources, SCORM content, or tool-specific settings are missing after applying a template.
Cause: Certain content types have limitations when templates are used across different sites, or when specific modules are not enabled on your site. For templates from the "Other sites" tab, see section 9 for a full list of differences.
Solution:
- If the template is from the "Other sites" tab, review section 9 to understand which content types are excluded for cross-site templates.
- For LTI 1.3 content that is not working, contact your administrator to set up the required LTI tool.
- For other missing content, add it manually to the course.
More Help Resources
Have more questions? Please start with asking your school administrator.
Product Release notes
Stay updated with the latest itslearning releases: https://itslearning.com/product-updates
Service Status
Check the current status of itslearning services: https://status.itslearning.com/
Ideas Portal
Share your ideas and help shape the future of itslearning: https://ideas.itslearning.com/
Roadmap
Check out our roadmap: https://itslearning.com/global/roadmap/
The cross template feature shown are part of the project within the framework of the German Development Project (GDP), a cooperation between four German states and itslearning with the aim of improving digital education in Germany through tailor-made product developments.
Learn more about the GDP roadmap and what other features you can expect.
For German readers: more information about the GDP project.