Collaboration Folder (Teacher)
TABLE OF CONTENTS
- 1 Overview and key concepts
- 2 Create a collaboration folder
- 3 Assign to participants
- 4 Set closing date for editing
- 5 Control folder visibility
- 6 Choose allowed elements
- 7 Manage existing collaboration folders
- 8 Troubleshooting
1 Overview and key concepts
Collaboration folders are special course folders that enable students to work together on shared content. Unlike regular resource folders, they support active group work: all assigned users can add, edit, and remove content until editing is closed.
Use collaboration folders when you want students to work together in the same place, while you stay in control of who participates, which tools are available, and when editing should stop. For example:
- Provide a shared workspace for student groups inside a course to support group projects.
- Build a shared resource bank created by students.
Key concepts
| Concept | Description |
|---|---|
| Participants | Assign collaboration folders to selected participants or course groups. Only those assigned can view and work within the folder. Teachers always see and manage the folder and its settings. |
| Closing date | Determines how long students can edit the folder. While open, participants can add, edit, and remove content. After the closing date, participants can only view the contents. |
| Visibility | Controls whether students can see the folder. Visibility settings function the same way as in all itslearning elements. |
| Allowed elements | The collaboration folder allows only specific elements, to focus on content creation and knowledge sharing. |
2 Create a collaboration folder
You can add a collaboration folder to your course from Resources or from a Plan.
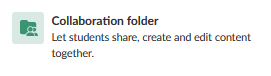
- In Resources, select Add → Collaboration folder.
In a Plan, select Add → Show all → Collaboration folder. - In the collaboration folder settings, fill in:
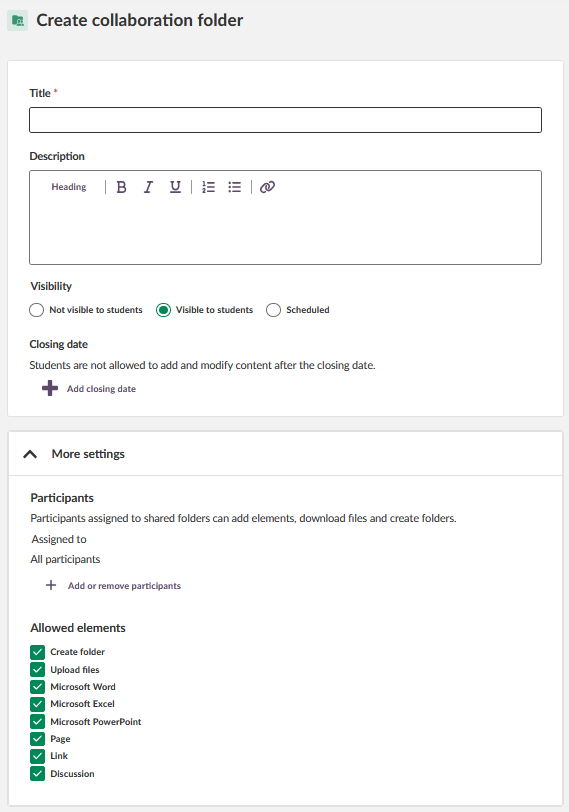
- Title – the name of the collaboration folder.
- Description – optional instructions or context.
- Review other settings and make adjustments as needed, then save to create the folder. For details, see sections 3–6.
Note: Collaboration folders can be created inside regular folders, but not inside other collaboration folders.
3 Assign to participants
All assigned participants can add, edit, and remove items within the collaboration folder, regardless of who created them.
- In the collaboration folder settings, go to the Participants section.
- By default, all students in the course are assigned.
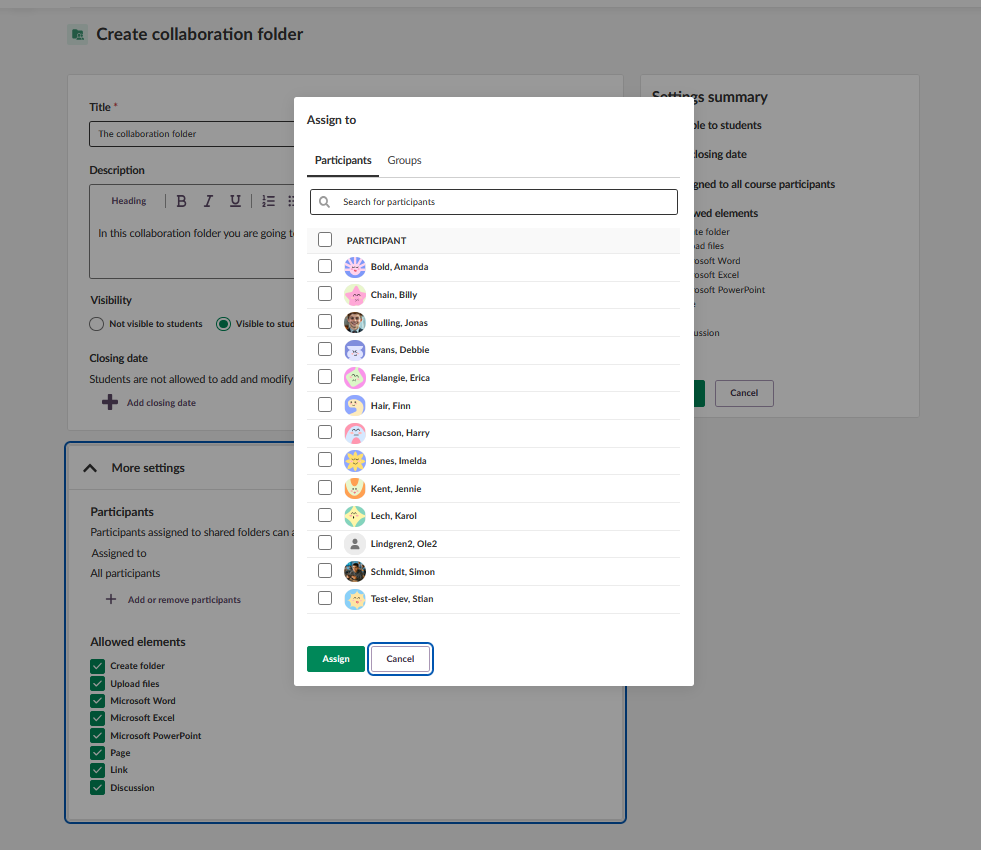
- You can assign the folder to:
- Selected users – choose one or more individual students.
- Groups – choose one or more course groups. Course groups can be created and modified on the Participants page.
- All participants in the course – this is the default. If you have already assigned the folder to specific students or groups and want to open it for all, unselect all participants or groups from the ‘Assign to’ dialogue. This is useful, for example, if a group of students has worked on a project and after the closing date you want to share the work with all participants.
Teachers in the course always see and can manage the folder and its contents.
Removing a group or individual from a collaboration folder or its assigned course group revokes their access to view or edit the content.
Note: If you want to share reference materials but do not want participants to edit or remove them, use a nested folder structure. First, create a regular folder and add the resource files. Then create collaboration folders inside the regular folder and assign them to participants.
4 Set closing date for editing

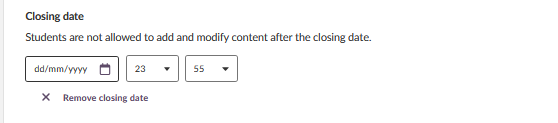
The closing date marks when students can no longer add, edit, or remove content in the folder. After this date, students can still open the folder to read files and pages, access links, and participate in discussions.
- In the collaboration folder settings, go to the Closing date section.
- Choose a date and time, or remove the date if you do not want the folder to close.
- Save your changes.
To close the folder immediately, set the closing date in the past. However, if a user has an element open for editing when you change the closing date, their changes will still be accepted.
Permissions before and after the closing date
| User type | Before closing date | After closing date |
|---|---|---|
| Teachers/Administrators | Full control | Full control |
| Assigned participants | Read, write, edit, participate | Read, participate |
| Non-assigned participants | No access | No access |
5 Control folder visibility

With the visibility settings, you can control when the folder is visible to students. The behaviour is the same as for any course element.
- In the collaboration folder settings, go to the Visibility section. By default, a new collaboration folder is visible to students.
- Choose one of the following options:
- Visible to students – students can see the folder.
- Not visible to students – students do not see the folder.
- Visible from date – the folder becomes visible automatically on the date and time you choose. A ‘Visible to’ date and time is optional.
Note: If you create a collaboration folder inside a regular folder that is not visible to students, the collaboration folder will not appear on the Resources page, even if its visibility is set to ‘visible’. In this case, adjust parent folder visibility, or add the collaboration folder to a Plan to share it with students. The collaboration folder is also searchable globally.
6 Choose allowed elements
You control which content types students can create inside the collaboration folder.
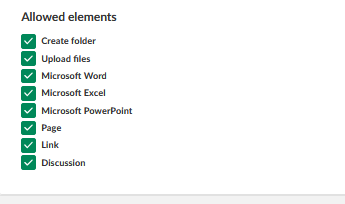
- In the collaboration folder settings, go to the Allowed elements section.
- Depending on your itslearning site configuration, the following tools can be allowed in a collaboration folder:
- Files and folders
- Microsoft Word, Excel, PowerPoint or Collabora Writer, Calc, Impress documents Add-on (if the Office/Collabora add-on is enabled on your site)
- Page
- Link
- Discussion
When you disable an element, new items of that type cannot be created inside the collaboration folder. However, any existing content of that type stays in the folder and remains viewable and editable until the closing date.
Co-editing: If Microsoft Office or Collabora Online tools are enabled on your itslearning site, students can co-edit documents created with Word, Excel, and PowerPoint (or Collabora Writer, Calc, and Impress) in the collaboration folder.
Note: The Page tool does not support co-editing.
7 Manage existing collaboration folders
7.1 Edit collaboration folder settings
- In Resources, locate the collaboration folder.
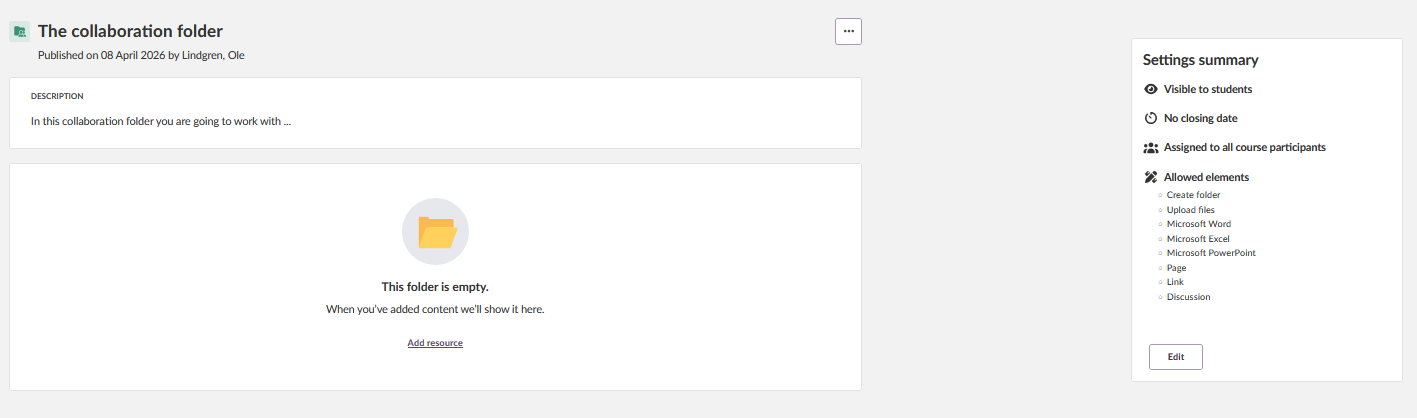
- Use the Editaction.

- Make the needed changes to the collaboration folder settings.
- Save changes.
7.2 Move a collaboration folder
- In Resources, locate the collaboration folder.
- Use the Move to action.
- Select the new location within the course’s resource structure.
- Confirm the move.
Note: You cannot move a collaboration folder inside another collaboration folder.
7.3 Copy a collaboration folder
Copying uses the regular workflow for copying resource folders in itslearning. Folder contents are always copied with the folder. Discussions are copied as new discussions.
- In Resources, locate the collaboration folder.
- Use the Copy to action.
- Choose where to place the copy.
- Once done, check the Assign to settings and adjust participants if needed.
Note: You cannot copy a collaboration folder inside another collaboration folder.

8 Troubleshooting
A student deleted content from the collaboration folder
Symptoms: Content is missing from the collaboration folder.
Cause: While the folder is open (before the closing date), participants who have edit rights can also delete content in the folder, including items created by other students.
Solution:
- If an entire element was deleted, restore it from the course trash can.
- If a student deleted content from within a document or Page (but not the element itself), the changes are irreversible. itslearning does not feature version control of elements.
Prevention: Remind students of collaboration rules. If deletions become frequent, consider using a regular folder and managing access rights with the permission system.
Students cannot add or edit anything in the collaboration folder
Symptoms: Students report they cannot add, edit, or create content.
Possible causes:
- The closing date has passed.
- All allowed elements are disabled.
Solution:
- Open the collaboration folder and select Edit.
- Check the closing date and allowed elements, and adjust as needed.
- Ask a student to refresh the course page and check again.
Students cannot see the collaboration folder in the course
Symptoms: Students report the folder is not visible in Resources.
Possible causes:
- The folder is set to not visible.
- The students are not assigned as participants to the folder.
Solution:
- Open the collaboration folder and select Edit.
- Check visibility and participants, and adjust as needed.
- Ask a student to refresh the course page and check again.
The list of allowed elements does not show all options
Symptoms: Some element types are missing from the allowed elements list.
Possible causes:
- The collaboration folder is placed inside a regular folder where elements are disabled in the parent folder.
- Microsoft Office (or Collabora Online) tools are an add-on and only available if your institution has purchased the add-on.
Solution:
- Check allowed elements in the parent folder (Edit > Select elements to allow).
More Help Resources
Have more questions? Please start with asking your school administrator.
Product Release notes
Stay updated with itslearning latest releases: https://itslearning.com/product-updates
Service Status
Check the current status of itslearning services: https://status.itslearning.com/
Ideas Portal
Share your ideas and help shape the future of itslearning: https://ideas.itslearning.com/
Roadmap
Check out our roadmap: https://itslearning.com/global/roadmap/
The features shown are part of the project within the framework of the German Development Project (GDP), a cooperation between four German states and itslearning with the aim of improving digital education in Germany through tailor-made product developments.
Click here to learn more about the GDP roadmap and what other features you can expect.
For German readers: Click here for more information about the project within the framework of the German Development Project.