Plans - Getting started (Teacher)
TABLE OF CONTENTS
Introduction
This article shows teachers how to create a plan in an itslearning course. A plan can hold a description, learning objectives, resources and activities.
1 Overview
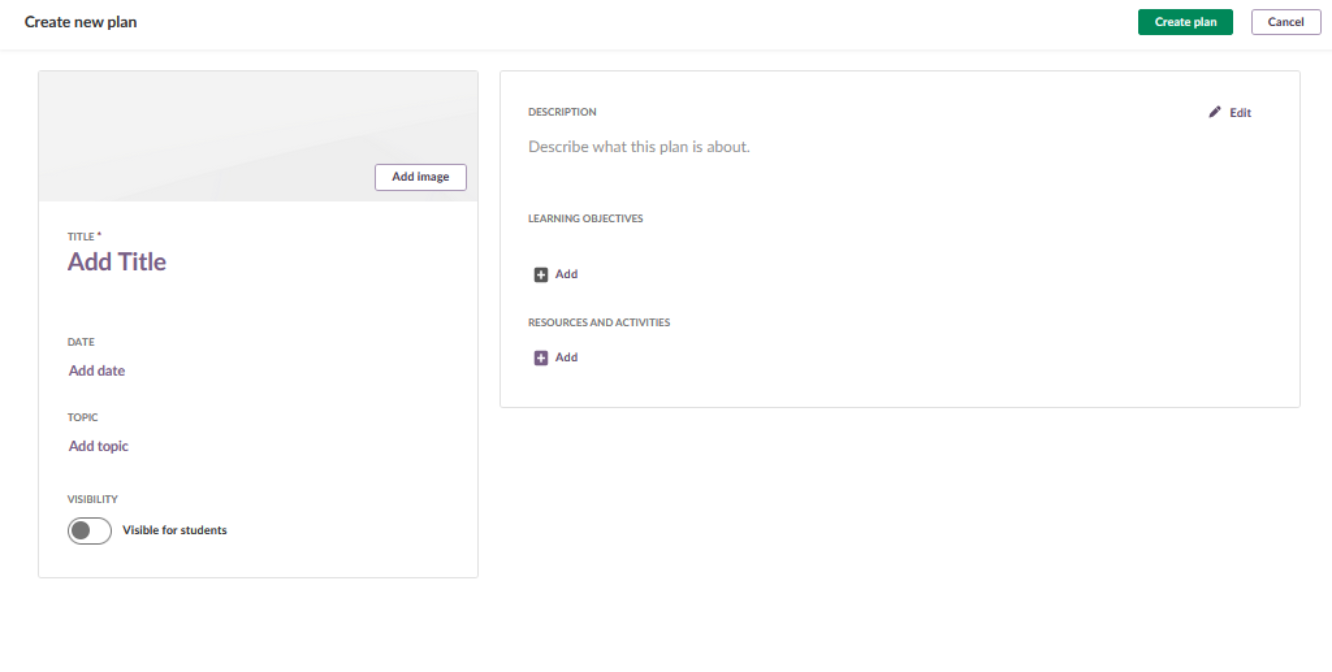
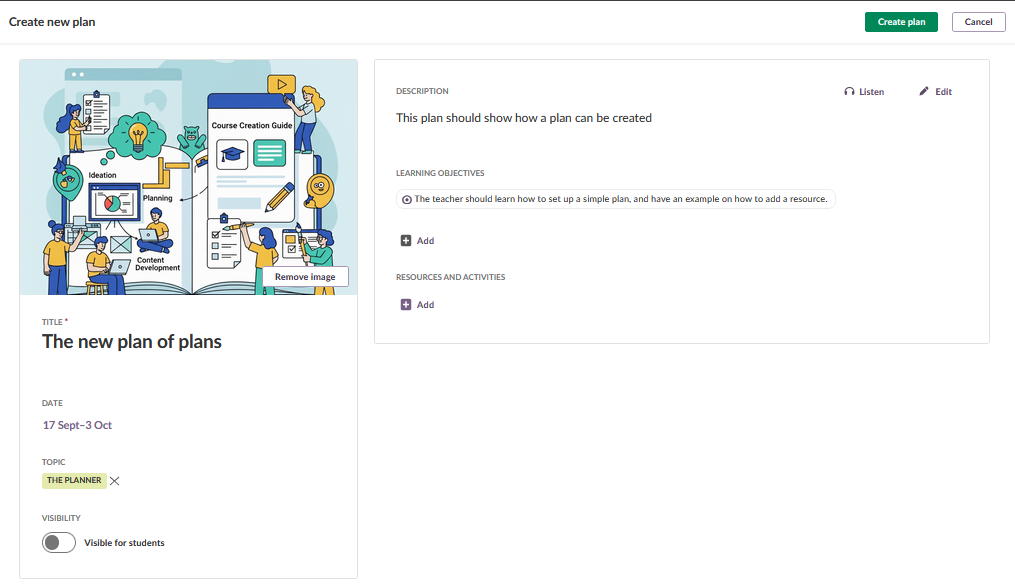
You create a plan from the Plans tab of your course. In the Create new plan window, you add a title, description and date, and set the topic, visibility and image. You can also add learning objectives, resources and activities.
The description tells your students what to expect from the plan. A plan can be a whole subject, an assignment or a simple learning path.
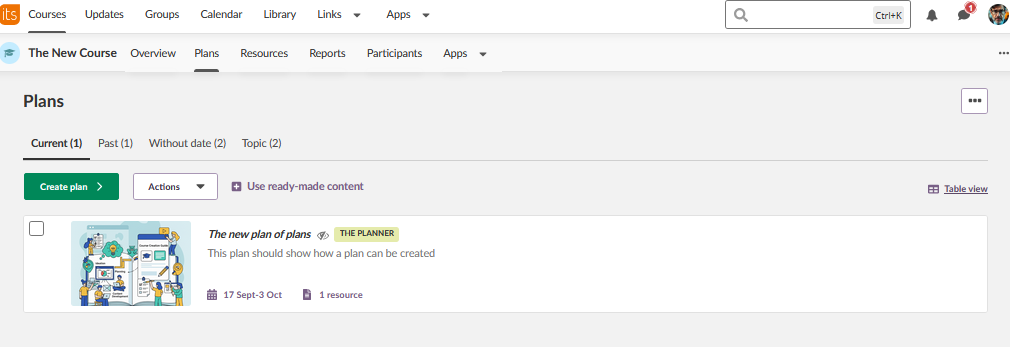
After you create the plan, it is listed on the Plans page and on the course overview page.
2 Prerequisites
- Teacher access to your course.
- A title for your plan, for example "Week 1: Introduction" or "Module A".
- Images to upload (optional).
- A list of the resources or activities you want to include.
3 Step-by-step instructions
3.1 Opening the Plans page
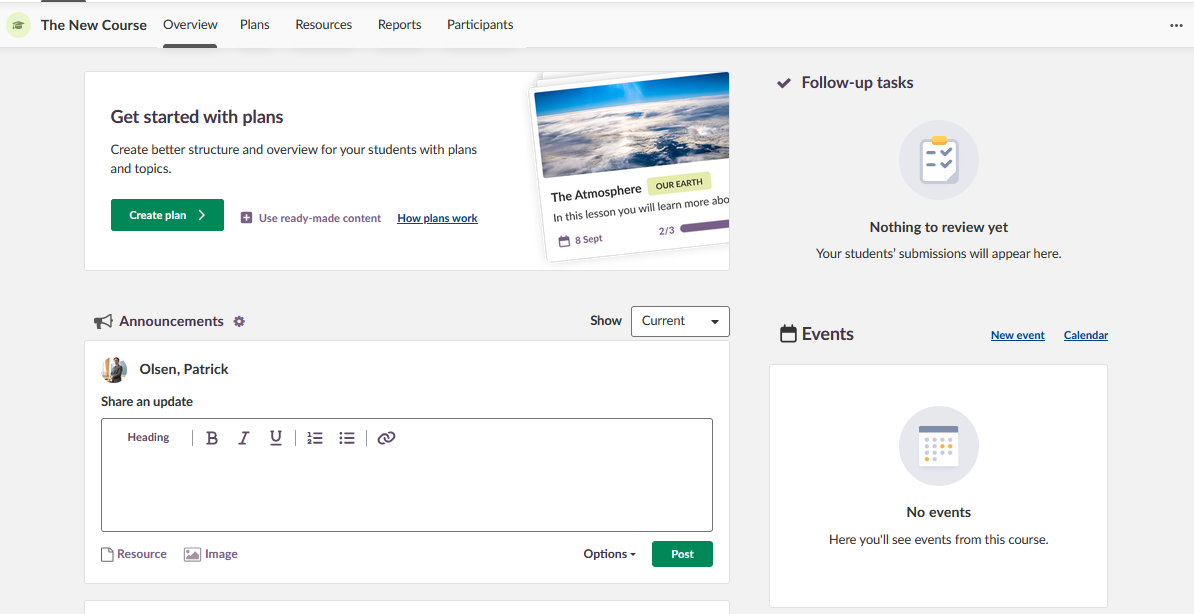
- On your course overview page, select the Plans tab in the main navigation menu, or follow the Get started with plans link.
3.2 Opening the Create new plan window
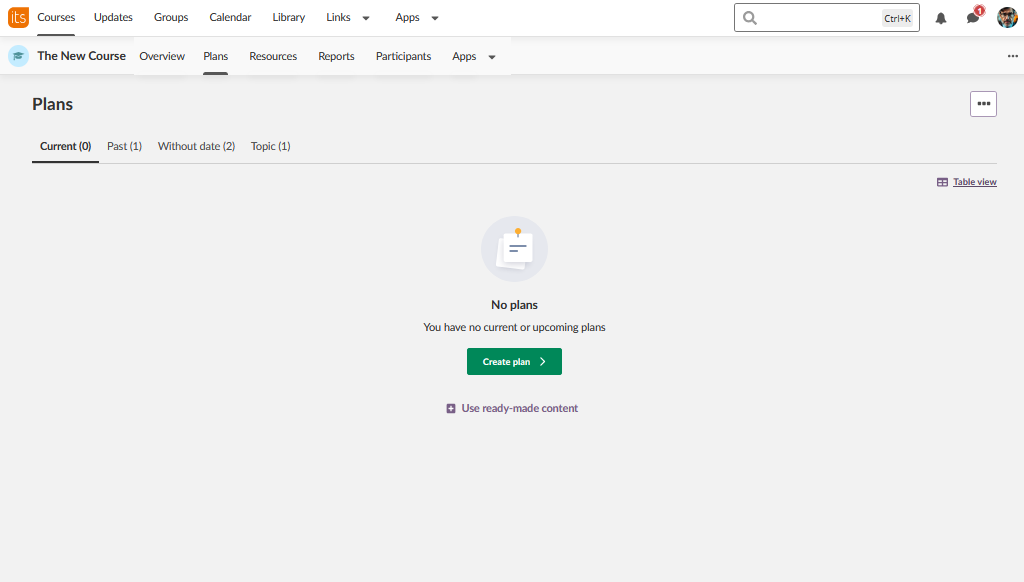
- Select the green Create plan button.
- The Create new plan window opens, with fields for title, date, topic and description.
3.3 Adding essential information
- Title: Enter a clear name for your plan.
- Description: Add a brief explanation of what the plan covers.
- Date: Select Add date to set when the plan becomes active (optional).
3.4 Configuring plan settings
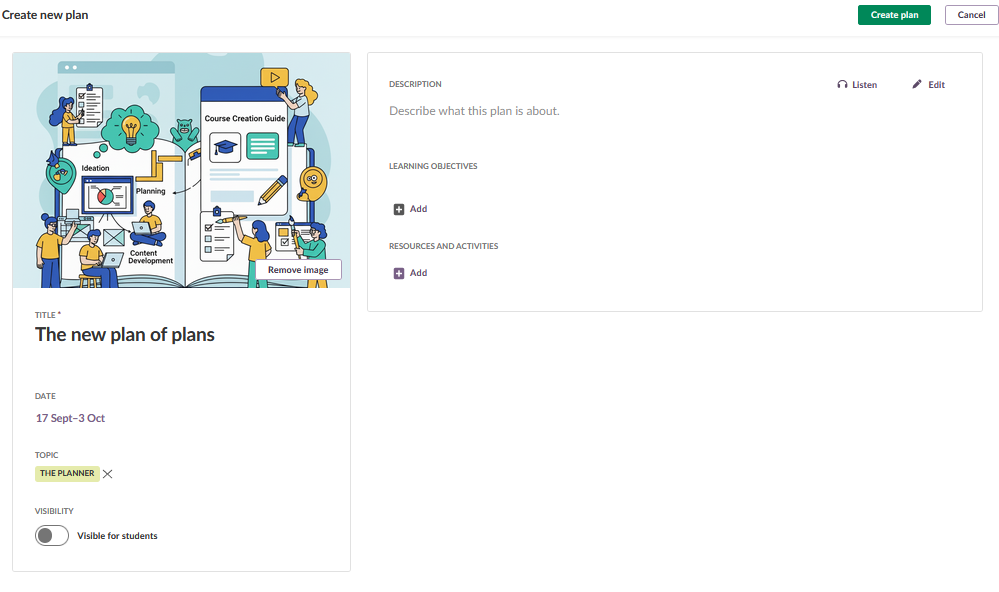
- Topic: Select Add topic to create or select a topic for organisation.
- Visibility: Turn on Visible for students when you are ready to publish.
- Add image: Select Add image to upload a visual for your plan (optional).
- The plan now has a title, description and visibility settings.
3.5 Adding learning objectives (optional)
- In the Learning objectives section, select Add.
- Add the curriculum objectives that are relevant to your plan.
Note: In some areas, learning objectives are imported automatically. In other areas, you must add them to the course manually.
3.6 Adding resources and activities
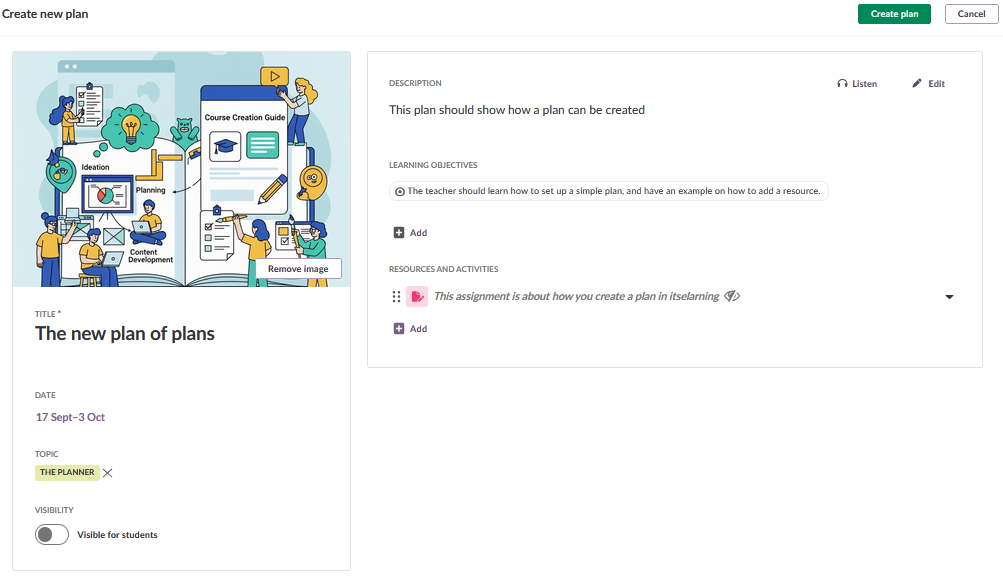
- In the Resources and activities section, select Add to open the resource menu.
- Select a common option, for example Assignment, Page or File.
- Configure the resource.
- At least one resource or activity now appears in your plan.
For more detail, see Resources and activities - Getting started (Teacher).
3.7 Reviewing and creating the plan
- Check that all information is correct.
- Check that the visibility is set as you want.
- Select the green Create plan button in the upper-right corner to save the plan.

3.8 Confirming that the plan is created
You return to the Plans page, where your new plan is listed. The plan also appears on the course overview page. Check that the plan shows the correct title, date and resource count.
More Help Resources
Have more questions? Please start with asking your school administrator.
Product Release notes
Stay updated with itslearning latest releases: https://itslearning.com/product-updates
Service Status
Check the current status of itslearning services: https://status.itslearning.com/
Ideas Portal
Share your ideas and help shape the future of itslearning: https://ideas.itslearning.com/
Roadmap
Check out our roadmap: https://itslearning.com/global/roadmap/