Individual Learning Plans – Template Configuration (Sysadmin)
Individual Learning Plans – Template Configuration (Sysadmin)
In this article
1 Overview
2 Prerequisites
3 Planning Considerations
4 Accessing the Template Overview
5 Creating a Template
5.1 Naming the template and setting scope
5.2 Adding fields
5.3 Configuring field permissions
6 Creating an Assessment Scale for Midterm Reviews
7 Managing Templates
Individual Learning Plans (ILPs) in itslearning consist of two components: Plans and Midterm Reviews. Before either can be used, a system administrator must configure templates and, if Midterm Reviews are used, an assessment scale. It is possible to use only Plans, only Midterm Reviews, or both.
Note: Administrators create templates. Mentors use those templates to create Plans for their assigned learners. Administrators do not create Plans in the template area.
1 Overview
| Component | Created by | Purpose |
|---|---|---|
| Plan | Mentor (using a sysadmin template) | Individual document created per learner, containing structured fields for goals, actions, and notes. |
| Midterm Review | Subject teacher (within a course) | Assessment of a learner's performance in a subject, optionally including student self-review. Visible within the learner's Plan. |
Templates are scoped to either the entire site or to a specific school or organisation within the hierarchy. Multiple templates can exist at the same time. Each template can be made visible or hidden independently.
2 Prerequisites
Prerequisite: An Administration profile with Supervisor access is required to create and edit ILP templates. The Mentor and Headteacher roles must be configured before templates are used in practice. See Mentor and Headteacher Roles – Configuration (Sysadmin).
3 Planning Considerations
Before configuring ILP templates for your organisation, consider the following questions. Decisions made here affect how templates are structured and how mentors and teachers use them.
▶ Template structure and ownership
- Should a site-level administrator create one template for all schools, or should local administrators create templates per school? A shared template ensures consistency if learners move between schools within the same site.
- What fields should the template contain, and who should be able to view and edit each field?
- Should an administrator create Plans for all learners in advance by temporarily assigning themselves as a mentor? This allows mentors to begin filling in Plans immediately rather than creating them individually.
▶ Timing and workflow
- Plans should be created at the start of each term so that the Plan's date range includes the period when Midterm Reviews are written.
- If Midterm Reviews are used, consider whether teachers write reviews first and students self-assess afterwards, or in reverse order.
- Should Midterm Reviews be created from a template course to ensure consistent naming? The term or period should be included in the review title.
- Plans created for multiple students at once cannot be edited in bulk afterwards. Verify the title and dates are correct before creating Plans for a large group.
4 Accessing the Template Overview
- Log in with an Administration profile.
- Go to Administration > Individual learning plans.
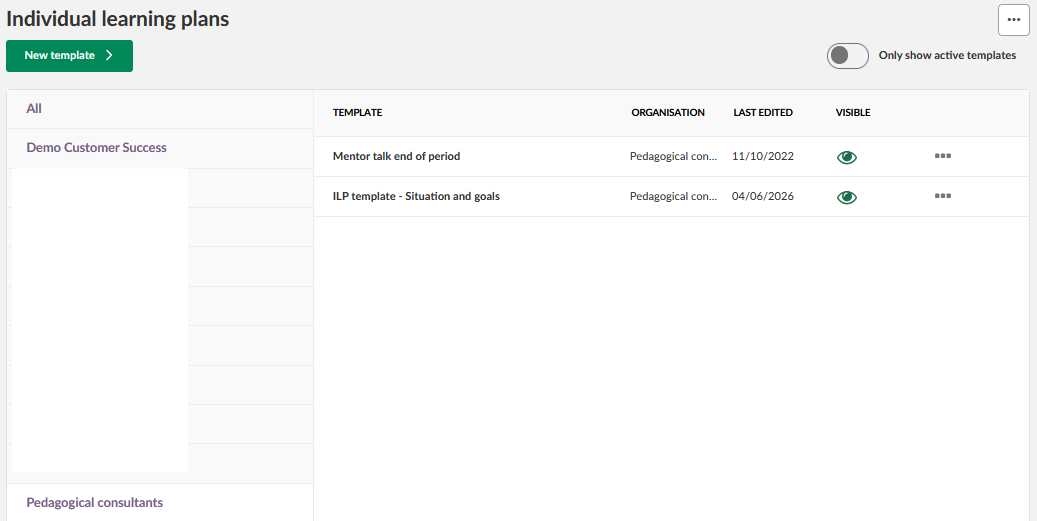
The template overview lists all existing templates. Use the left sidebar to filter by organisation, or select All to view templates across all organisations. The list shows the template name, organisation scope, last edited date, and current visibility status.
Use the Only show active templates toggle to filter out hidden templates.
5 Creating a Template
5.1 Naming the template and setting scope
- In the left sidebar, select the organisation you want to create the template for.
- Click New template.
- Click Change title to enter a name for the template.
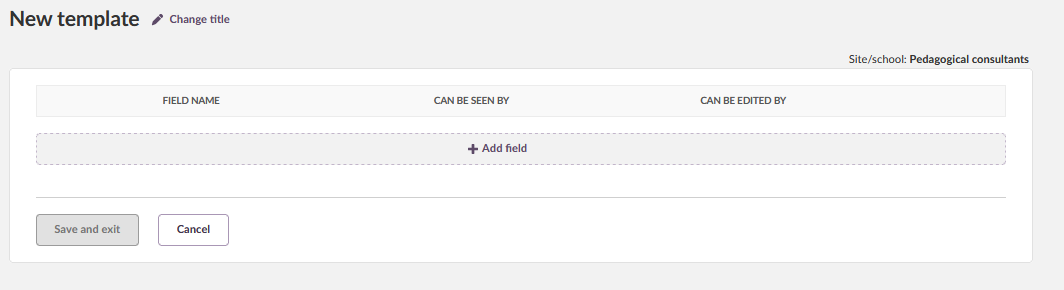
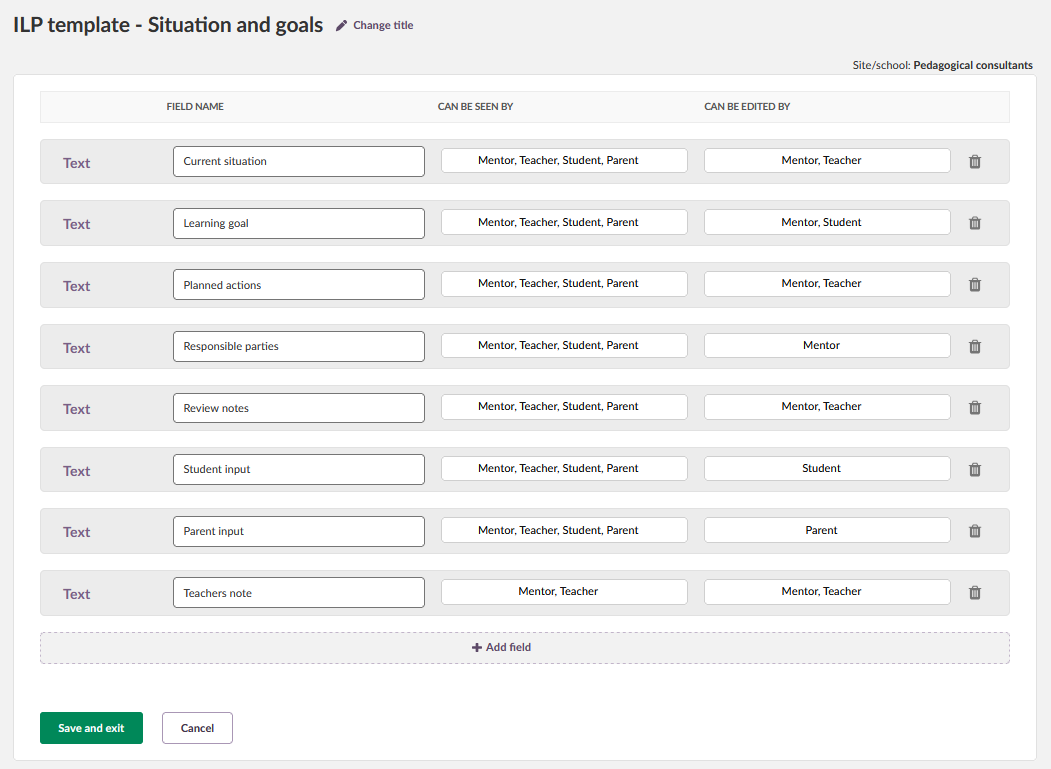
The scope is confirmed by the organisation name shown in the upper right corner of the template editor.
5.2 Adding fields
- Click + Add field to insert a new field.
- Enter a name in the Field name column.
- Repeat for each field required.
Note: All fields are of type Text. Fields can be removed using the delete icon on the right side of each row.
5.3 Configuring field permissions
For each field, configure two permission settings:
| Setting | Description |
|---|---|
| Can be seen by | Which roles can view the field and its contents. |
| Can be edited by | Which roles can write to the field. |
The available roles are: Mentor, Teacher, Student, and Parent.
Note: A field restricted to specific roles in Can be seen by will not be visible to other roles, regardless of the edit setting. For example, a field with Can be seen by: Mentor, Teacher will not appear for students or parents.
When all fields are configured, click Save and exit.
6 Creating an Assessment Scale for Midterm Reviews
If your organisation uses Midterm Reviews with a structured assessment scale, the administrator must create a dedicated scale for this purpose. This scale is separate from any scales used for regular course assessments.
Admin setting: Administration > Edit Global Settings > assessment scales
Important: The assessment scale used for Midterm Reviews must have 2, 3, or 6 levels. If a scale with a different number of levels is used, the mentor's overview of all students' reviews across courses will be empty. It is possible to select No assessment, in which case reviews can only be written as free text.
The mentor overview displays assessments edited within the last 4 months by default. If no Plan or date range is selected, this is the default time window.
Note: Midterm Reviews are displayed in a Plan based on their last edit date, not their creation date. A review created in autumn but edited in spring will appear in the spring Plan, not the autumn Plan. Including the term or period in the review title helps identify any errors. This should be communicated to subject teachers when setting up the workflow.
7 Managing Templates
Existing templates are listed in the template overview. Each row includes:
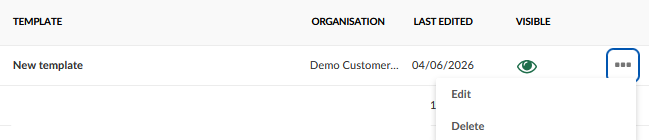
- A three-dots menu with options to edit or delete the template.
- An eye icon indicating current visibility. Toggle this to control whether the template is available to mentors when creating Plans.