A day in the life of a Class course teacher
itslearning for primary education
A day in the life of a Class course teacher
Follow Ms Andersen as she uses itslearning to guide her Year 3 class through a full school day — from morning social studies to afternoon art.
★
One course, all subjects
Maths, reading, art — everything in one place. No course switching.
▣
Visual navigation
Colourful images help young students find their subject — no reading needed.
▲
Grows with the class
Start simple for Year 1. Add features as students develop.
Ms Andersen's day at a glance
Before school
Set up the Class course with colourful topics for each subject.
08:15
Make a social studies resource visible to students and reorder it to the top.
08:30
Students tap a picture, find their work, and start immediately.
09:45
Hide unfinished topics and preview the student experience.
10:30
Use plans for structured lessons in maths.
11:45
Simplify the interface by hiding the course menu for younger students.
13:00
Drag topics to reorder the afternoon schedule.
14:30
Finish the Natural Science topic and move it to the top — ready for tomorrow.
● Before the school day
1 One course for everything
Ms Andersen teaches Year 3 at a primary school. Her students are 8–9 years old and need a simple, visual way to find their schoolwork. Instead of creating separate courses for every subject, she has one Class course that brings maths, reading, social studies, and art together in a single place.
Each subject is a topic with its own colour and image. Her students tap the picture they recognise — no reading required to find the right subject.
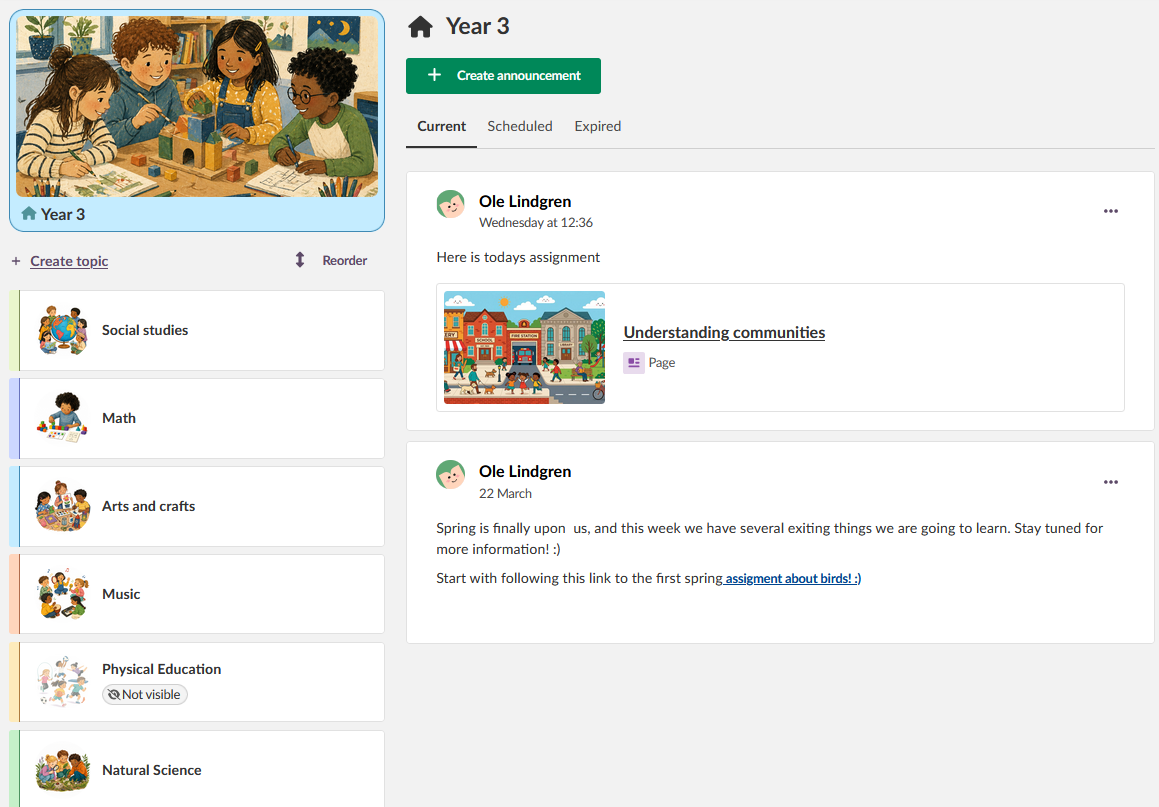
Why this matters: Younger students navigate visually. A single course with picture-based topics removes the complexity of switching between separate courses. Students who cannot yet read fluently can still find their subject independently.
● 08:15 — Morning preparation
2 Making a social studies resource visible
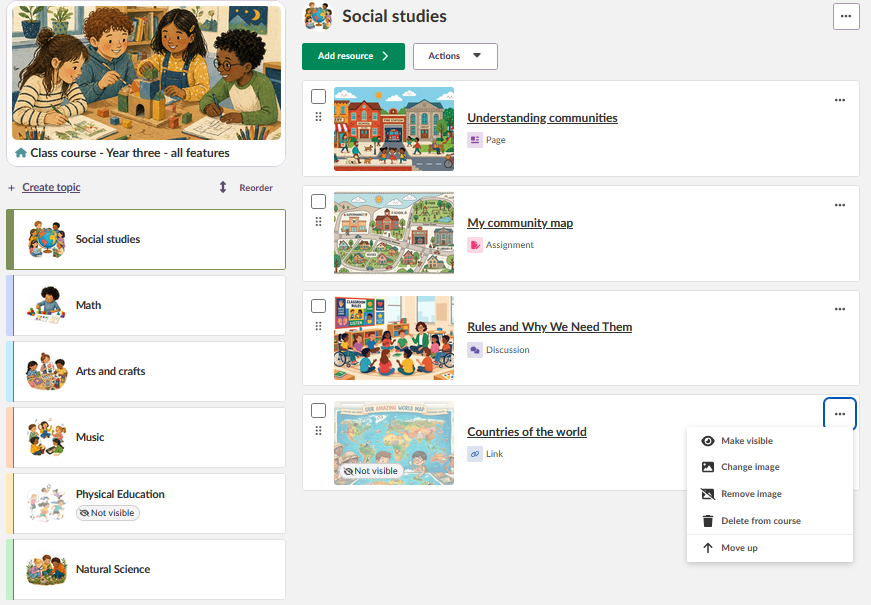
School starts in 15 minutes. Ms Andersen prepared a link resource called Countries of the world earlier in the week and kept it invisible until today. She navigates to the Resources section, opens the Social studies topic folder, and selects Make visible from the resource's three-dot menu. The resource is now visible to students immediately.
She wants Countries of the world to appear at the top of the list so students see it first. A quick drag of the handle moves it into place. Done — the students will see it first when they open the Social studies topic.
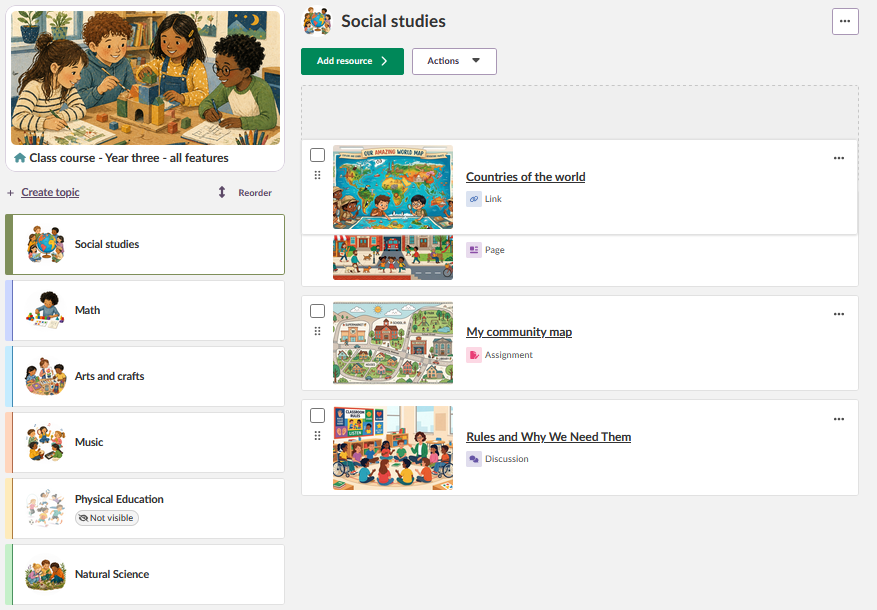
Did you know? You can also reorder resources using Move up and Move down in the three-dot menu — useful on tablets and touch screens.
● 08:30 — First lesson: Social studies
3 Students find their work
The students log in and see Ms Andersen's Class course on their dashboard. They tap the Social studies image in the topic panel and find Countries of the world waiting at the top of the list. No menus to navigate, no course switching — just tap and start.
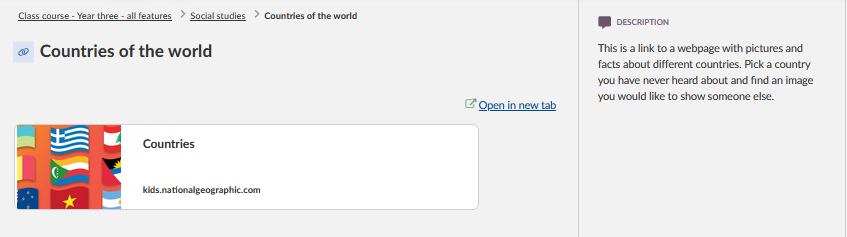
When a student finishes and wants to go back, the breadcrumb trail takes them straight back to the topic — not to a confusing Resources page.
What happens when you follow a breadcrumb?
Teacher
Breadcrumbs lead to the Resources section. To return to the topic view, select Overview in the course navigation bar.
Student
Breadcrumbs lead back to the topic they were working in. The experience stays simple and familiar.

● 09:45 — Planning ahead
4 Hiding what's not ready yet
Ms Andersen has started preparing next week's materials, but they are not finished. She opens the three-dot menu on the Natural Science topic and selects Make invisible. The topic stays visible to her but disappears from the student view entirely.
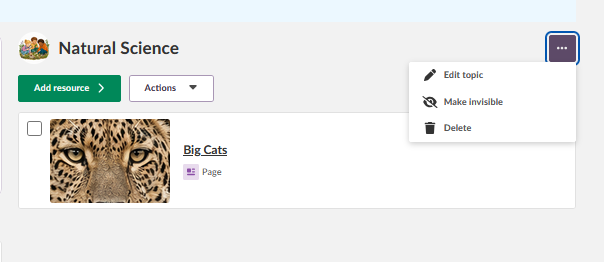
She can check this at any time using Student view to see exactly what her class sees. A yellow banner reminds her she is previewing, and one tap exits back to the teacher view.
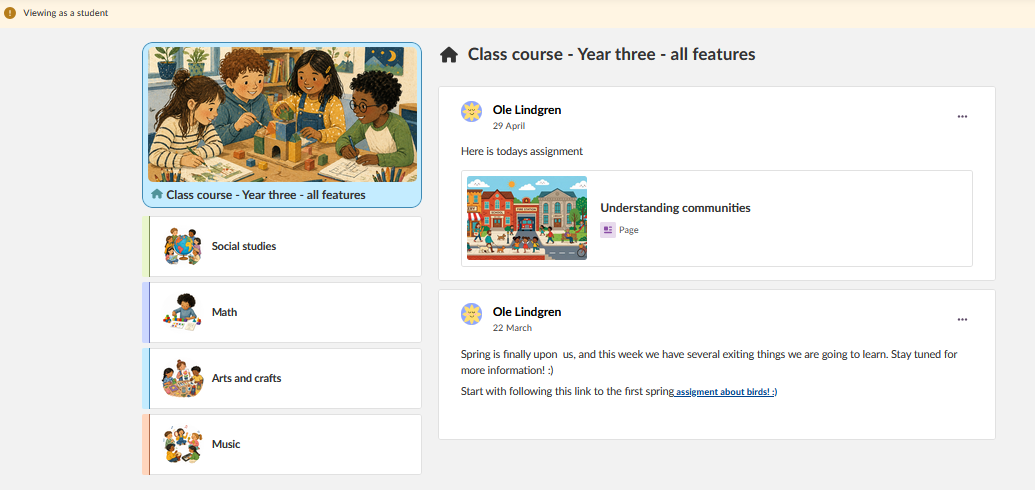
Note: You can also hide individual resources within a topic. Select the three-dot menu on any resource card and choose Make invisible. To update multiple resources at once, use the checkboxes and the Actions dropdown.
● 10:30 — Structured learning with plans
5 A guided lesson in maths
Some subjects work better with structured, step-by-step lessons rather than a list of individual resources. For maths, Ms Andersen has set the topic presentation to Show plans. Each plan represents a week of work, such as “Multiplication Tables — Week 1” or “Multiplication Tables — Week 2”, and students work through the plan in order.
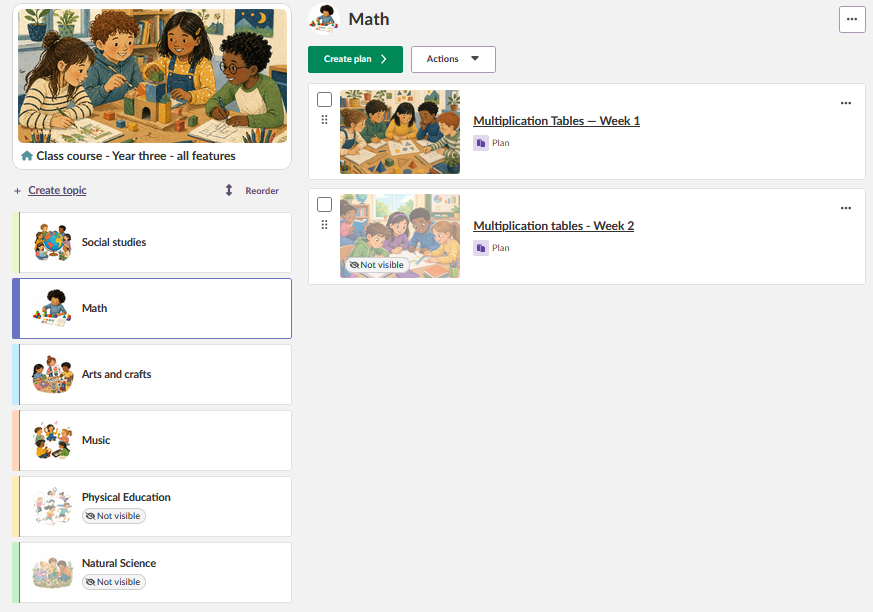
Ms Andersen can mix and match: maths uses Show plans for structured weekly lessons, while social studies uses Show resources for flexible activities like links, pages, and assignments. Each topic can be configured independently.
| Show resources | Show plans | |
|---|---|---|
| Best for | Daily tasks, worksheets, flexible activities | Structured lessons, guided sequences |
| Student sees | A flat list of resource cards | Plan cards that open in Single Plan Page |
| Example | Social studies: links, pages, and assignments | Maths: “Multiplication Tables — Week 1” |
| Can switch? | Yes — change the Topic presentation setting at any time by editing the topic. | |
Note: Creating a plan inside a topic folder does not change the topic's presentation setting. If the topic is set to show resources, students will continue to see resources even if plans exist in the background.
● 11:45 — Keeping it simple
6 Adapting the course to the age group
Ms Andersen's Year 3 students do not need the full course menu with tabs for Resources, Plans, and Reports. Under Course properties and features, she has disabled the course menu for students. Her class navigates using only the topic panel and breadcrumbs — the simplest possible experience.

Next year, when her students are more experienced, she can enable the course menu and the Resources page to give them more independence.
How Ms Andersen's settings evolve with her students
Year 1–2: Topics with images only. Course menu hidden. No Resources page.
Year 3–4: Topics with images and text.
Year 5+: Full course features. Course menu visible. Resources page enabled.
● 13:00 — Afternoon: Arts and crafts
7 Reordering the day
After lunch, the afternoon starts with arts and crafts. Ms Andersen selects Reorder at the top of the topic panel and drags Arts and crafts to the top of the list so it is the first thing her students see when they return.
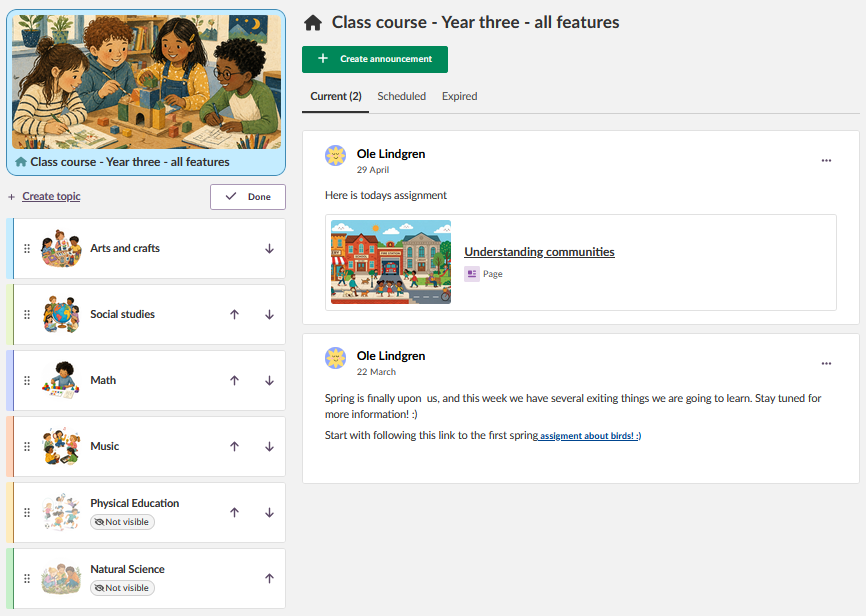
The change takes effect immediately. No saving required — when she selects Done, the new order is already stored.
Note: You can also reorder topics using the up and down arrow buttons — a useful alternative for keyboard users and touch devices.
● 14:30 — End of the school day
8 Ready for tomorrow
Before leaving, Ms Andersen adds the last resource to the Natural Science topic she has been building this week. With the topic now complete, she makes it visible and selects Reorder to drag Natural Science to the top of the list — the first thing her students will see when they log in tomorrow morning.
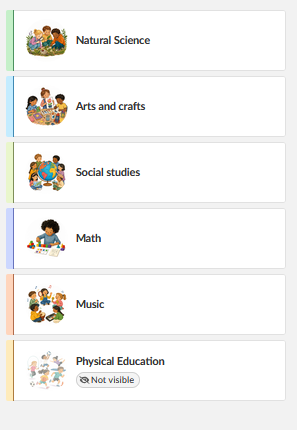
Everything is in one place. One course, one login for the students. Tomorrow, her class will open itslearning, tap a picture, and get to work.
Ready to set up your own Class course?
Read the full guide for creating and managing your Class course.
Class Course (Teacher) →The features shown are part of the project within the framework of the German Development Project (GDP), a cooperation between four German states and itslearning with the aim of improving digital education in Germany through tailor-made product developments.
Click here to learn more about the GDP roadmap and what other features you can expect.
For German readers: Click here for more information about the project within the framework of the German Development Project.