Planner - Reference (Teacher)
TABLE OF CONTENTS
- 1 Overview
- 2 Create a plan
- 3 The plan card
- 4 Plan details
- 5 Plan images
- 6 Student ownership
- 7 The Plans page
- 8 Table view
- 9 Plan settings
- 10 Plans without dates and self-paced
- 11 FAQ
The Planner is where you create and organise plans for a course. A plan groups the resources, activities, description and learning objectives that you and your students work with over a period of time. This article describes the standard, deadline-driven Planner for teachers.
Prerequisite: You need a course before you can create a plan. See Creating a course.
1 Overview
itslearning offers two plan types: deadline-driven (the default) and self-paced. Deadline-driven plans have set dates and appear under the Current, Past, Without date and Topics tabs. Self-paced plans have no time constraints and let students progress at their own pace. This article covers the deadline-driven Planner. For self-paced plans, see section 10.
From the Plans page you can create, copy, delete, print and control the visibility of your plans. Plans are sorted by date and are not visible to students by default.
2 Create a plan
To create a plan, open your course and go to the course overview page, then click the green Create plan button.
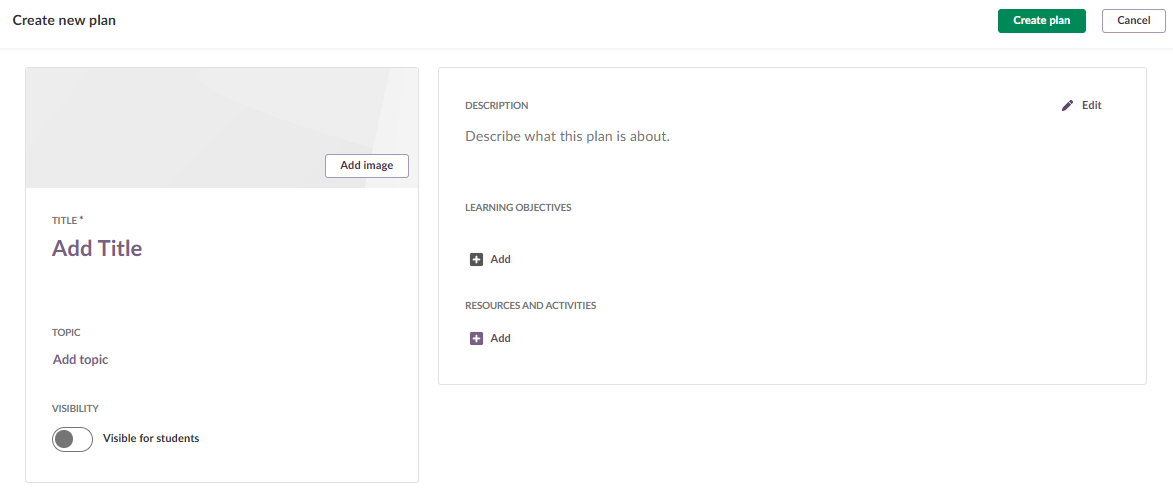
The create-plan window contains the following fields.
| Field | Description |
|---|---|
| Add image | Add an image from your computer to illustrate the plan. The image appears on the plan and on the plan card on the course overview page. See section 5 for accepted formats and sizing. |
| Add title | The name of the plan. This can be a week, a topic or any label that suits how you plan. |
| Add date | Set a start and end date (and time) for activation and deactivation. You can also connect the plan to specific calendar events, so it applies only on certain days. |
| Add topic | Topics group your plans and provide structure, similar to tagging. Topics can be predefined or created as you go. |
| Add description | A description that gives students context for the plan. |
| Add learning objectives | If learning objectives are connected to the subject, select from them to show which part of the curriculum the plan covers. |
| Resources and activities | Add the content of the plan. The most common resources and activities appear in the drop-down menu. Click Show all to see every available resource and activity. For details, see Course Resources. |
| Visibility toggle | The plan is not visible to students until you toggle this switch on, or until the activation date is reached. |
Note: New plans are sorted by date automatically and are invisible to students by default.
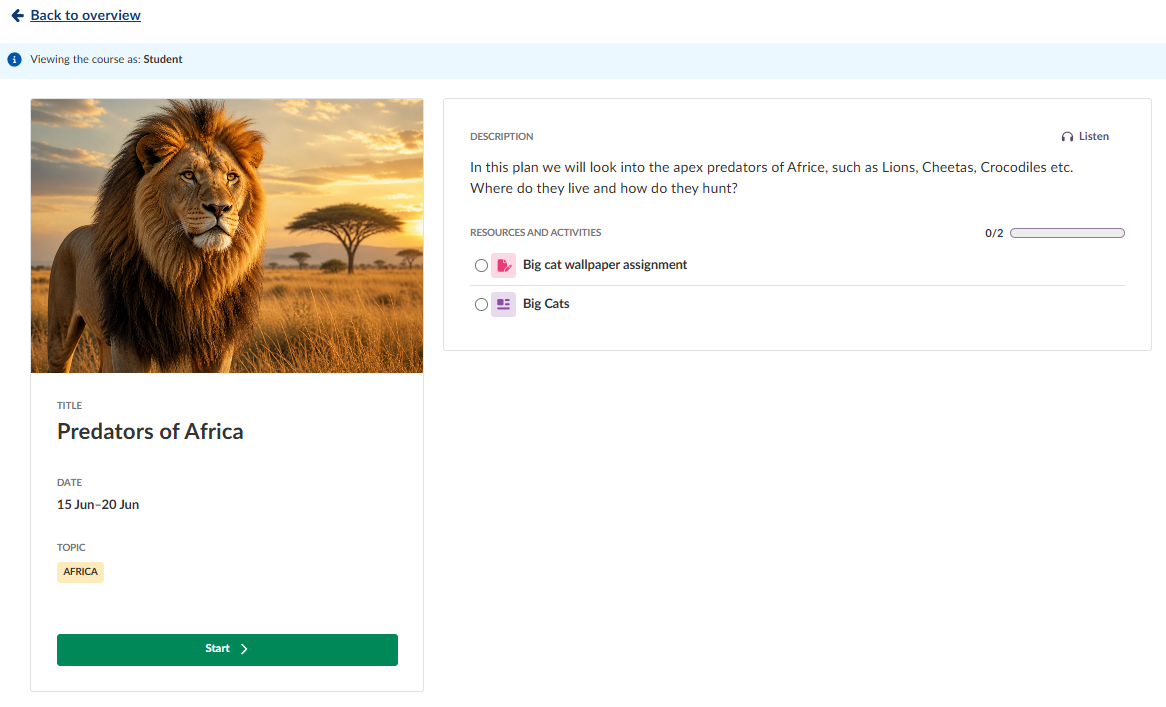
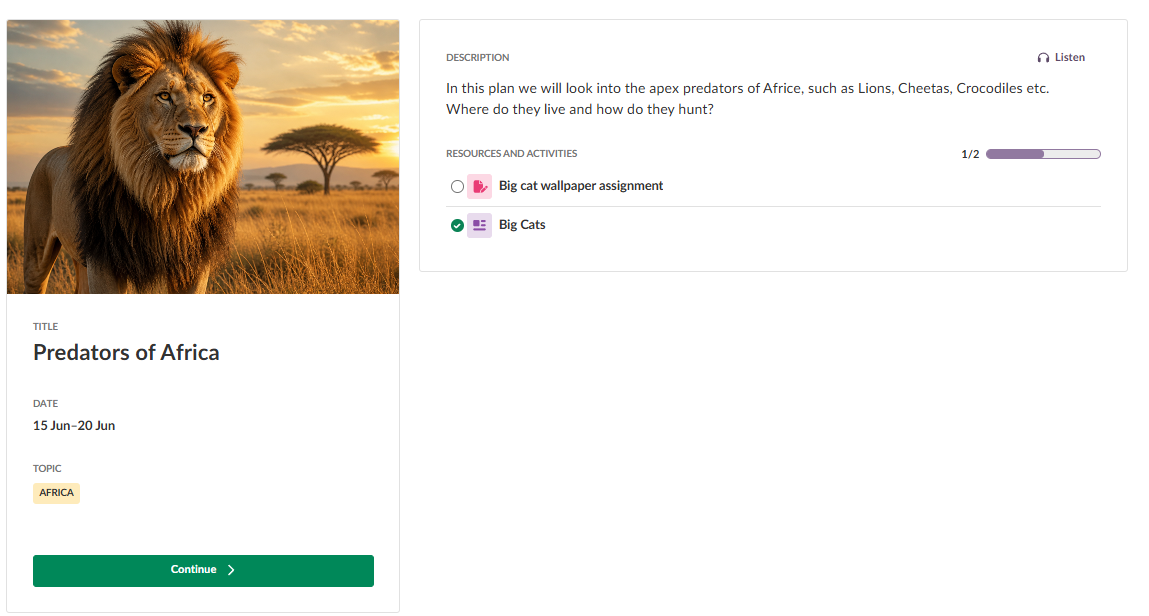
3 The plan card
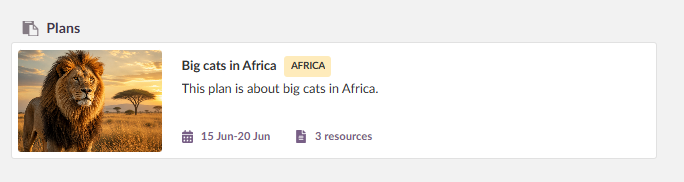
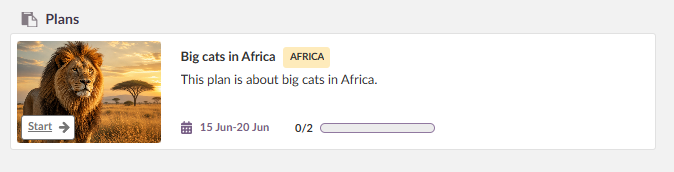
Teachers and students see their active plans for the week as a plan card on the course overview page. The plan card shows an overview of the content in each plan:
- Plan title
- Topic
- Description
- Start and end dates
- Number of resources
- Image or illustration
- Progress bar (students only)
Students also see a progress bar so they know how much of the plan they have completed.
If there are several plans for the week, only the first two appear in full. Click Show more to see the rest.

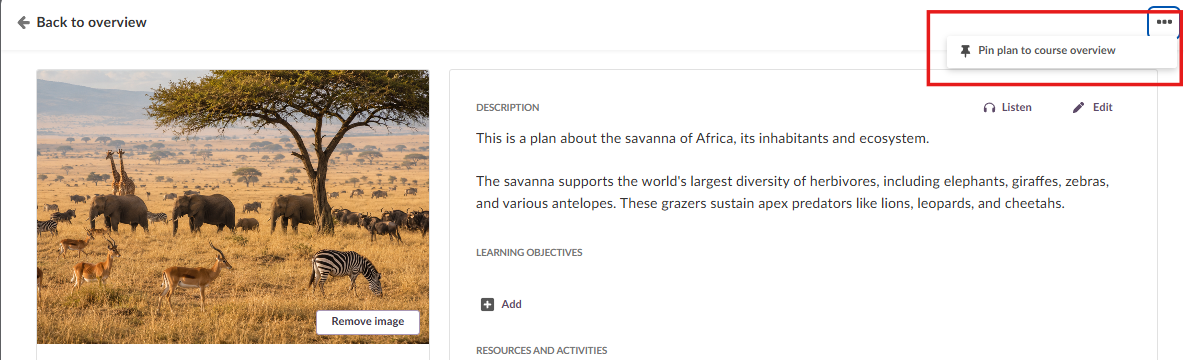
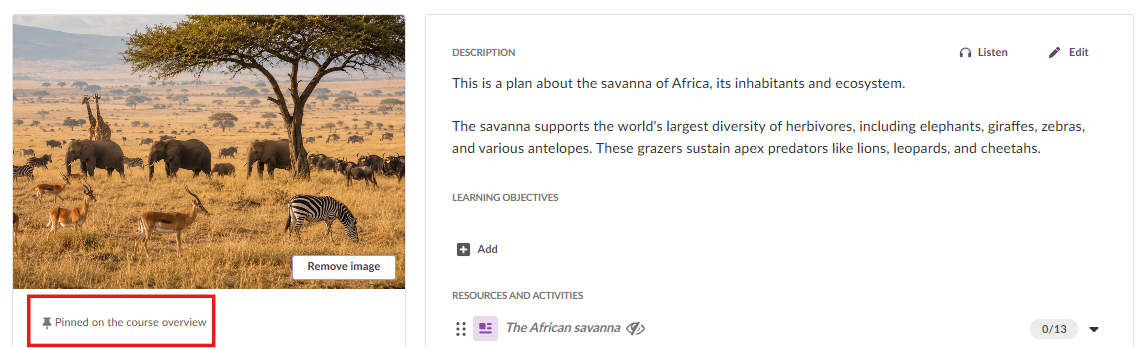
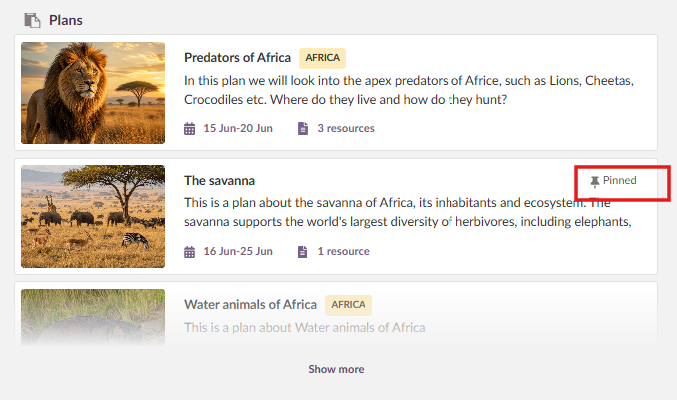
3.1 Pinning a plan
To control what students see first when they open a course, you can pin a plan to the course overview page. Open the single plan page, click the three-dot menu in the top right corner, and select the pin option. The pinned plan is listed first on the course overview page.
You can pin plans with or without a date. Only one plan can be pinned at a time.
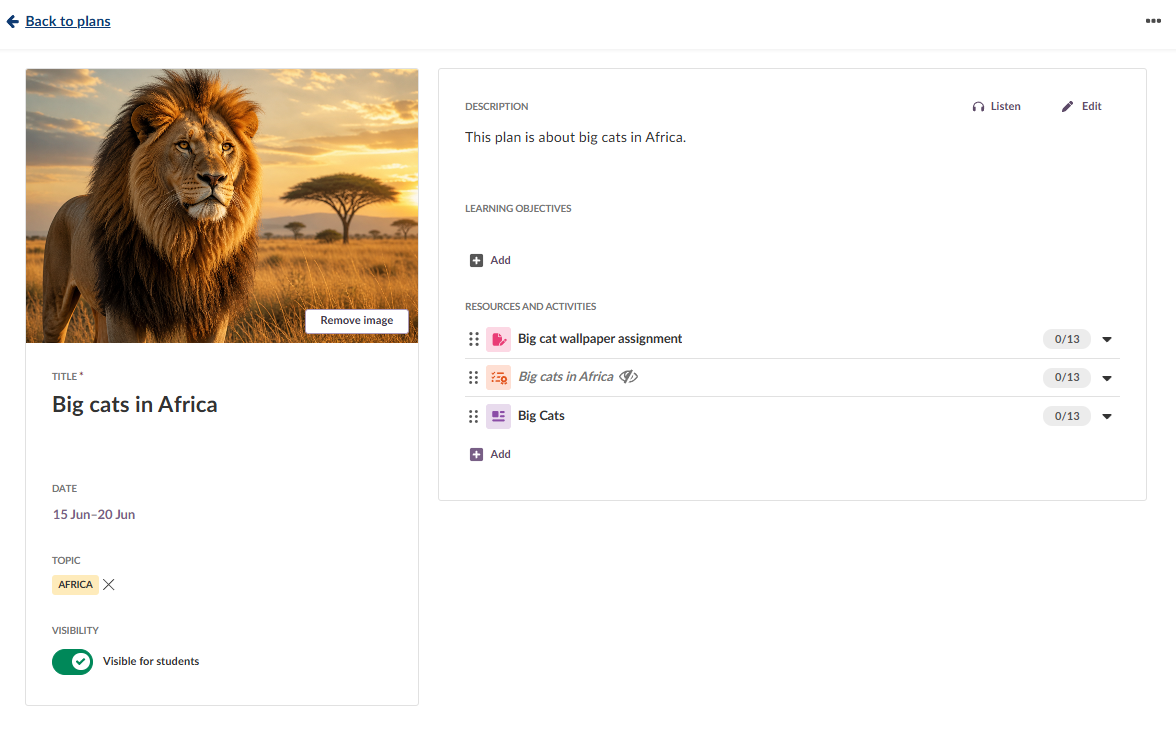
4 Plan details
Click a plan card to open it and see all plan details.
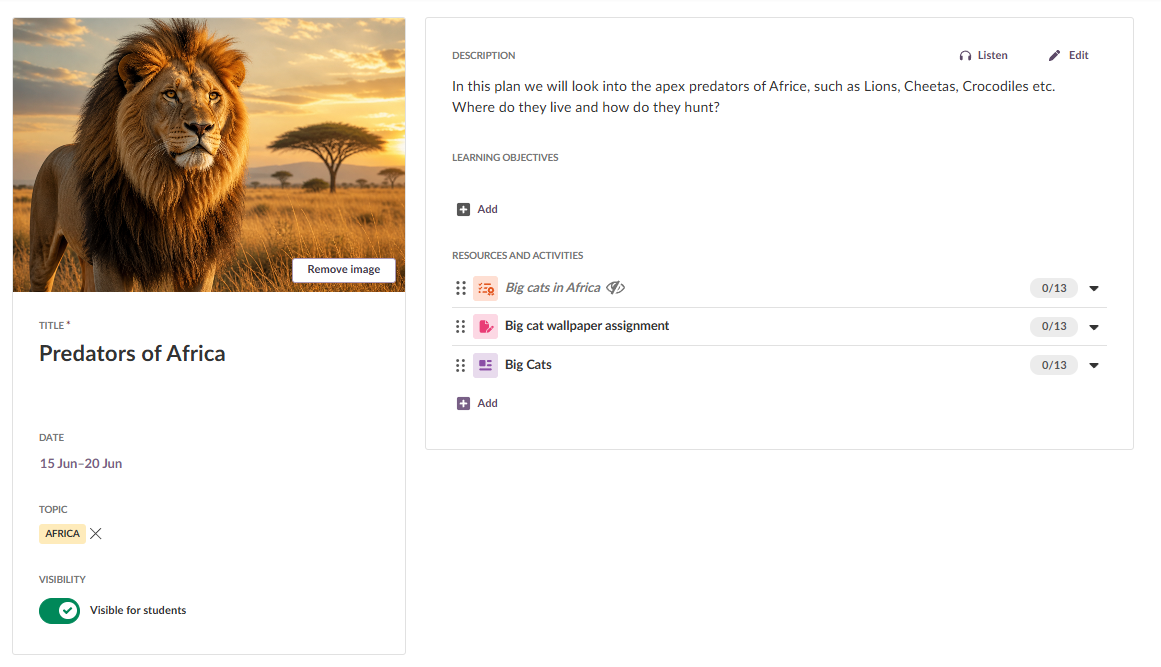
The plan details page contains:
- On the left: general information about the plan, such as title, topic, date, visibility toggle and image or illustration.
- On the right: the plan description, resources and activities, and learning objectives.
- Progress numbers: next to each resource and activity, two numbers give an overview of student progress without opening the 360° reports. The left number shows how many students have submitted an activity or opened a resource. The right number shows the total number of students.
Important: Student progress cannot be tracked in courses with more than 99 students, to avoid performance issues.
You can arrange resources and activities in any order using drag and drop or your keyboard. Any extra information you add, such as teacher notes, appears at the bottom. The Back to overview link at the top returns you to the course overview page.
5 Plan images
You can add images from your computer. To remove an image, click Remove image.

Quick reference: Plan images
Accepted formats: jpg, jpeg, gif, bmp, png
Maximum file size: set by the customer setting "Maximum allowed upload picture size" (no fixed product limit)
Recommended: horizontal images with a 3:2 ratio
Images are not auto-scaled but are adjusted to fit the image box. Portrait images keep their aspect ratio but are clipped to fit, so the top and bottom are cut off.
6 Student ownership
Check marks and a progress bar help students take ownership of their learning and monitor their own achievement. A resource is marked as read automatically when a student opens it, but students can choose to mark it as unread. An activity is marked as done after the student submits it. If you assess an activity as not satisfactory, the check mark is removed again.
To start working on a plan, a student clicks any resource or activity. All resources and activities for the plan appear in a side menu that can be used for navigation. Teachers see this side menu as well.

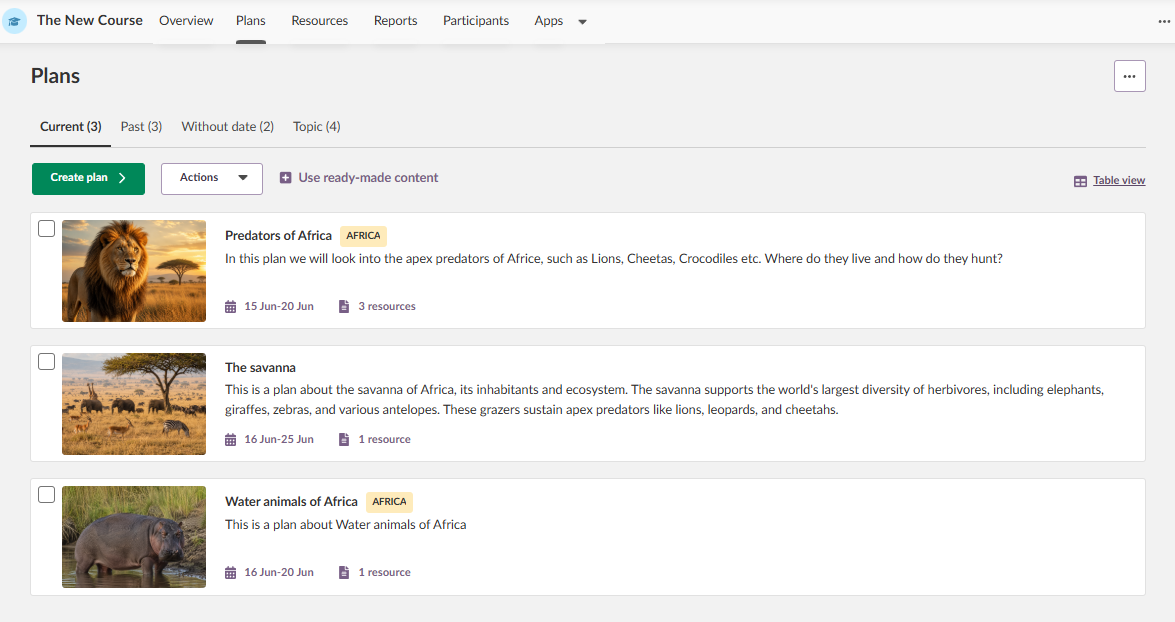
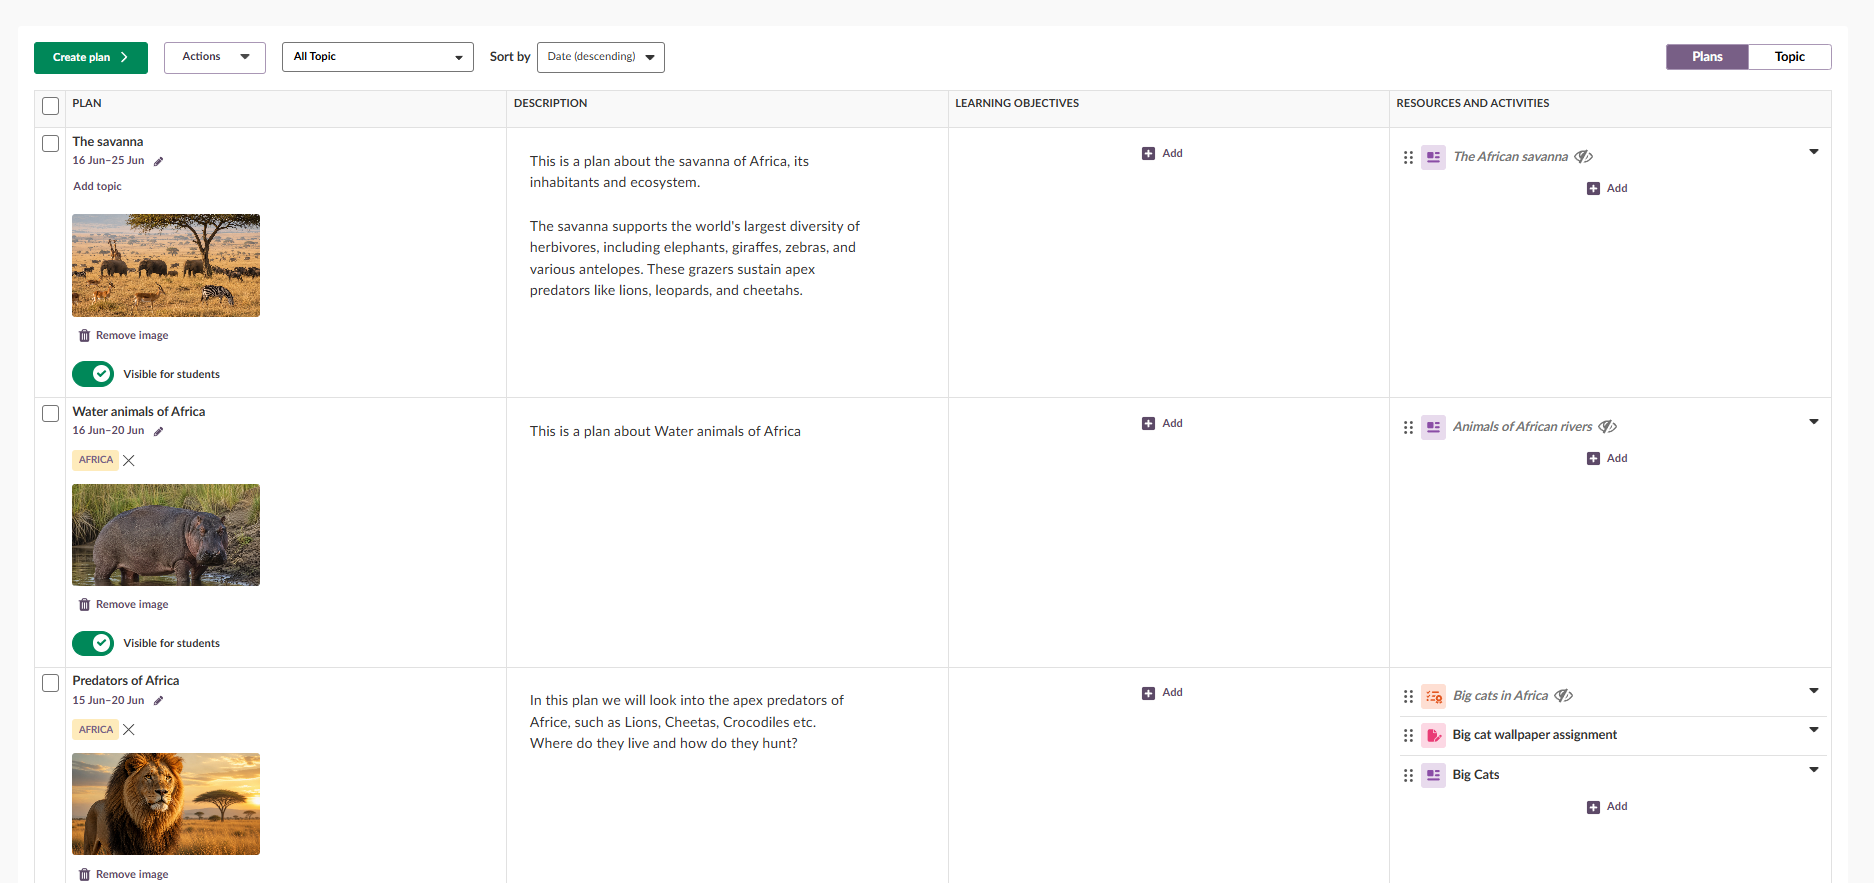
7 The Plans page
The Plans page gives an overview of all your plans. Tabs let you filter on Current, Past, Without date and Topics. Each tab has a counter showing the number of plans or topics it contains. From this page you can also copy, delete, print and control the visibility of your plans.
7.1 Current plans
Plans are sorted by date. The plan at the top is either the current plan or the next upcoming plan. To create a new plan, click the green Create plan button.
7.2 Past plans
The most recent plan appears at the top of the list.

7.3 Plans without date
Plans without dates are sorted with the most recently created plan at the top. You can also set your own order using drag and drop or your keyboard.
If a plan has no image, it shows a dynamic placeholder image in the same colour as its topic. In the example below, the plan "The Moons" appears in the same yellow colour as its topic.

7.4 Topics
Topics work like a folder or tag, making it easier to organise plans. You see a list of your topics plus a folder for plans without a topic. Each topic shows the number of plans it contains, and the dates shown are the start date of the first plan and the end date of the last plan. You can set your own order for topics using drag and drop or your keyboard.

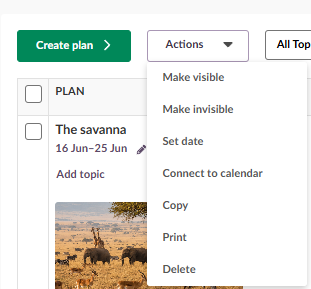
7.5 Bulk actions
When you select one or more plans on the Plans page, whether in normal or table view, the following actions are available.
| Action | Description |
|---|---|
| Make visible / invisible | Activate or deactivate a plan regardless of any date set on it. |
| Set date | Set a date on one or more plans. If you select several plans, you can start the first on a chosen date and have the following plans activate automatically on a recurring schedule. |
| Connect to Calendar | Connect a calendar event to your plans. The plan's date and time update to match the event. |
| Copy | Copy the plan to another course or the same course. |
| Print a hard copy of the plan. | |
| Delete | Delete the plan. |
8 Table view
For long-term planning, you can create plans directly in the table view when you select the topic view. The table view has two tabs, plans and topics, making it easier to organise and manage content. You can also select and copy all plans in the table view, which makes it simpler to duplicate and manage plans.

8.1 Sorting plans in table view
You can sort plans directly in the table view without changing how they appear on the topic page.
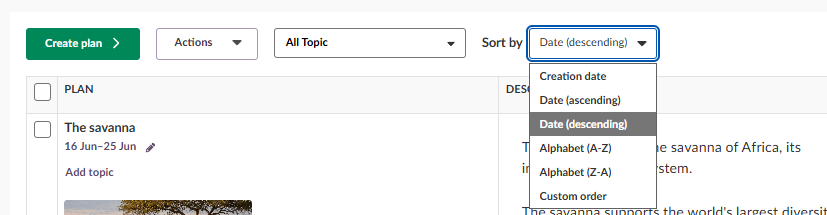
Sorting in the table view is personal and temporary. It applies only to your own view, and it resets each time you reopen the table view.
Even though sorting is personal, it still follows the sorting logic set on the topic page:
- If a topic is sorted alphabetically, the table view shows plans in the same order.
- If no sorting is defined:
- In deadline-driven courses, plans are sorted by date (ascending).
- In self-paced courses, plans follow the custom order set by the teacher.
When you view multiple topics in the table view, plans are shown in one unified list rather than grouped by topic. This makes it easier to compare plans across topics and to reorganise them in a single view.
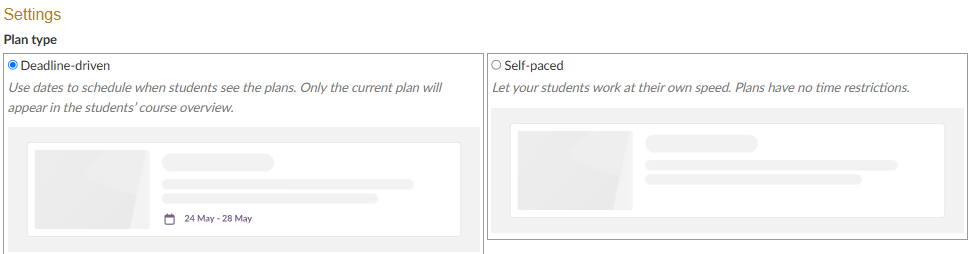
9 Plan settings
Plan settings let you change the standard setup for your plans.
Note: Plan settings apply to all plans in the course. They are not individual per-plan settings.
To open plan settings, click the three-dot menu in the top right corner of the Plans page and select Plan settings.

9.1 Settings
At the top of Plan settings, you choose the plan type. The default is Deadline-driven. Select Self-paced to let students progress at their own pace. For more on self-paced plans, see section 10.
| Setting | Description |
|---|---|
| Topics | When enabled, plans with the same topic are grouped in a folder on the Plans page. |
| Resources and activities | Toggle whether resources and activities use one combined field or two separate fields. |
| Visibility | By default this is set to "manually". You can choose to activate plans automatically from the drop-down menu. You can also choose whether elements in a plan become visible automatically when the plan is activated, or whether they follow their own visibility rules. |
| Anonymous access | Provides a link to the plan that can be published externally, for example on the school's website. |
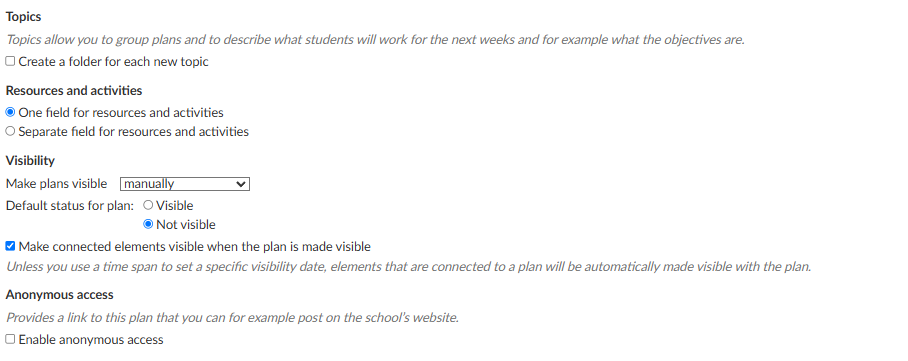
Note: The documented default configuration is: Default status for plan = Not visible (new plans are hidden from students until made visible), and Make connected elements visible when the plan is made visible = ON.
▶ How elements inherit visibility from a plan [VERIFY]
By default, activation of elements connected to a plan is disabled, so there is no automatic date-driven activation of elements until it is switched on in the settings.
When you create a resource or activity from inside a plan (Add > Create):
- The element inherits the plan's activation status (active, inactive or scheduled).
- This link means the plan's settings control the element's visibility.
- If you change the element's activation setting before saving, the link is broken. The element no longer follows the plan, and later changes to the plan's visibility do not affect it.
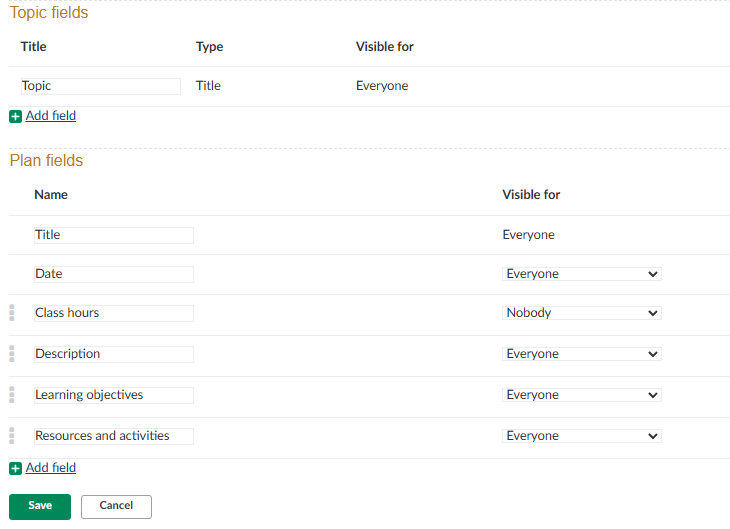
9.2 Topic and plan fields
In this part of the settings you can add fields to the plan and move existing fields using drag and drop. You can also choose who can see each part of the plan. This is useful if, for example, you want a text field for your own notes on how well a plan is working that only you can see.
Note: Default plan fields include: Title, Date, Class hours, Description, Learning objectives, Resources and Activities. Field visibility can be set to Everyone, Teacher or Nobody.
10 Plans without dates and self-paced
If you do not add dates to your plans, you can use a Self-Paced Learning course or self-paced plans. These are two separate settings: the course focus, and the plan type. See the linked articles for full details.
10.1 Change the course focus to Self-Paced Learning
You can create a new course with this focus or change an existing one. To change the focus of an existing course:
- Go to Course Settings in the drop-down menu.
- Click Course properties and features.
- Change the course focus to Self-paced learning.
10.2 Use self-paced plans
To use self-paced plans:
- In the Plans tab, click the drop-down menu and select Plan settings.
- In Plan settings, change the plan type to Self-paced and choose your preferred plan workflow.


Self-paced plans have no time constraints, and activities have no deadlines by default, although deadlines can still be set for individual activities. When a course is set to self-paced, task updates are not shown on the course card for students on the itslearning start page. Two workflows are available: One plan at a time (linear) and All plans at once (non-linear).
10.3 Workflow comparison
| Feature | One plan at a time | All plans at once |
|---|---|---|
| Student access to plans | Current plan only; others locked | All plans simultaneously |
| Completion required to progress | ✓ | ✗ |
| Resources in course menu visible | ✗ | ✓ |
| Pinning a plan | ✗ | ✓ |
| Table view for plans | ✗ | ✓ |
For full details of the self-paced workflows and the student experience, see Self-paced Plans.
11 FAQ
Why can't I see student progress numbers on my plan?
Student progress cannot be tracked in courses with more than 99 students, to avoid performance issues.
Why can't my students see a plan I created?
New plans are invisible to students by default. Make the plan visible using the visibility toggle on the plan, or set an activation date.
Can I pin more than one plan?
No. Only one plan can be pinned at a time. You can pin plans with or without a date. Pinning is not available in the "One plan at a time" self-paced workflow.
What image format and size should I use?
Use jpg, jpeg, gif, bmp or png files. There is no fixed product file-size limit; the maximum is set by the customer setting "Maximum allowed upload picture size". Horizontal images with a 3:2 ratio give the best result.
Does sorting in the table view change what students see?
No. Sorting in the table view is personal and temporary, applies only to your own view, and resets when you reopen the table view.
More Help Resources
Have more questions? Please start with asking your school administrator.
Product Release notes
Stay updated with itslearning's latest releases: https://itslearning.com/product-updates
Service Status
Check the current status of itslearning services: https://status.itslearning.com/
Ideas Portal
Share your ideas and help shape the future of itslearning: https://ideas.itslearning.com/
Roadmap
Check out our roadmap: https://itslearning.com/global/roadmap/