Send to itslearning - Getting Started (teacher and students)
TABLE OF CONTENTS
- 1 Overview
- 2 Prerequisites
- 3 Attaching files to an assignment (student)
- 4 Saving files to Your files (teacher)
- 5 Frequently asked questions
1 Overview
Teachers and students use a wide range of applications in their daily schoolwork. Different tools serve different purposes – for example, some are best suited for content creation, while others focus on language learning or mathematics practice.
On mobile devices, file management is more limited than on desktop computers. Mobile operating systems rely on a native share function (often called “Send to” or “Share”) as the primary way to move content between applications. The itslearning mobile app registers as a share target, so files created in other apps can be sent to itslearning without manual file handling.
| Role | What you can do |
|---|---|
| Student | Send a file from another app to the itslearning app and attach it to an assignment in a course. |
| Teacher | Save a file from another app to Your files in itslearning, where it can be used when preparing course content. |
2 Prerequisites
Prerequisite: You must be logged in to the itslearning mobile app on your device. The share function is only available through the native mobile app — it is not available in a web browser.
3 Attaching files to an assignment (student)
When you have created or captured content in another app — for example, taken a photo, recorded a video, or taken a screenshot — you can send the file directly to an assignment in itslearning.
- In the app where you created the content, open the file and select the share option (the share sheet).
- Select the itslearning app from the list of available share targets.
- In the Send to itslearning screen, select the course where the assignment is located.
- Select the assignment the file should be attached to.
- Tap Send to itslearning. The assignment opens with the file attached.
- Continue working on the assignment if needed, then tap Submit or save it as a draft.
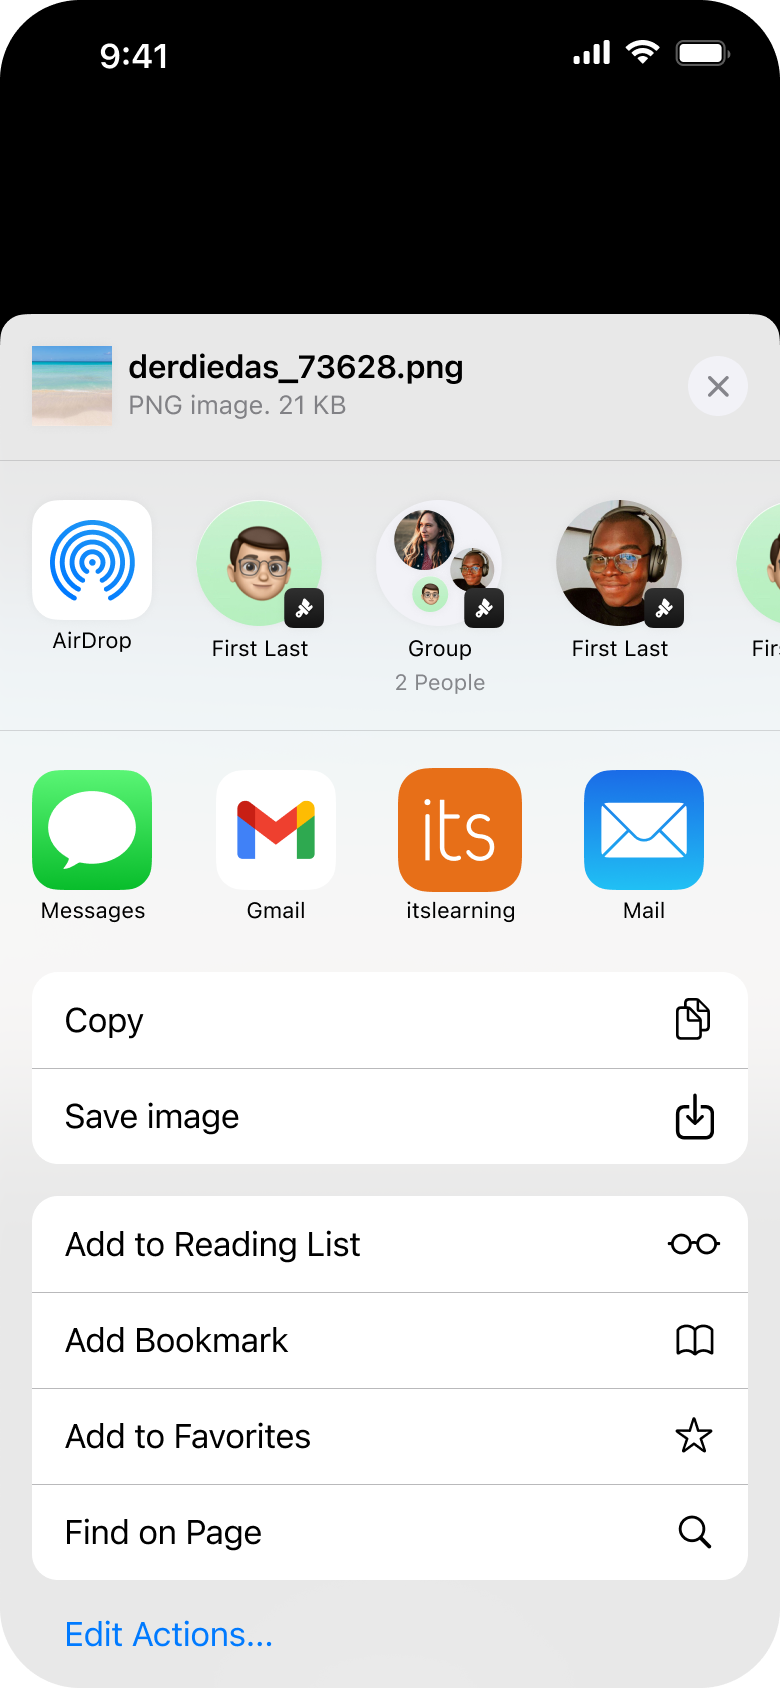
1. Select itslearning from the share sheet
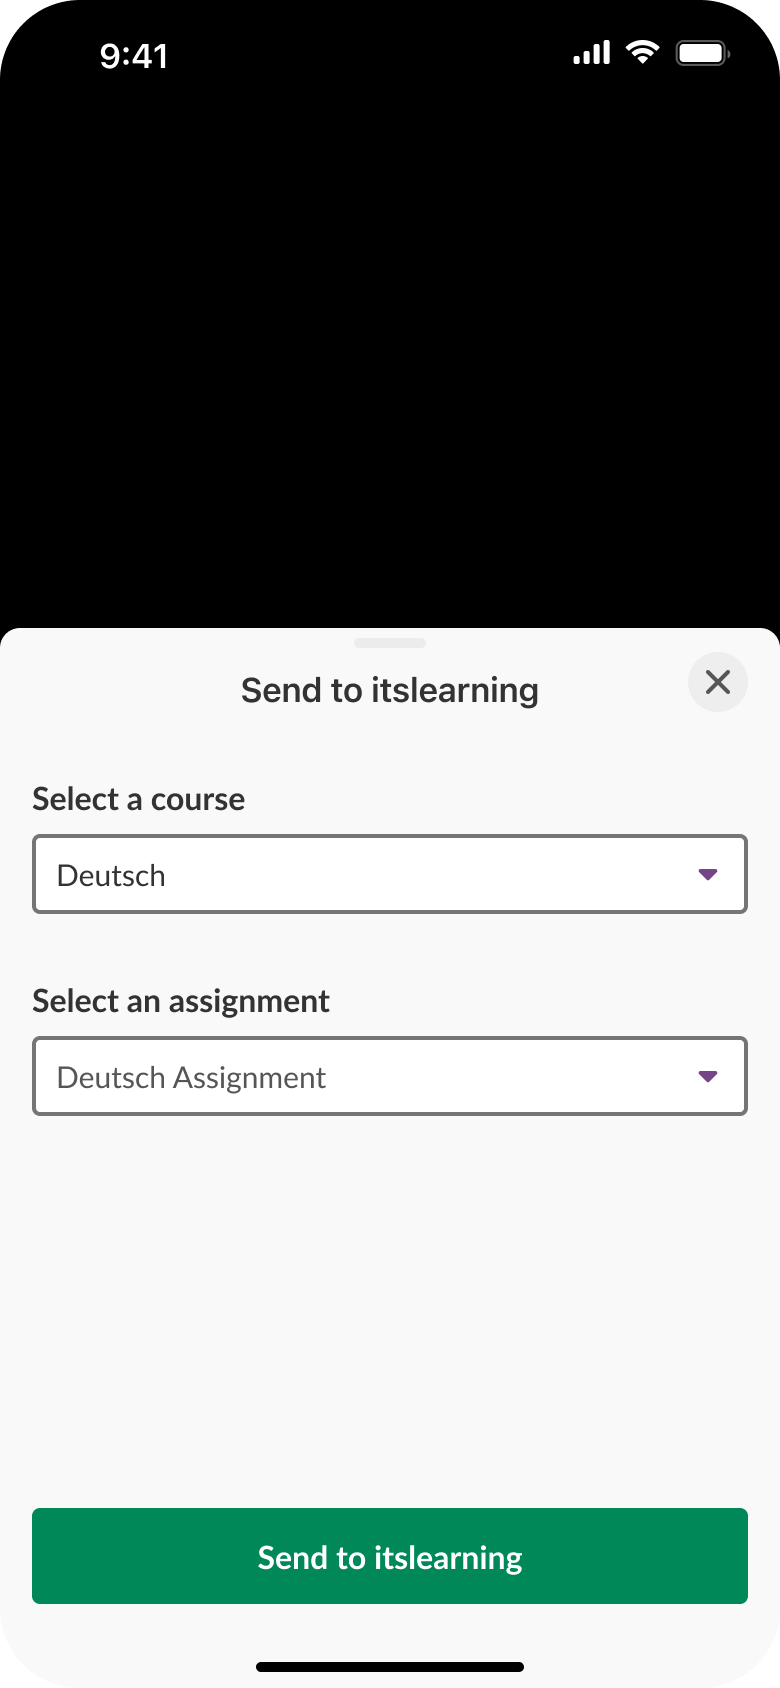
2. Select course and assignment
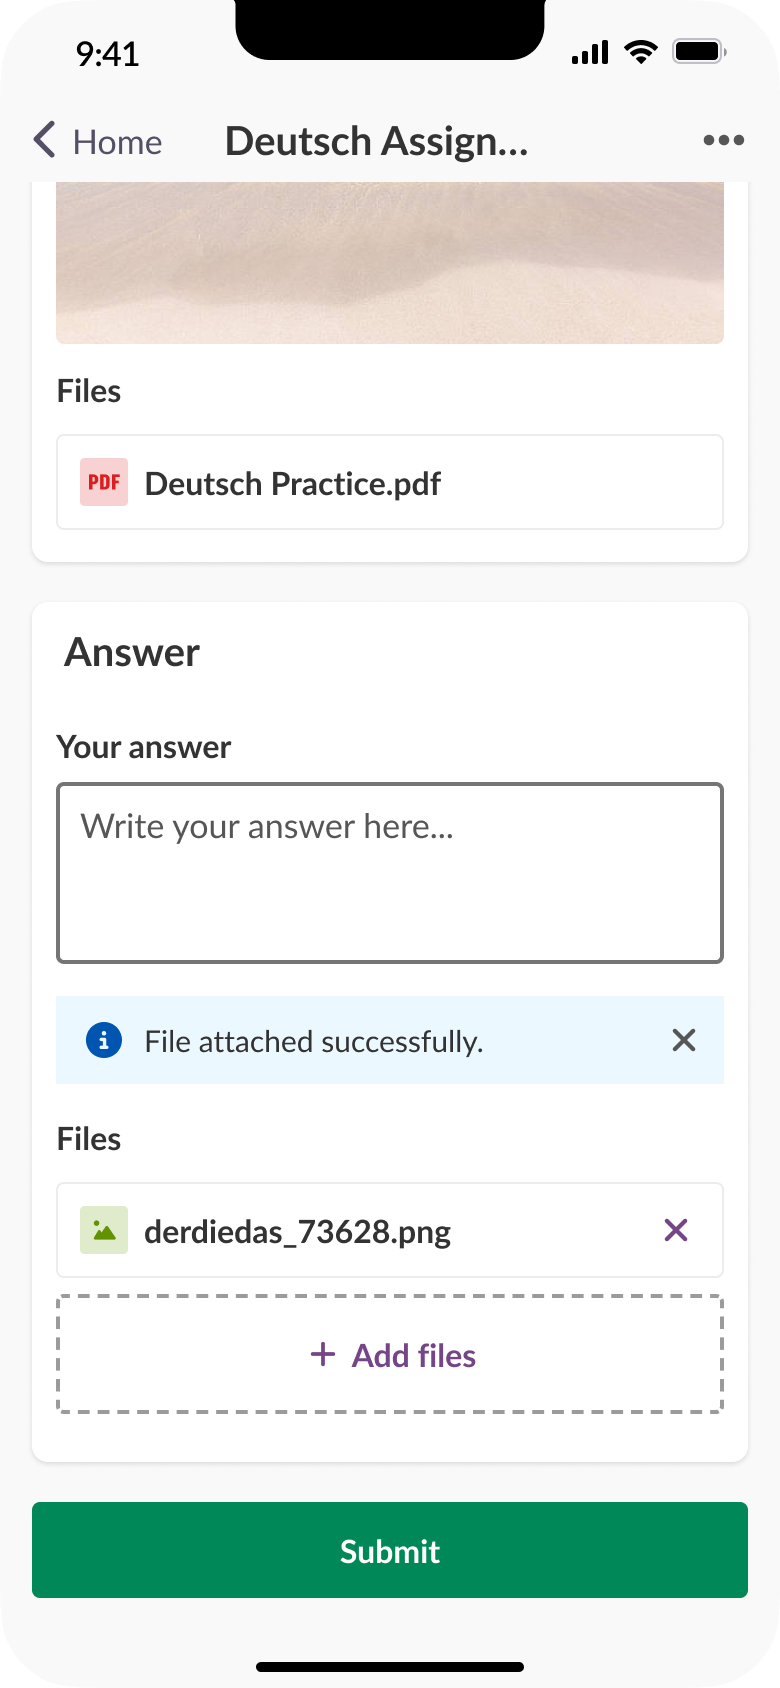
3. File attached – submit or save as draft
4 Saving files to Your files (teacher)
When you have created or captured content in another app that you want to use in your course — for example, a photo, video, or screenshot — you can save it directly to Your files in itslearning.
- In the app where you created the content, open the file and select the share option (the share sheet).
- Select the itslearning app from the list of available share targets.
- A confirmation screen appears, showing how many files will be saved to itslearning. Tap Send to confirm.
- The system confirms that the files have been saved to the Mobile Uploads folder in Your files.
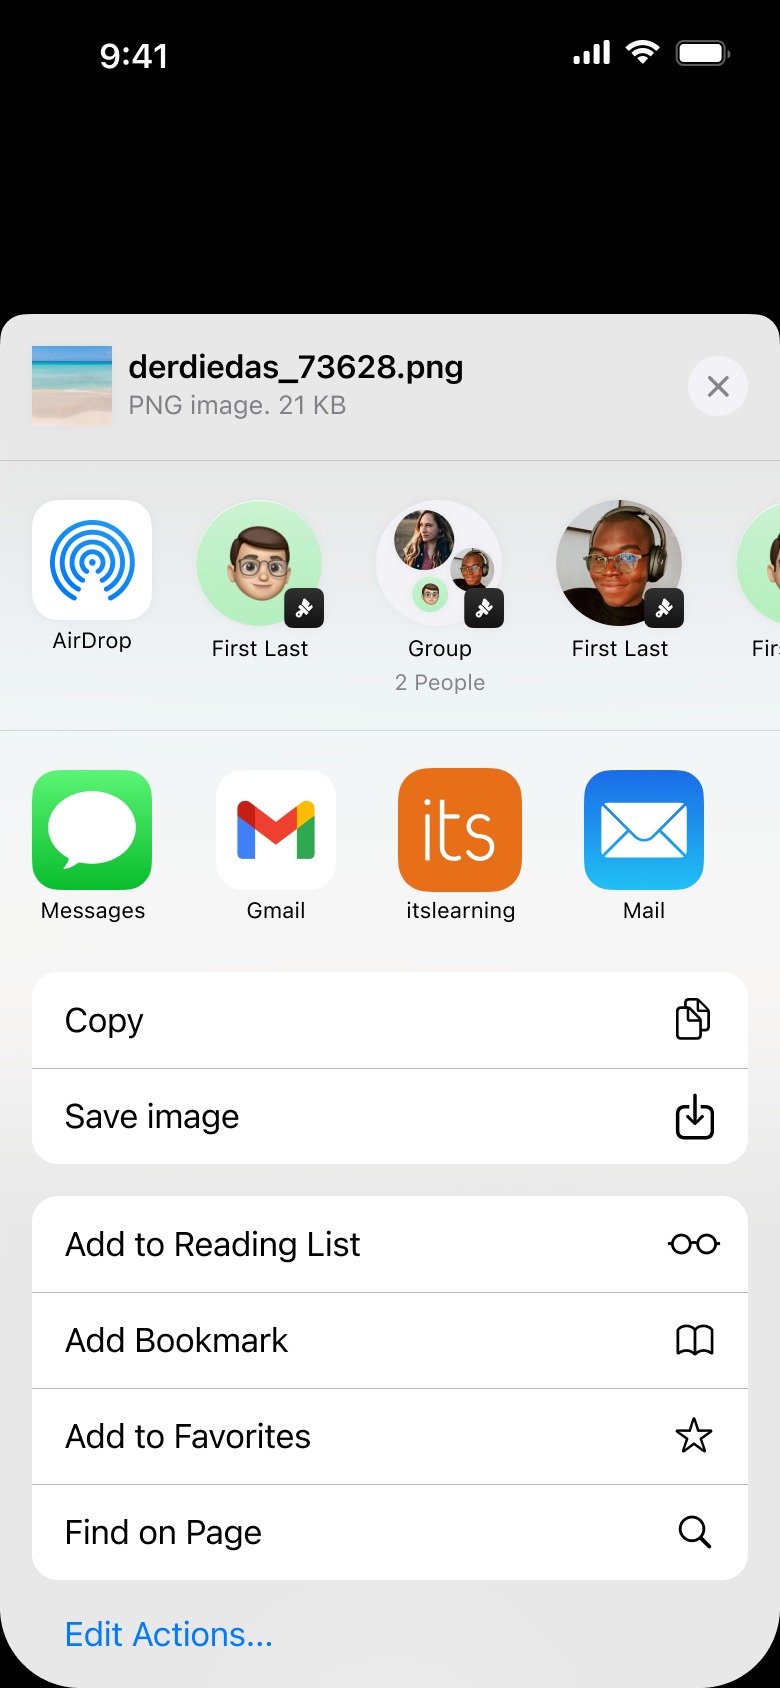
1. Select itslearning from the share sheet
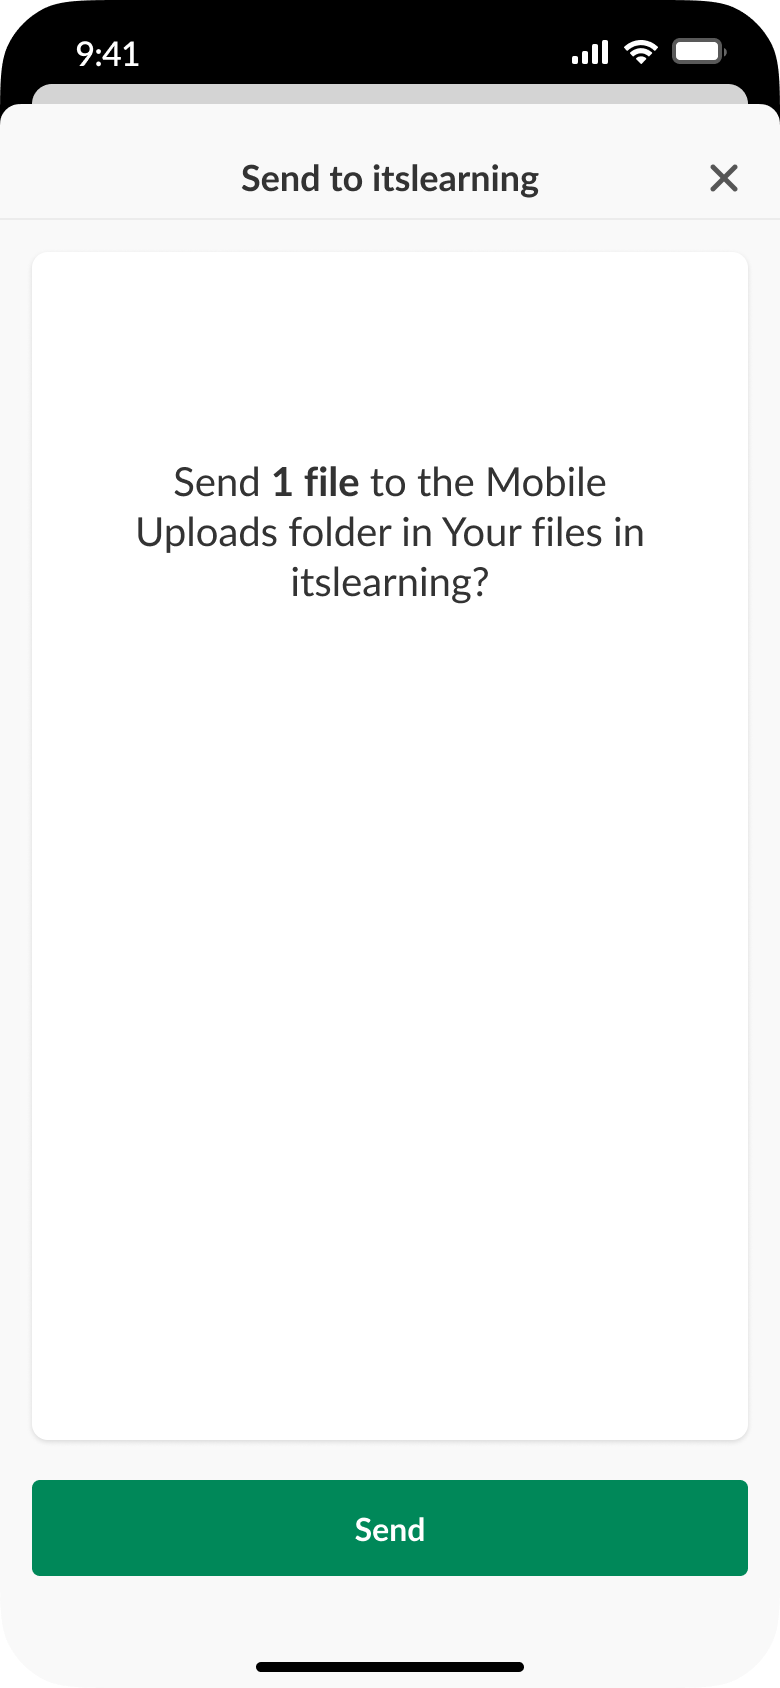
2. Confirm the save
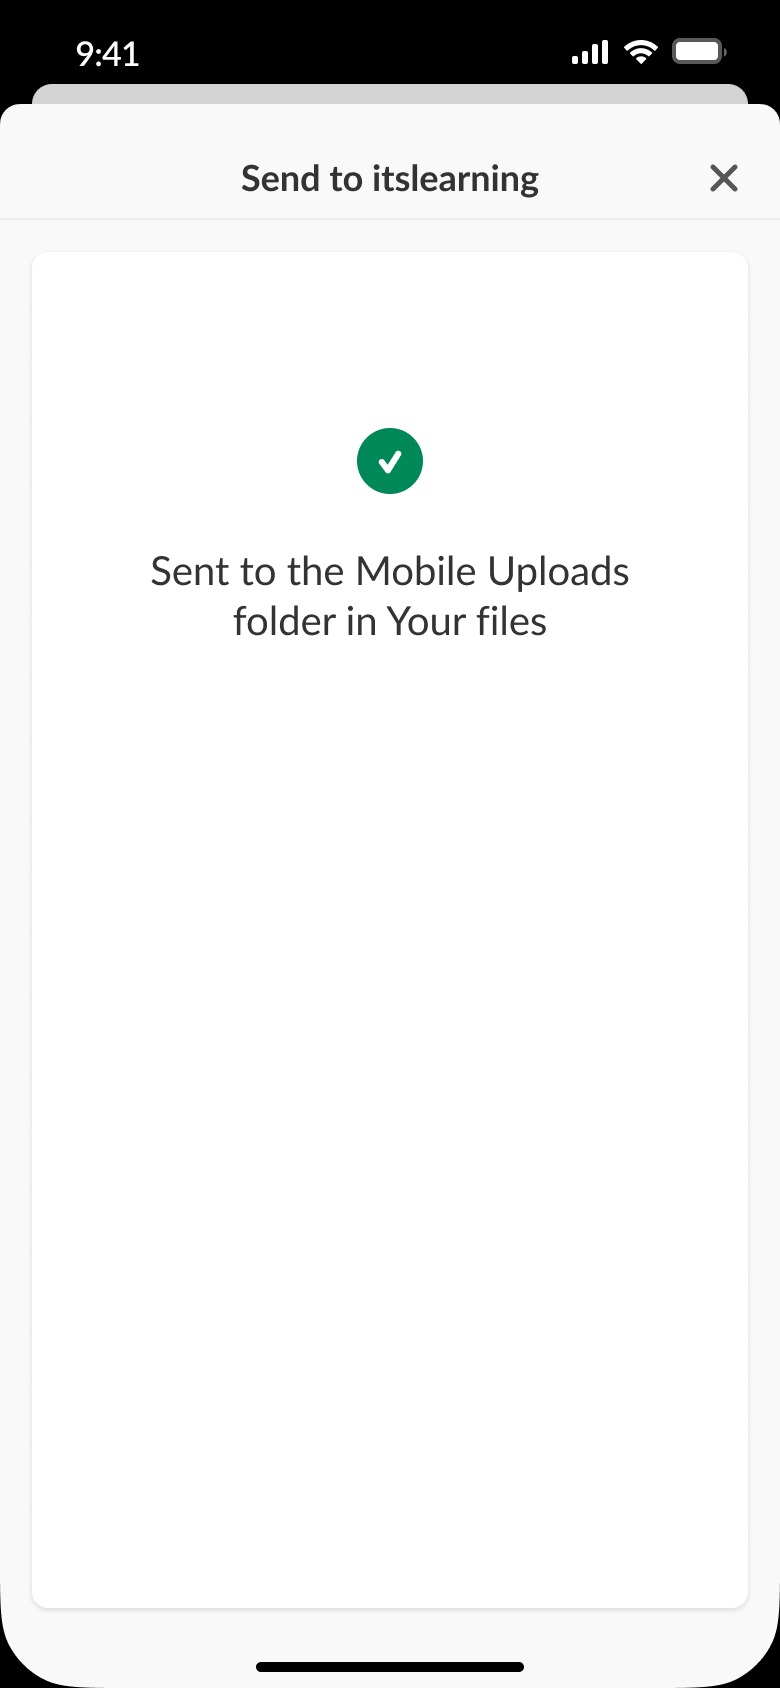
3. Files saved successfully
Note: Files sent via this method are saved to the Mobile Uploads folder inside Your files. You can then add them to your courses from there.
5 Frequently asked questions
What types of files can I send to itslearning?
You can send any file type that the originating app makes available through the device’s share function, such as photos, videos, screenshots, and documents.
Is the Send to feature available on desktop?
No. The Send to feature relies on the mobile operating system’s native share function and is only available through the itslearning mobile app.
Where do files go when a teacher uses Send to?
Files are saved to the Mobile Uploads folder in Your files. From there, you can add them to any course you manage.
Can a student send a file without selecting an assignment?
No. The student workflow requires selecting both a course and an assignment. The file is attached directly to the chosen assignment.