Course Participants Page (Teacher)
Participants
TABLE OF CONTENTS
The Participants page lets teachers manage who has access to a course, either as individual users or as groups. This article explains the four Participants tabs, how to add and remove participants and groups, and how to assign group responsibles.
1 Overview
The Participants page allows teachers to add individual users or entire groups, such as a class or lesson group, to a course. When an organisation group is added, membership changes made by the administrator or via an integration are automatically reflected in the course.
The Participants page contains the following tabs:
- Course participants – view, add, and remove individual users
- Groups – manage organisation groups and course groups
- Applicants – approve or reject course enrolment applications (visible only when course enrolment is enabled)
- Removed participants – view users who have been removed from the course
If you do not want membership changes in a group to be automatically reflected in your course, you can remove the automatic update on the Groups tab. This is explained in section 3.1.
2 Course participants
The Course participants tab displays all users currently participating in the course and their assigned role. From this tab you can add or remove participants, change roles, and send messages to one or more users.
Note: This tab has its own Search field, used to find users already added to the course. This is different from the search inside Add participants, which is used to find people or groups to add to the course, see section 2.4.
Use the Search field, and the Group and Role dropdown filters, to narrow the list of participants already added to the course.
2.1 Add individual participants
- Open the course and go to Participants > Course participants.
- Click Add participants.
- Browse through the organisation structure by clicking the arrow to the right of a group, or click anywhere on the group name. Use the breadcrumb trail to navigate back.
- Select a role from the dropdown next to the user's name.
- Click Add participant.
By default, each user is added with the role they have in the organisation (hierarchy) group. You can change this to any of the available course roles before adding, or change it afterwards from the Course participants tab.
Note: System administrators can only be added individually. They can be found at the site or organisation level in the structure, or by using the search function.
Note: The role you select here is the participant's role within this course, which can differ from their role in the organisation (hierarchy) structure. For example, a student's organisation role stays Student while they hold the Teacher role in this course. Course-level roles are not affected by synchronisation, even if the course is managed by an integration; only the organisation (hierarchy) role is managed by the integration.
2.2 Add a group
- Open the course and go to Participants > Course participants.
- Click Add participants.
- Browse to the group you want to add.
- Click Add group.
Each user in the group is added with their default organisation role. You can change individual roles afterwards from the Course participants tab.
2.3 Adding groups with sub-groups
By default, users with the course role Teacher cannot add a group that contains other groups (sub-groups). This is only allowed for users with the course role Administrator. This may be needed for courses that span an entire organisation, year group, or cohort.
Admin setting: Administration > Profiles > Course tab > "Import group structures when adding organisation groups to courses"
When this right is enabled for the Teacher role, the Add group button is visible on any level in the organisation structure, not only at group level.
2.4 Search for users or groups
In addition to browsing the organisation structure, you can search for users or groups by name while adding participants.
- Click Add participants on the Course participants tab.
- Enter your search criteria in the search field.
To narrow the search, click Filters next to the search field:
- Filter by: choose Organisation group or Participant to limit results to one type
- Search in: restrict the search to a specific organisation group by clicking Choose organisation group, or remove the restriction with Clear
Click Apply filters to run the search with the selected filters.
Note: This search and its filters apply only when adding participants. To search or filter the participants already added to the course, use the search field and the Group and Role filters on the Course participants tab itself, see section 2.
2.5 Actions on participants
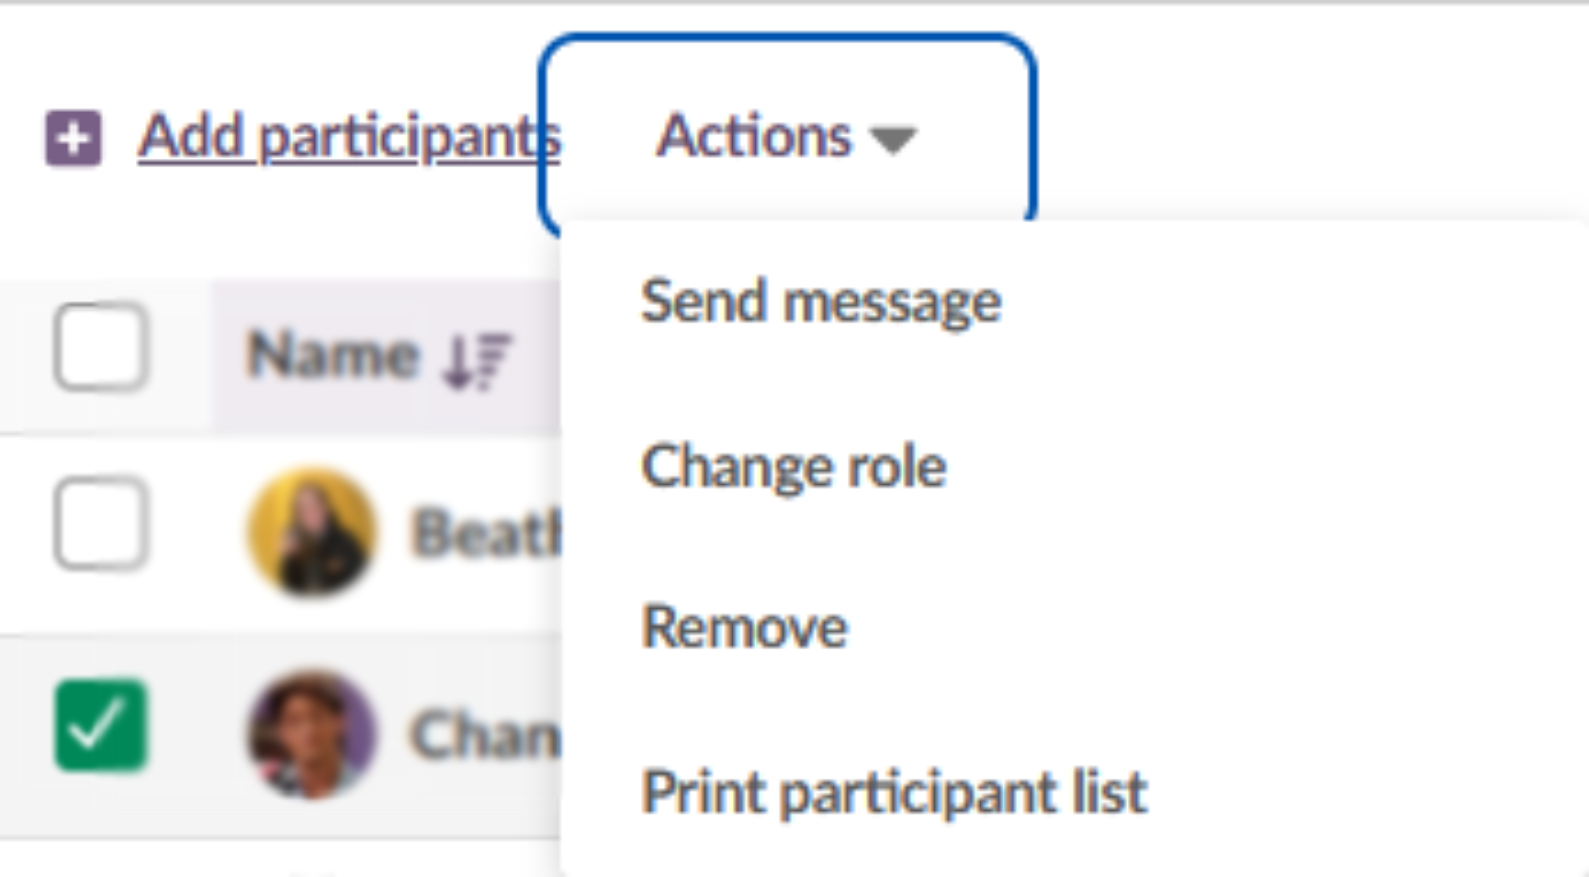
Select one or more participants using the checkboxes on the Course participants tab, then click Actions to choose from the available options.
| Action | Description |
|---|---|
| Send message | Available when the internal messaging system and/or cloud email is enabled. Sends a message to the selected participants. |
| Change role | Select the new role (Teacher, Student, or Guest) for the participant and click Change. This changes the participant's role within this course only; it does not change their organisation (hierarchy) role, and is not affected by synchronisation. |
| Remove | Removes the selected participants from the course. See section 5.2 for participants added via an organisation group or integration. |
| Print participant list | Opens a print preview of the full participant list for the course (name and role for every participant), independent of any selection or filter applied on the tab. |
3 Groups
The Groups tab allows you to manage all groups added to the course. Groups are divided into two sections: Organisation groups and Course groups. In courses with more than one teacher, you can also assign teachers to specific groups from this tab.
3.1 Organisation groups
An organisation group is part of the hierarchy structure of the organisation. It can be managed by the system administrator or via an integration with a SIS. When an organisation group is added to a course, any changes in group membership, such as a new student joining a class, are automatically reflected in the course.
From the Organisation groups section you can:
- Add a new organisation group to the course
- Send a message to all members of a group
- Remove the automatic update for a group (this converts all group members to individual participants; future membership changes in the organisation group will no longer be reflected in the course)
- Remove an organisation group from the course
If more than one organisation group has been added to the course, or if you have created course groups, you can use groups to filter lists of students or to assign content to specific groups.
3.2 Course groups
Course groups can be created within the course to divide students into smaller groups. These groups can then be used to differentiate instruction or to allow students to work on group assignments.
To create a single course group:
- On the Groups tab, click Create course group and select Create one group.
- Enter a name for the group and click Create.
- Add course participants to the group by selecting them from the list and clicking Add members.
You can open a course group at any time by clicking on its name to manually add or remove group members.
3.3 Create several groups
To create multiple groups at once:
- On the Groups tab, click Create course group and select Create several groups.
- Enter a base name for the groups. A sequential number is added to each group name automatically.
- Choose how to split students:
- Choose number of groups: course participants are randomly distributed across the specified number of groups.
- Choose the number of participants in each group: the number of groups is determined automatically based on the total number of course participants.
- Click Create.
3.4 Assigning teachers to groups
In courses with multiple teachers, you can assign a group responsible to each group via the Groups tab. The group responsible is the teacher who receives notifications and follow-up tasks for the students in that group. This is useful when different teachers are responsible for different groups of students, for example in vocational education where student intakes start at different times throughout the year.
Prerequisite: The course must have more than one teacher. The group responsible option is not available in single-teacher courses.
To assign a group responsible:
- Go to Participants > Groups.
- Click the name of the group you want to assign a teacher to.
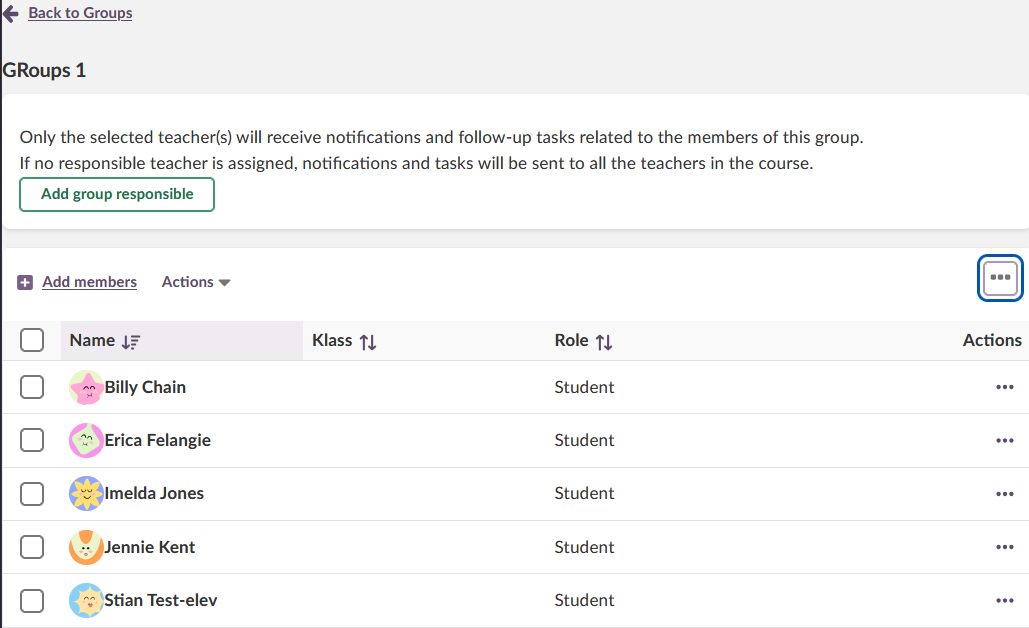
- Click Add group responsible.
- Select the teacher to assign.
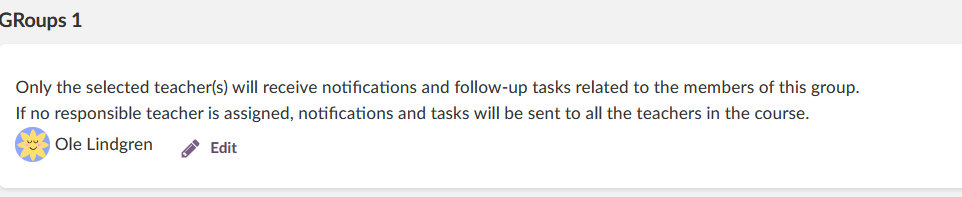
After assigning a teacher, their name is displayed below the group description with an Edit option. Click Edit to change the assigned teacher.
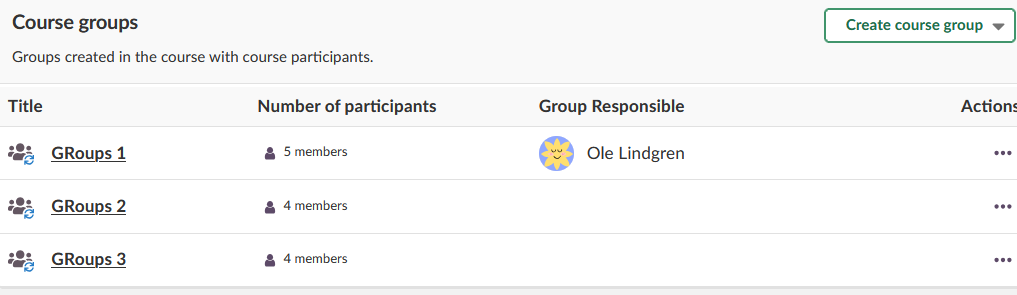
The Groups tab displays a Group Responsible column showing the assigned teacher for each group.
When a teacher is assigned as group responsible, the following applies:
| Effect | Detail |
|---|---|
| Targeted follow-up tasks and notifications | The teacher only sees follow-up tasks and receives notifications for students within their assigned groups. Students who have no group responsible assigned are visible to all course teachers. |
| Pre-filtered student overviews | Pages that list students, such as the assignment tool or the 360 report, default to showing the teacher's assigned groups. Teachers can change this filter manually, for example when substituting for a colleague. |
Note: All course teachers see follow-up tasks and receive notifications for students who are not in any group, or who are in a group with no teacher assigned. This ensures no student is left without a responsible teacher.
4 Applicants
If course enrolment is enabled, for example via the course catalogue, the Applicants tab is visible. Here, teachers can approve or reject enrolment applications if the course is configured to require approval.
5 Removed participants
The Removed participants tab displays users who have been removed from the course, either manually or via an integration. This allows teachers to access a removed student's assessment record, for example to finish registering grades in the SIS.
The three-dot menu next to a removed participant opens their assessment record; it is not used to remove or restore participants. See section 5.2 for how participants and groups are removed from a course.
5.1 Temporary access
When the site setting "Let teachers grant temporary access to students who have been removed from a course" is enabled, teachers can give a removed participant temporary access to the course so they can finish assessments.
- Go to Participants > Removed participants.
- Click the three-dot menu next to the removed participant.
- Select the option to grant temporary access.
As long as a student has temporary access, an additional Temporary access column is displayed on the Course participants tab, with a label next to each student who has temporary access.
5.2 Removing participants and groups
How a participant or group is removed, and whether the removal is permanent, depends on how they were added to the course.
| Added via | To remove |
|---|---|
| Manual addition (not synced) | Select the participant on the Course participants tab and use Actions > Remove. See section 2.5. Manually added participants are not affected by synchronisation and stay removed. |
| Organisation group / integration (SIS) | On the Groups tab, remove the automatic update to convert members to individual participants, or remove the organisation group directly. See section 3.1. |
Important: A synced-in student who is only removed from the course in itslearning is added back automatically at the next synchronisation. To remove a synced student permanently, they must also be removed from the source system (SIS) or the sync list, not only from the course.
Removed participants and groups appear on the Removed participants tab, see section 5.
More Help Resources
Have more questions? Please start with asking your school administrator.
Product Release notes
Stay updated with the latest itslearning releases: https://itslearning.com/product-updates
Service Status
Check the current status of itslearning services: https://status.itslearning.com/
Ideas Portal
Share your ideas and help shape the future of itslearning: https://ideas.itslearning.com/
Roadmap
Check out our roadmap: https://itslearning.com/global/roadmap/