TABLE OF CONTENTS
1. What You'll Accomplish
By the end of this guide, you'll have configured your essential personal settings including your profile photo, language preferences, and notification settings. This process takes about 10-15 minutes and ensures itslearning works the way you prefer.
2. Before You Begin
• Have a profile photo ready on your computer (optional)
• Know your preferred language and time zone
• Consider which email notifications you want to receive
3. Quick Start Workflow
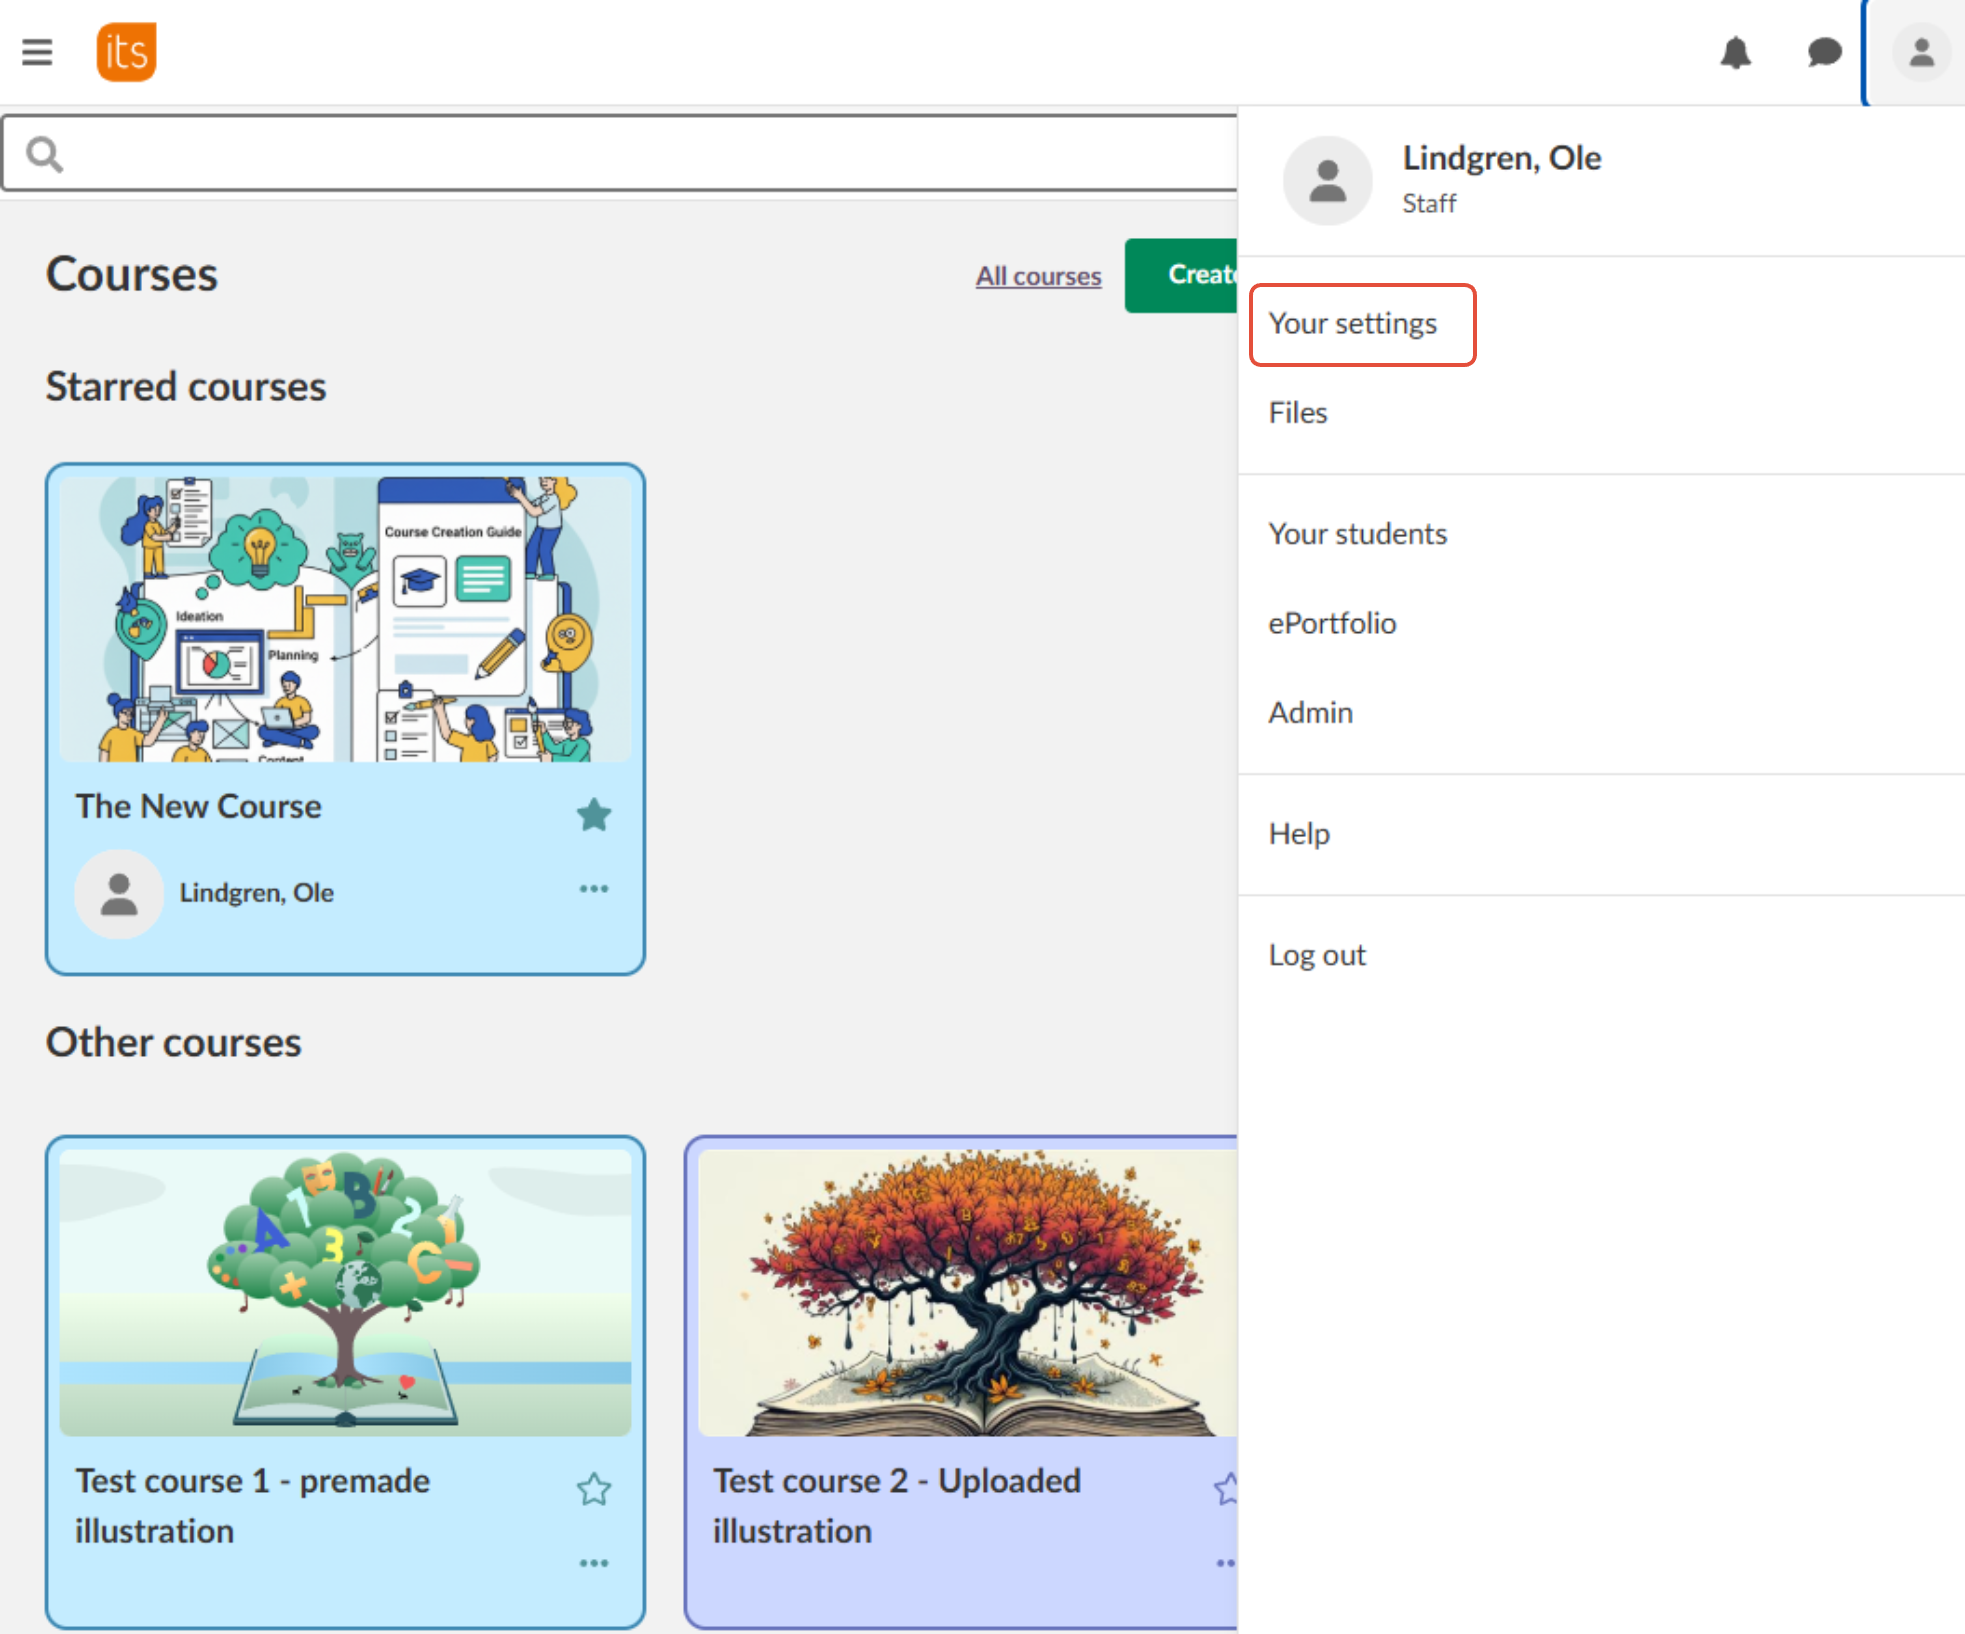
Step 1: Access Your Settings
Click the grey silhouette in the menu bar and choose "Your settings"
Step 2: Update Your Profile
Click "Edit profile" to add personal information that you want to share with others in itslearning:
- Upload a profile picture by clicking "+ Add image", or change your picture via "Change image" if you have already selected a profile picture.
- Add your phone number or email if desired
- Complete any other personal details
- Remember to press save(!)
✓ Checkpoint: Your profile photo should now appear in the top menu bar

Step 3: Customise itslearning Interface
Click "Customise itslearning" to set your preferences:
- Language: Choose from 18 available languages
- Time zone: Select your local time zone
- Navigation: Enable simplified navigation tree if preferred
- Text editor: Choose simplified text editor if needed

Step 4: Configure Email Notifications (optional)
Under "Email notifications" section, set up your alerts:
- "Important changes": Enable notifications for assignments and news
- "New messages": Set up an alert when you get messages
✓ Checkpoint: Your interface should now display in your chosen language and time zone
Step 5: Connect Cloud Accounts (Optional)
Click "Connected accounts" to link external services (must be defined by sysadmin):
- Connect Google Drive for easy file access
- Connect OneDrive for document integration
Step 6: Always remember to save before leaving a page:
Ensure all your settings are saved by clicking "Save" or "Update" where prompted
✓ Checkpoint: Your personalised settings should now be active across itslearning
Optional: Change password
If your site is using native itslearning login, you can change your login password from this page
More Help Resources
Have more questions? Please start with asking your school administrator.
Product Release notes
Stay updated with itslearning latest releases: https://itslearning.com/product-updates
Service Status
Check the current status of itslearning services: https://status.itslearning.com/
Ideas Portal
Share your ideas and help shape the future of itslearning: https://ideas.itslearning.com/
Roadmap
Check out our roadmap: https://itslearning.com/global/roadmap/