Individual Learning Plans - Creating and Managing Plans (Teacher)
TABLE OF CONTENTS
- 1 Overview
- 2 Prerequisites
- 3 Accessing Individual Learning Plans
- 4 The Student List
- 5 Creating a Plan
- 6 Viewing and Editing Plans
- 7 Publishing a Plan
- 8 Managing Existing Plans
- 9 Midterm Reviews
- 10 Student and Parent Access
Individual Learning Plans (ILPs) in itslearning support a structured school process for collecting feedback from mentors and teachers, and input from students and parents. Used together with 360° reports and ePortfolio, ILPs help mentors set and track goals for each individual student.
1 Overview
ILPs consist of two parts: the individual plan, created and maintained by the mentor, and midterm reviews, written by course teachers. Both parts can be used independently.
An ILP is created by a mentor for one or more students, based on a template configured by the system administrator. The template defines which text fields the plan contains, and which roles can view or edit each field. Once a plan is created, it is independent of its template: changes made to the template afterwards do not affect existing plans.
Mentors manage ILPs via the Mentor menu. Course teachers can access midterm reviews from within a course via Status and Follow-up. ILPs are accessible on mobile devices.
Multiple mentors can collaborate on the same ILP, making it suitable for observations or progress monitoring across staff.
2 Prerequisites
Prerequisite: The ILP feature must be enabled by a system administrator. Both the Use Individual Learning Plan and Enable new Individual Learning Plan settings must be active in your organisation's feature settings.
Prerequisite: To create and manage ILPs, a user must be assigned the Mentor role. See Mentor and Headteacher Roles – Configuration (Sysadmin). At least one ILP template must be created and published by the administrator before plans can be created.
Prerequisite: To allow parents to view or contribute to ILPs, child–parent relationships must be configured and the parent portal must be enabled. Contact your system administrator.
3 Accessing Individual Learning Plans
3.1 Via the Mentor menu
Mentors access all ILP management functions through the main navigation menu.
- Click Mentor in the main menu.
- Select Individual learning plans.
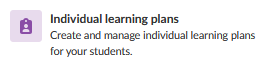
This opens the student list for all students under the mentor's charge.
3.2 Via a course
Course teachers can access ILP content and midterm reviews for their course participants directly from the course view, without requiring the Mentor role.
- Open the course.
- Go to Status and Follow-up.
- Click Individual learning plan.
This opens a view with two tabs:
| Tab | Content |
|---|---|
| Current plans | A list of course participants. The current plan for each student is shown. Clicking a plan opens the student's detailed ILP page. |
| Midterm reviews | A list of midterm reviews created in this course. New midterm reviews are also created from this tab. |
4 The Student List
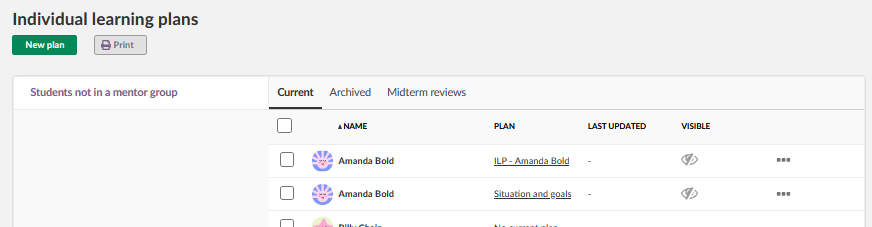
The student list, accessed via the Mentor menu, shows all students under the mentor's charge, sorted by group. All students are shown regardless of whether they have an active plan.
Note: A student with more than one current plan will appear multiple times in the list, once for each active plan.
5 Creating a Plan
Plans are created from the student list in the Mentor menu. A single plan can be created for an individual student, a selected group of students, or the entire mentoring group.
- From the student list, select the student or students for whom you want to create a plan.
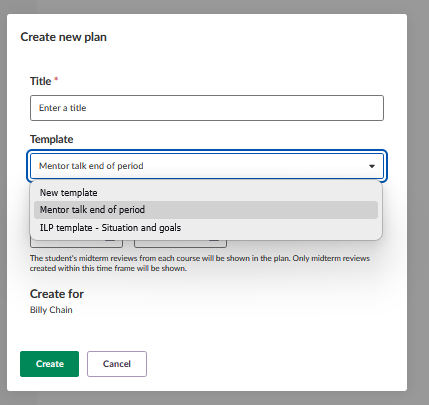
- Click to create a new plan.
- Select a template. If only one published template is available for your organisation, it is selected automatically. If multiple templates are available, choose the one appropriate for this plan.
Note: Once a plan is created, it is no longer linked to the template it was based on. Any subsequent changes to the template will not affect existing plans.
Note: Plans created for multiple students simultaneously become individual elements after creation. Each plan can only be edited and deleted individually. Verify that the title and dates are correct before creating plans for a large group of students.
6 Viewing and Editing Plans
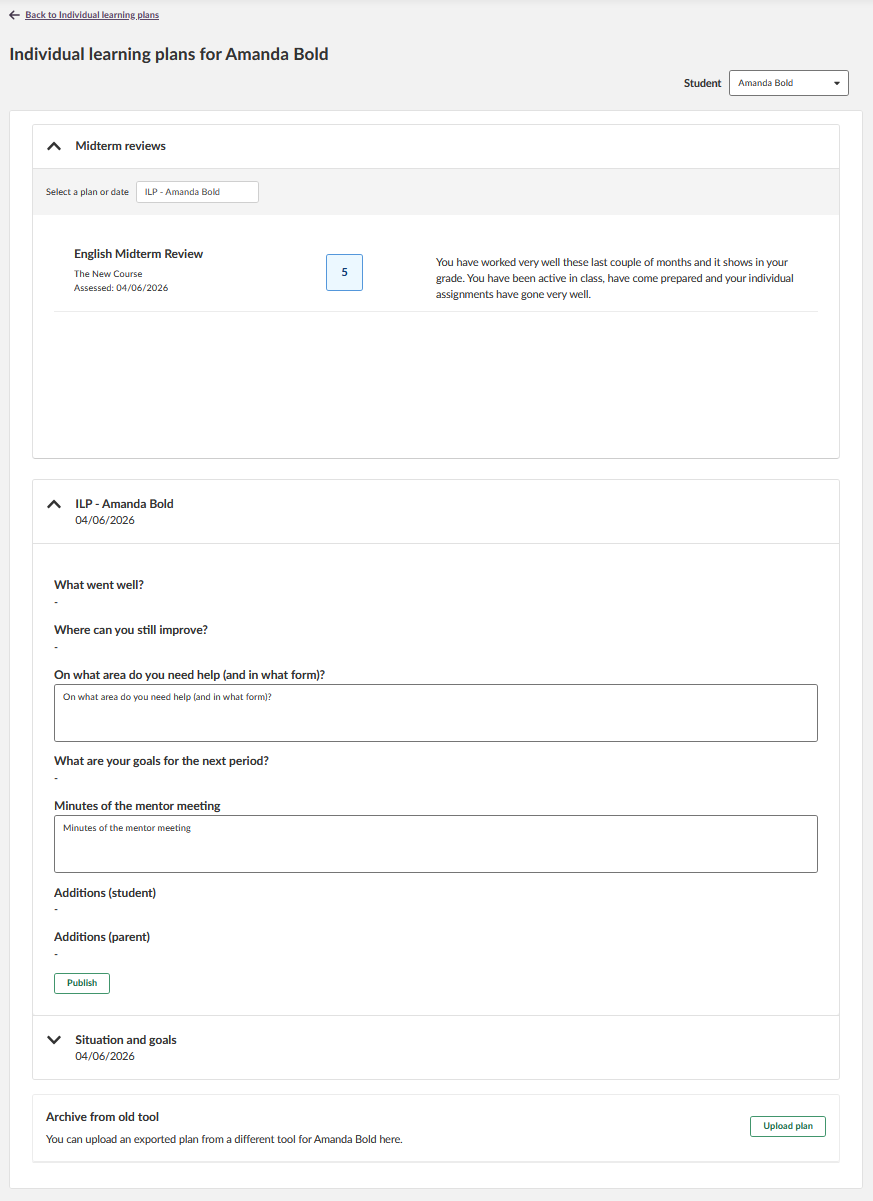
Clicking a plan in the student list opens the detailed view for that student. This view shows:
- Midterm reviews related to the selected plan.
- All plans for that student, sorted chronologically, including plans with no content.
Each plan can be opened for review and editing. The fields available in a plan are determined by the template used when the plan was created. Which fields a user can view or edit depends on the permissions set in that template by the administrator.
Note: Mentors and teachers can always see all plans for each student, with or without content. Multiple mentors can collaborate on the same plan. Plan fields can be minimised and expanded independently of each other.
To navigate to another student without returning to the list, use the student dropdown menu at the top right of the page.
7 Publishing a Plan
Publishing a plan makes it visible to the student and any connected parents. Unpublished plans are only visible to mentors and teachers.
Note: Each plan includes a validity period defined by start and end dates. These dates are editable. Midterm reviews are displayed in relation to the plan's validity dates.
Note: All users with access to a published plan receive a warning about the potential for sensitive information in the plan's content.
8 Managing Existing Plans
From the student list, a mentor can perform the following actions on existing plans:
| Action | Description |
|---|---|
| Create | Create a new plan for one or more students, based on an available published template. |
| Publish | Make the plan visible to the student and connected parents. |
| Print / Export | Select and print or export up to 100 plans at a time from the student list. |
| Archive | Archive a plan that is no longer active. |
| Delete | Permanently remove a plan. Deletion cannot be undone. |
Important: Deleting a plan is permanent. If a template needs to be disabled temporarily, the administrator should unpublish it rather than delete it.
Note: If your organisation previously used the legacy ILP tool, those plans are available at the bottom of the ILP view. PDF and Word files can also be uploaded manually from your computer.
9 Midterm Reviews
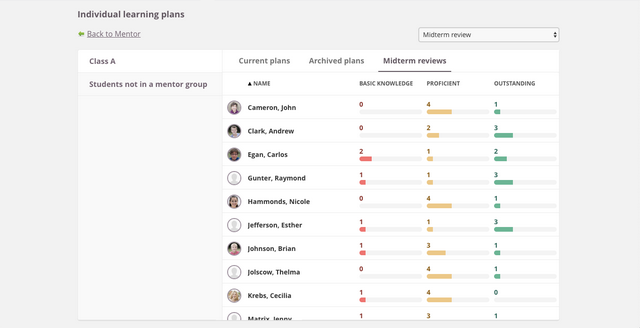
Midterm reviews allow course teachers to provide interim feedback for individual students within a specific course. They are linked to an ILP by date: midterm reviews entered within the validity period of a plan appear when viewing that plan in the Mentor menu.
Note: Midterm reviews are not visible in the overall assessment record. They are accessed and created via Status and Follow-up within a course, not via the Mentor menu.
9.1 Creating a midterm review
- Open the course.
- Go to Status and Follow-up > Individual learning plan.
- Select the Midterm reviews tab.
- Click to create a new midterm review.
- Configure the review properties: enter a title (including the current term or period in the title is recommended), select an assessment scale or choose No assessment for free text only, enable student self-assessment if required, and set visibility. If an assessment scale is used, set this before assessing any students.
Important: The assessment scale for a midterm review is locked once at least one student has been assessed. Adjust the scale before beginning assessment.
Important: Midterm reviews are linked to a plan based on the date they were last edited, not the date they were created. If a review is edited after the plan's validity period ends, it will appear in the next active plan instead. Including the term or period in the review title makes it easier to identify unexpected shifts.
Note: A midterm review can be given with or without a grade. Multiple midterm reviews can be created per course.
9.2 Assessing students in a midterm review
Once a midterm review has been created, select students to assess. For each student, an assessment selector and a comment field are available for descriptive and textual feedback. Feedback is saved automatically. Multiple students can be assessed at once.
Students can also enter their own self-assessment, which is visible in the midterm review alongside the teacher's feedback.
Midterm reviews are displayed in the student's ILP view based on the date they were last edited, relative to the plan's validity period. For example, if a plan is valid from 1 February to 30 June, the mentor sees midterm reviews from all courses the student attended during that period. If no plan or date range is selected, the view shows reviews from the last four months by default.
10 Student and Parent Access
Access to ILP content is controlled by two factors: the plan's publication status and the field permissions defined in the template.
| Role | Access |
|---|---|
| Mentor / Teacher | Can view all plans for their students at all times, published or unpublished, with or without content. |
| Student | Can only view published plans. Can view and write comments and self-assessment in fields where they have edit permission. |
| Parent | Can access current, published plans via a content block on the parent dashboard. Requires the parent portal and child–parent relationships to be configured by the administrator. |
Note: Which fields are visible to each role is determined by the template settings. A field restricted in Can be seen by will not appear at all for roles not listed in that setting, regardless of edit permissions.
More Help Resources
Have more questions? Please start with asking your school administrator.
Product Release notes
Stay updated with itslearning latest releases: https://itslearning.com/product-updates
Service Status
Check the current status of itslearning services: https://status.itslearning.com/
Ideas Portal
Share your ideas and help shape the future of itslearning: https://ideas.itslearning.com/
Roadmap
Check out our roadmap: https://itslearning.com/global/roadmap/