TABLE OF CONTENTS
- 1 Overview & Introduction
- 2 Prerequisites & Requirements
- 3 Creating a Project/Community
- 4 Adding Participants
- 5 Managing Project Content
- 6 Understanding Project Roles
- 7 Project Groups
- 8 Additional Resources
1 Overview & Introduction
Projects (known as Communities in US English) are collaborative spaces within itslearning designed for group work, school clubs, cross-functional events, and associations. Unlike courses, Projects do not include assignments, tests, or assessment tools. Instead, they provide a streamlined environment for sharing resources, coordinating activities, and facilitating discussions.
When to Use Projects:
- School clubs and societies
- Planning cross-functional events such as sports day or school productions
- Collaborative working groups across year groups or departments
- Staff committees and working parties
- Student-led initiatives requiring shared resources
Key Differences from Courses:
- No assignments or tests
- No gradebook or assessment features
- Simpler structure focused on collaboration
- All users can typically create Projects (subject to site settings)
- Flexible membership management
You can find Projects under the Groups section in the main menu. Projects support threaded discussions, file sharing, link sharing, calendar events, and bulletin boards for announcements.
2 Prerequisites & Requirements
Required to Create a Project:
- Active itslearning user account
- Permission to create Projects (typically enabled for all users; check with your administrator if unavailable)
Required to Join a Project:
- Active itslearning user account
- Invitation from Project creator or manual addition by an itslearning administrator
System Requirements:
- Access to itslearning via web browser or mobile app
- Internet connection
3 Creating a Project/Community
Time Required: Approximately 2-3 minutes
All users are typically able to create Projects. Follow these steps to create your collaborative space:
Navigate to Groups in the main menu

- Click the Add button
- Select Add to favourites if you want quick access (optional)
- Provide a titlefor your Project
- Use a clear, descriptive name that indicates the Project's purpose
- Examples: "Science Club 2024", "Sports Day Planning Committee", "Year 10 Drama Production"
- Enter a descriptionfor your Project
- Explain the Project's purpose and what participants will collaborate on
- Include any relevant information about meeting schedules or expectations
- Click Save or Create to finalise your Project

Result: Your new Project appears in your Groups list. You are automatically assigned as the Project manager.
Next Steps: Add participants to your Project so collaboration can begin.
4 Adding Participants
There are two ways to add users to a Project: invitation or administration.
4.1 Adding Participants by Invitation
Time Required: 2-3 minutes
As a Project manager, you can invite users to join your Project:
- Open your Project from the Groups menu
- Navigate to Participants or look for a participants management option
- Click Invite users
- Search for users by first name or last name
- You must enter a name to search
- Select users from the search results
- Send the invitation

Important: Users must accept the invitation to become part of the Project. You can also send an internal message to users inviting them to the Project/Community.
4.2 Adding Participants by Administration
itslearning administrators can manually add users to Projects without requiring acceptance. If you need bulk user additions or require administrator assistance, contact your site administrator.
Checking Participant Status
You can view your Project's participant list to see:
- Participant names
- Assigned roles (Project manager or Project participant)
- Last online status
The participant list is accessible from the Project's main menu under the Participants section.
5 Managing Project Content
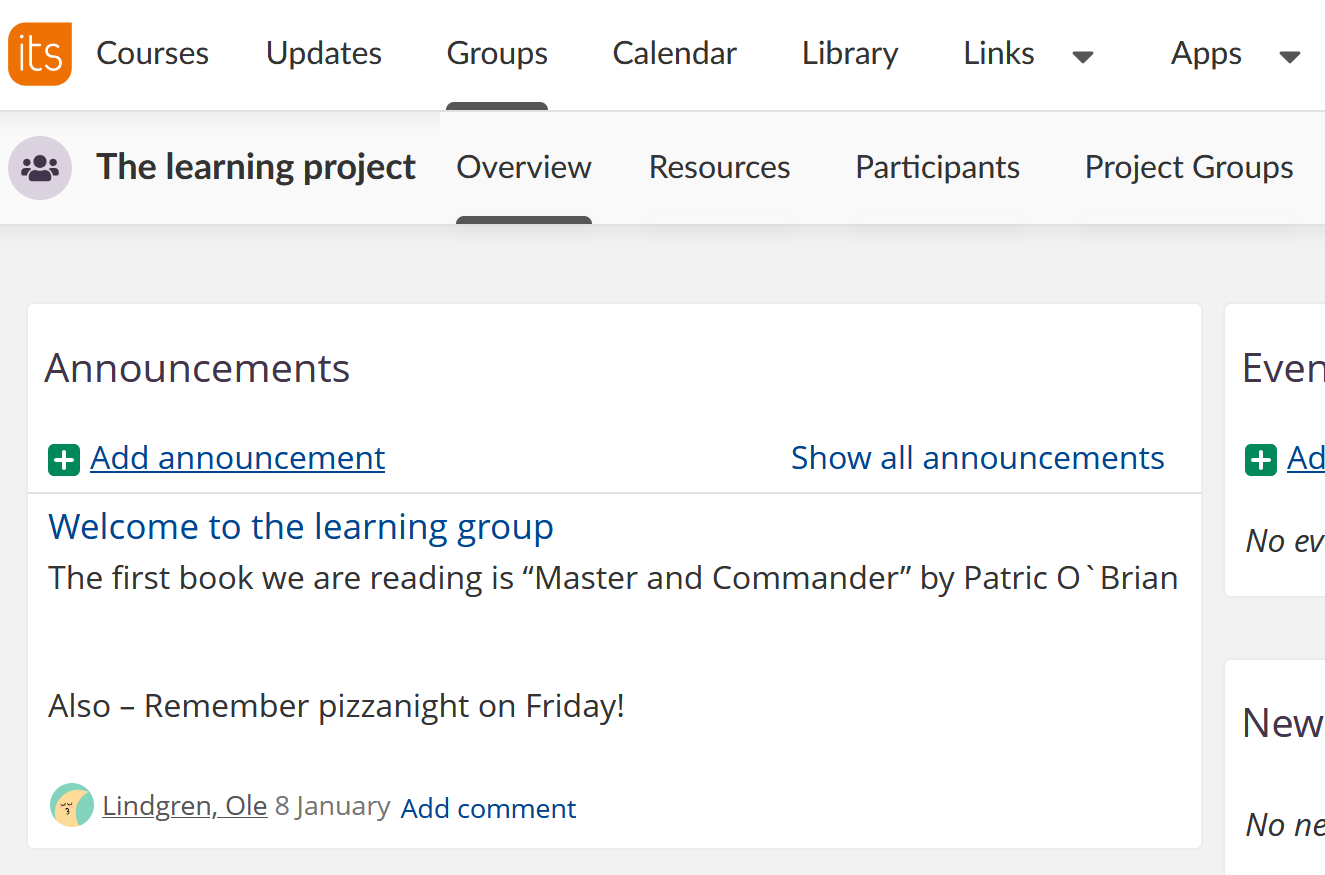
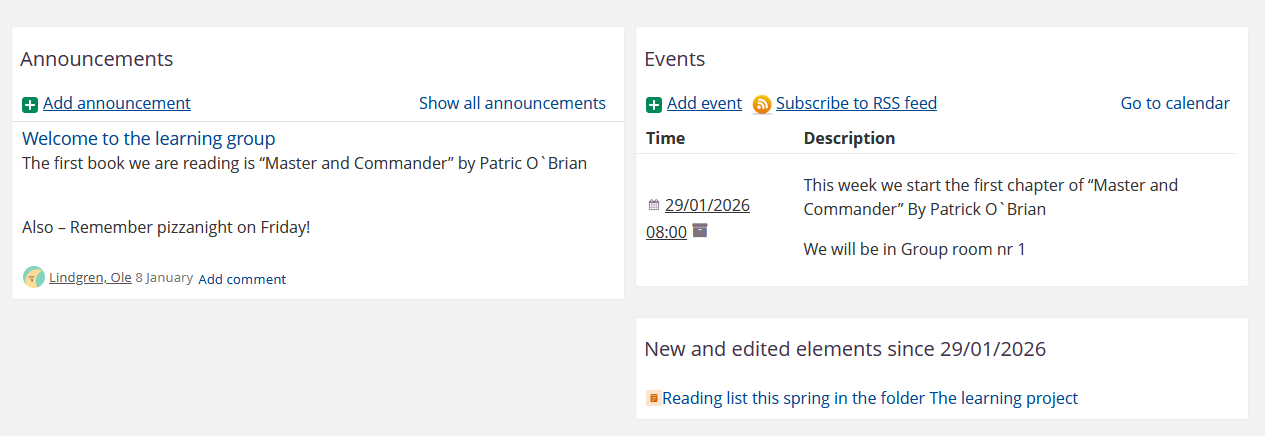
The Project overview page provides a stream of announcements and a list of upcoming events. You can add content to your Project in two ways:
5.1 Adding Content via Bulletins
Post announcements, updates, or information directly within a bulletin on the overview page. Bulletins appear in the activity stream and keep participants informed about Project developments.
5.2 Adding Content via Resources Tab
- Navigate to your Project
- Select the Resources tab
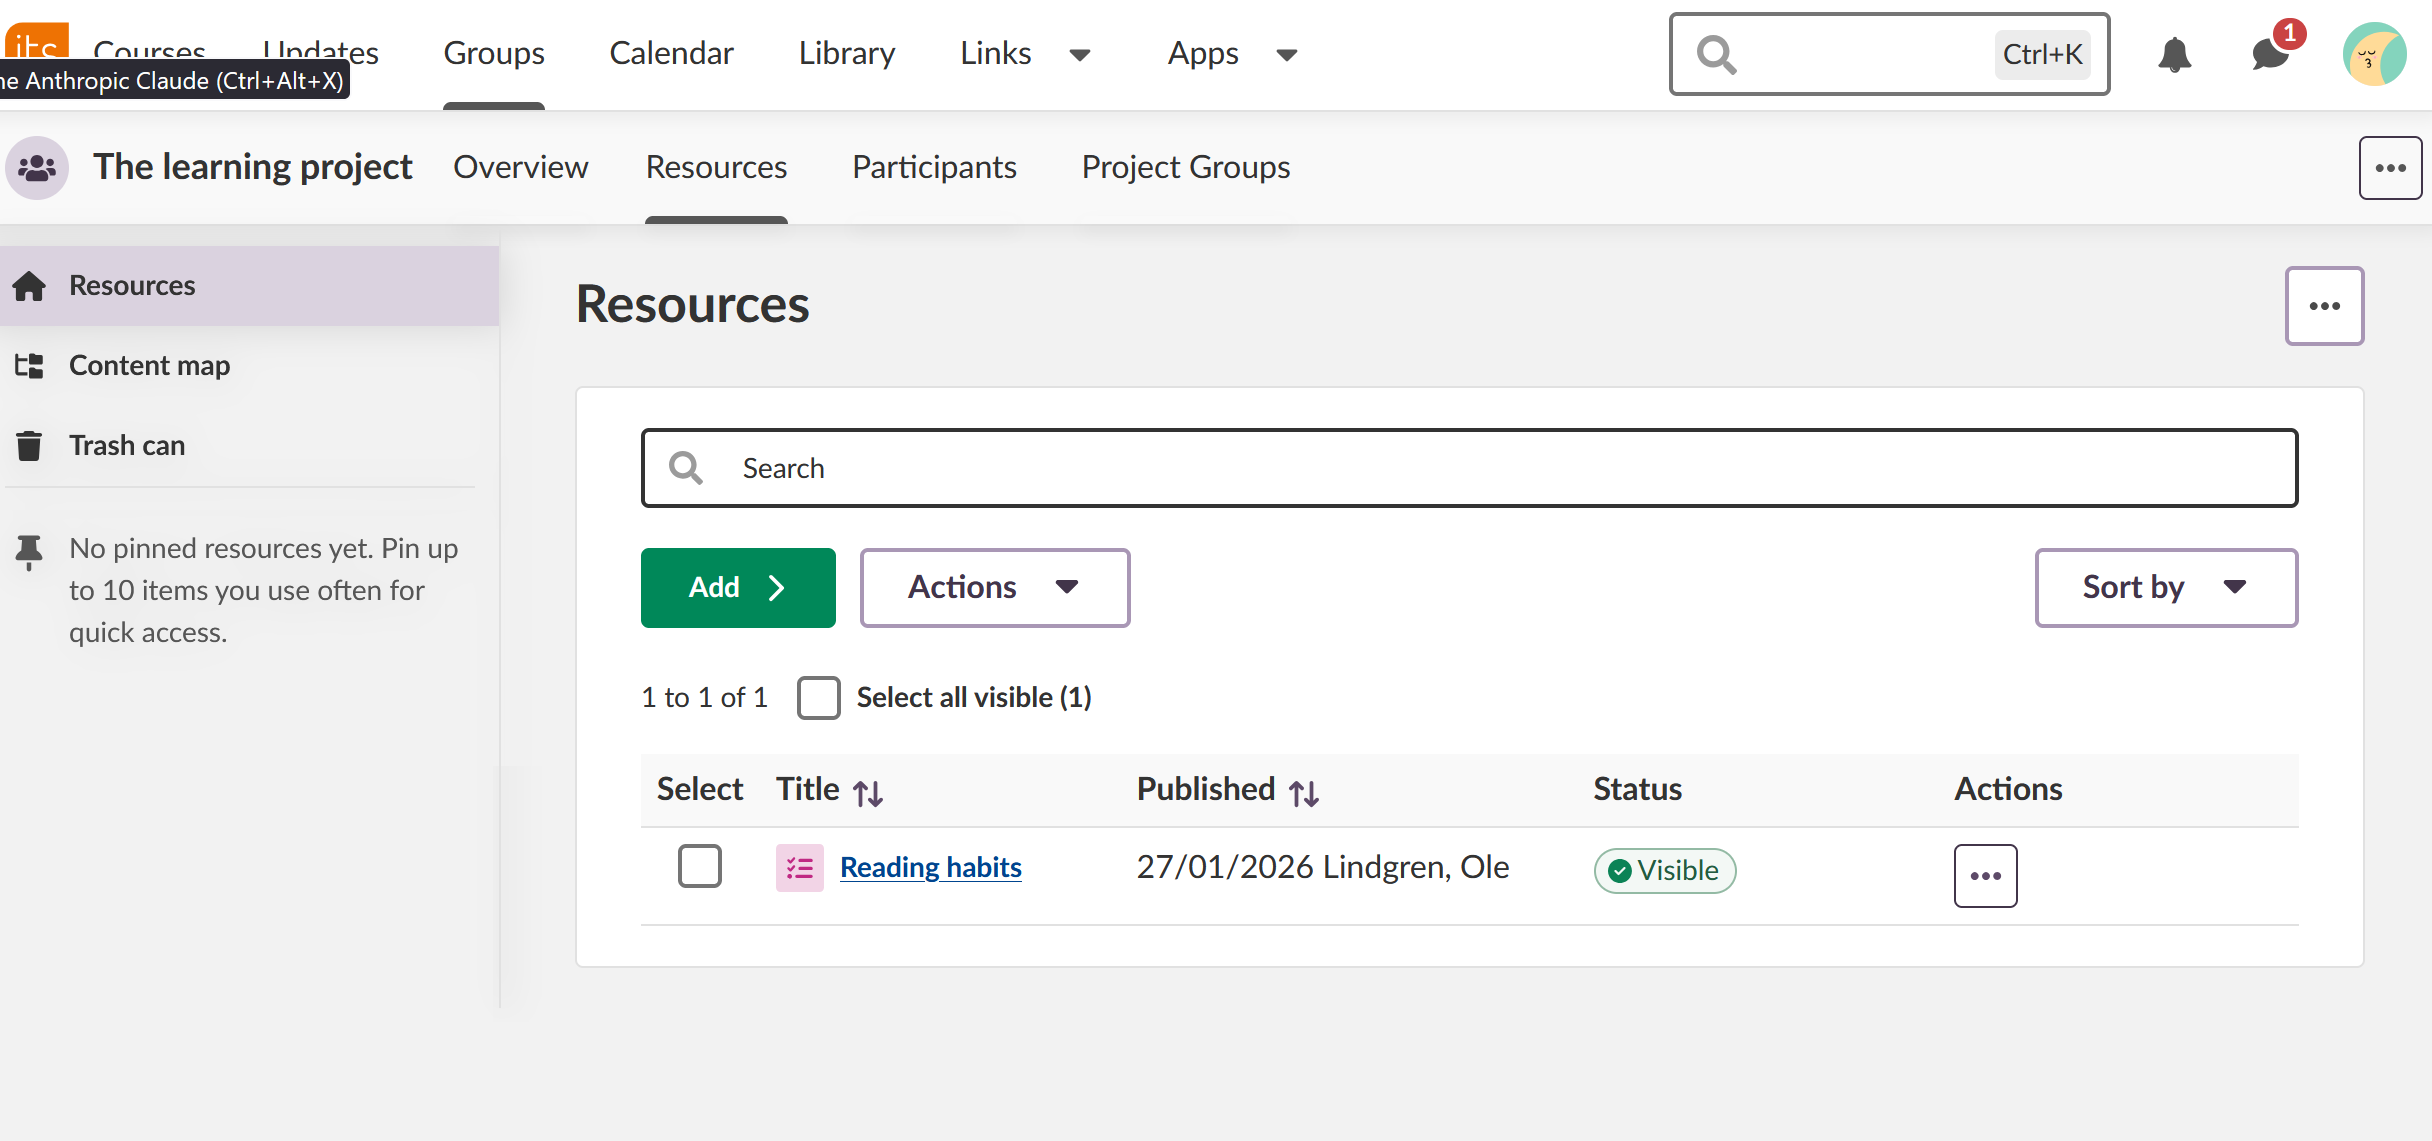
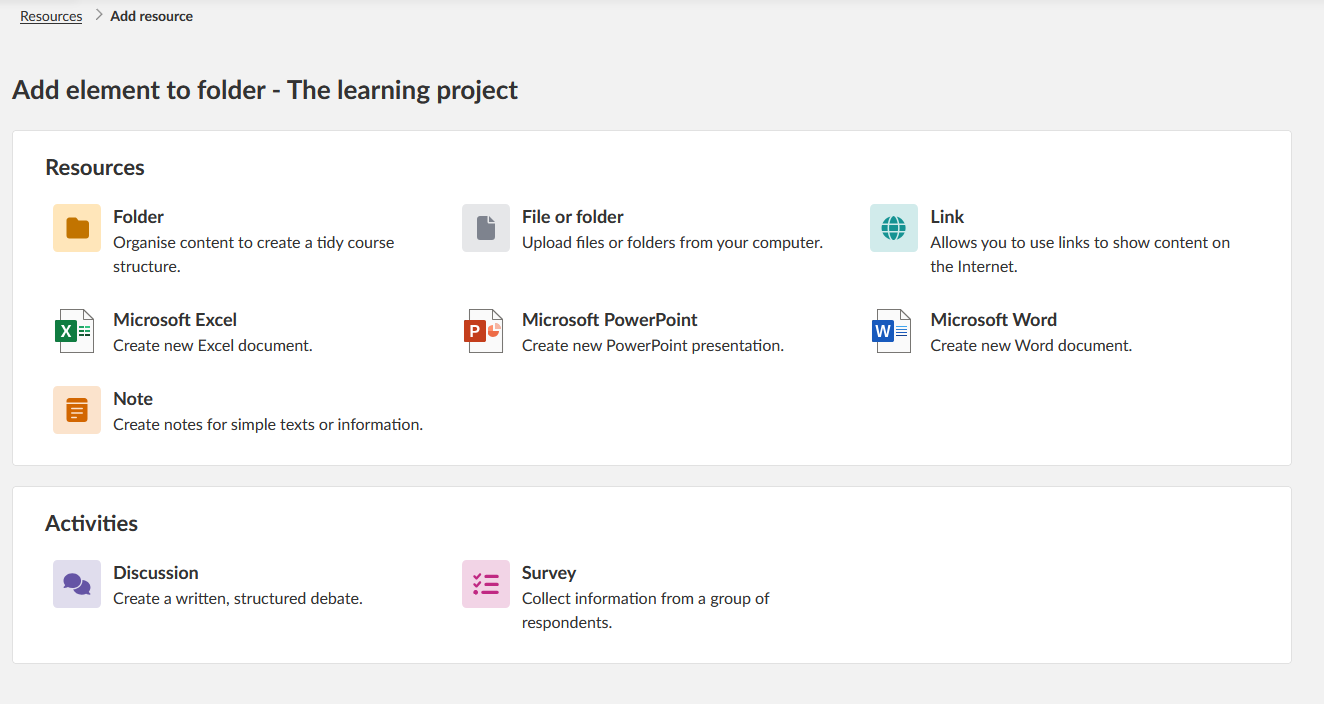
- Click Add to add content to a folder
- Choose the type of content to add:
- Folders: Organise content into categories
- Files: Share documents, images, or other files
- Links: Share external websites or resources
- Notes: Create text-based content directly in itslearning
- Discussions: Create threaded conversations for specific topics
- Surveys: Gather feedback or opinions from participants
- Conferences and Microsoft tools: Only if made available on your site
5.3 Managing the Project Calendar
Add events to the Project calendar to coordinate schedules:
- Navigate to the Events section on the Project overview
- Click Add event or Subscribe
- Enter event details (title, date, time, description)
- Save the event
Note! All Project participants can view calendar events. Depending on permissions, some participants may also add or edit events.
5.4 Using the Trash Can
Deleted content moves to the trash can and can be recovered if needed:
- Click the More tab in the Project main menu
- Select the trash can setting
- Locate the deleted item
- Check the item and click Restore
Note: Trash can access depends on your Project role and permissions.
6 Understanding Project Roles
Projects have two primary roles that determine what participants can do:
6.1 Project/Community Manager
Project managers have full administrative control within the Project. This role is automatically assigned to the user who creates the Project.
Capabilities:
- Add, edit, and delete participants
- Manage Project settings
- Edit and delete any content
- Create groups within the Project
- Access the trash can to restore deleted items
- Manage bulletin boards and announcements
- Control calendar events
6.2 Project/Community Participant
Project participants are standard members who can collaborate and contribute content but cannot perform administrative tasks.
Capabilities:
- Add and share content within the Project
- Participate in discussions
- View shared resources
- Participate in community activities
- Add content to folders (depending on folder permissions)
Cannot:
- Add or remove other participants
- Change Project settings
- Access administrative functions
- Delete content added by others (in most cases)
Important Note: The Project manager can adjust individual permissions for specific users within the Project if needed. Your role may vary between different Projects depending on who created each Project and what permissions you've been granted.
7 Project Groups
Project groups allow the Project/Community manager to organise participants into smaller working units within the same Project. Groups are useful when different members need to collaborate on specific tasks, sub‑projects, or thematic areas without involving the entire Project.
7.1 What Project Groups Do
Project groups provide:
- A dedicated space within the Project for sharing resources
- Group‑specific discussions
- Group‑level visibility for content (only accessible to members of that group)
- A way to structure large Projects into manageable units
Each group inherits the overall Project settings, but access to content is limited to the group's members. Participants can belong to multiple groups within the same Project.
7.2 Creating a Project Group
- Open your Groups tab at the top of the page.
- Navigate to the tab Project Groups
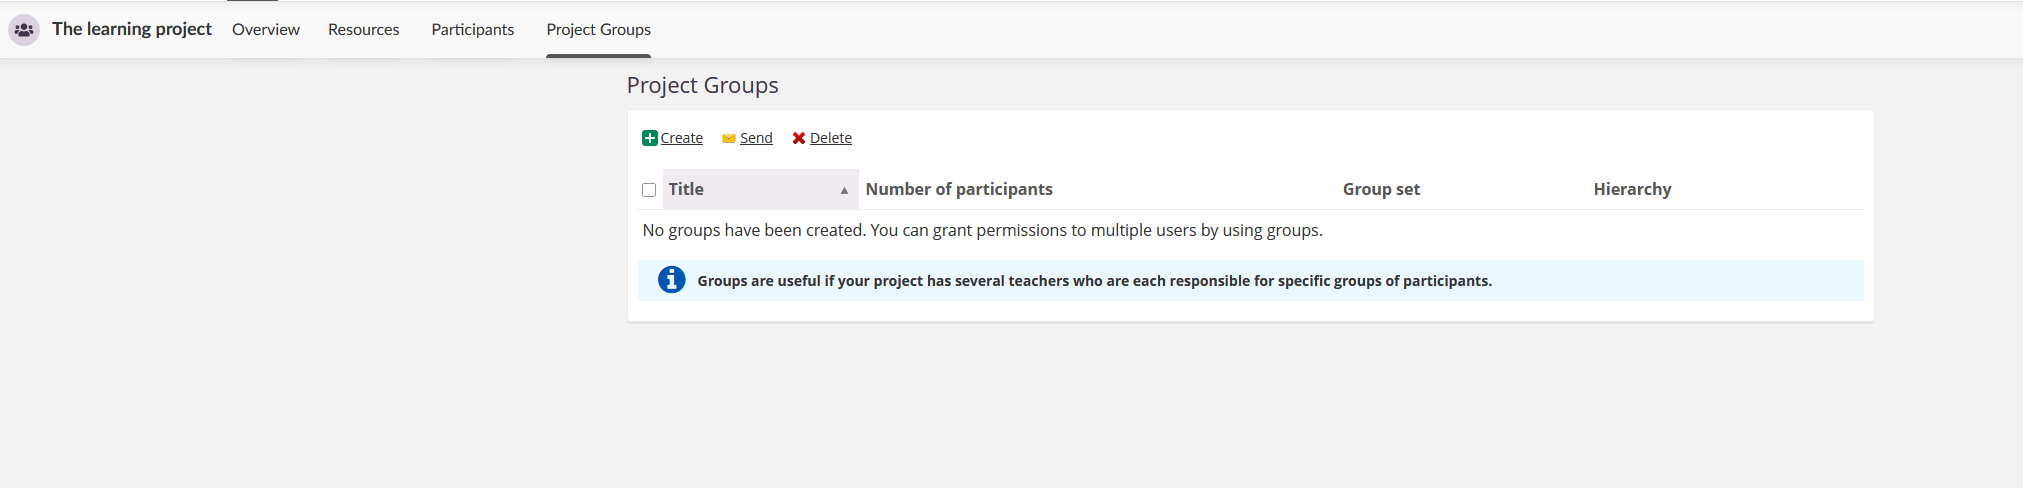
- Click + Create.
- Enter a group name and (optional) description.
- Add members from the list of Project participants.
- Save the group.
7.3 Managing Group Content
Group members can:
- Share files, links, and notes
- Hold group‑specific discussions
- Add items to their own group folder in the Resources tab
- You can also send a message to all group members directly from the Project Groups overview.
Project managers can view and manage all groups and their content. Participants usually see only the groups they belong to.
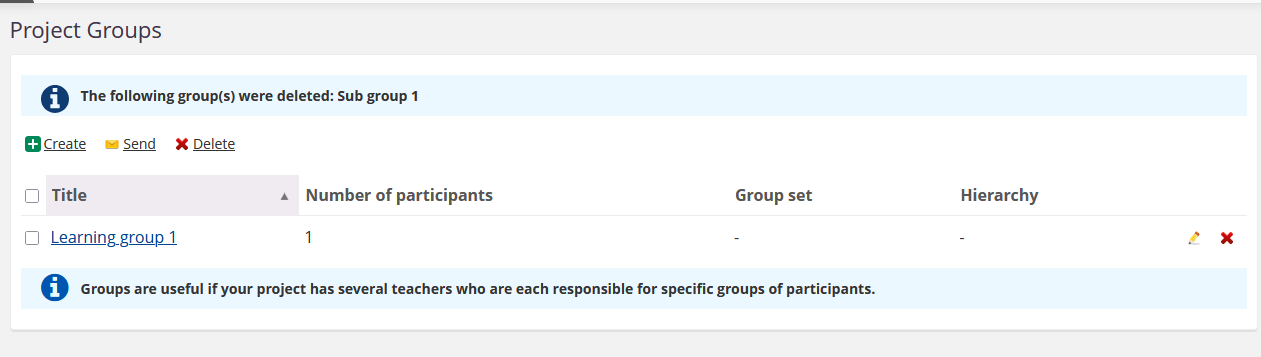
7.4 Editing and Deleting Groups
Project managers can edit group names, descriptions, and membership at any time:
- Open the group you want to modify.
- Navigate to the group settings.
- Make your changes and save.
To delete a group, select Delete from the group settings. Deleting a group removes access to group-specific content. If content needs to be recovered, check the Project's trash can.
Note: Only Project managers can create, edit, or delete groups.
7.5 When to Use Project Groups
Use groups when:
- A large Project requires several sub‑teams (e.g., "Logistics Team", "Marketing Team")
- Students are working on different topics within the same Project
- Staff committees split tasks across smaller working groups
- Clubs or societies need internal committees (e.g., "Events Committee", "Finance Committee")
Project groups keep collaboration organised by providing dedicated spaces for focused work.
8 Additional Resources
Related Articles:
More Help Resources:
Service Status Check the current status of itslearning services at https://status.itslearning.com/
Ideas Portal Share your ideas and help shape the future of itslearning at https://ideas.itslearning.com/
Roadmap Check out the itslearning product roadmap at https://itslearning.com/global/roadmap/
Need More Help?
If you cannot access Projects or need additional support:
- Contact your site administrator to verify Projects are enabled
- Check your site permissions if the Groups menu is not visible
- Refer to your institution's local support resources for Project-specific guidance